Back in those rose tinted days of the ultimate 2 stroke 250cc GP racer replicas, Aprilia dominated the 1990’s and the ’00’s. A road going Aprilia race replica was every young riders dream bike. I worked holidays from the age of 13 so I could save enough for an Aprilia 50cc AF1 Reggiani replica, which was replaced by an Extrema 125 RS. The next step would have been the RS250, however life (University) intervened and it was not to be, but the desire to one day own one never diminished. I sold my RS175 (yes it seized and was replaced with a Malossi 175cc engine kit) in 1996, the same year as the ‘green pin stripe’ Chesterfield was released.
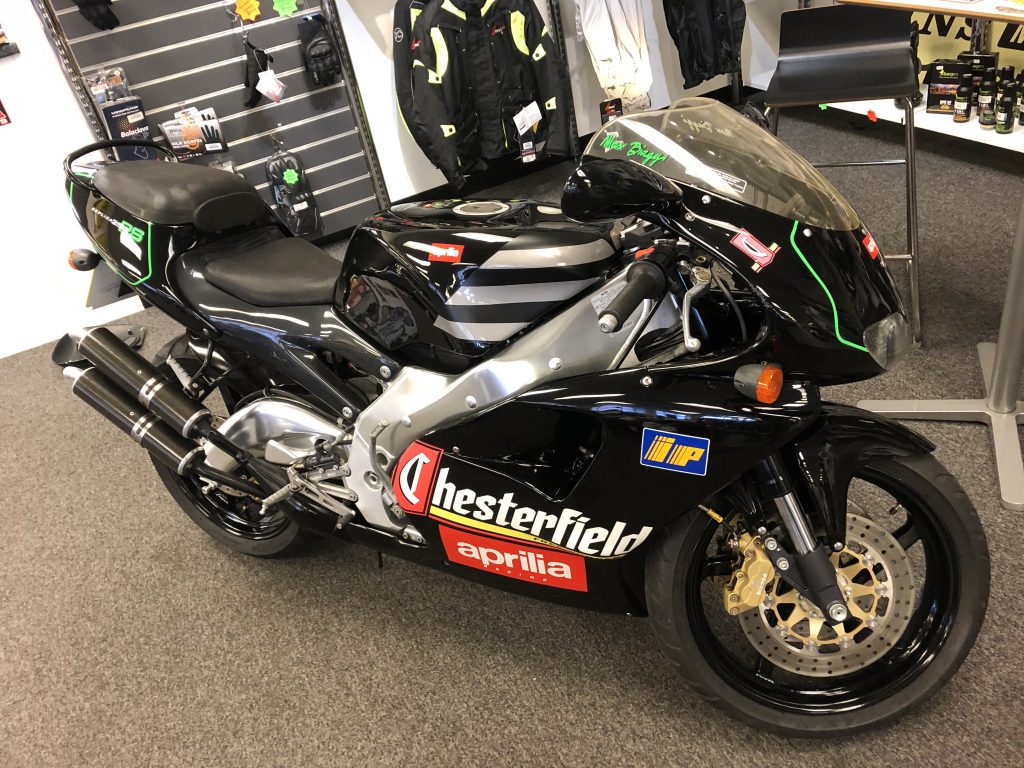
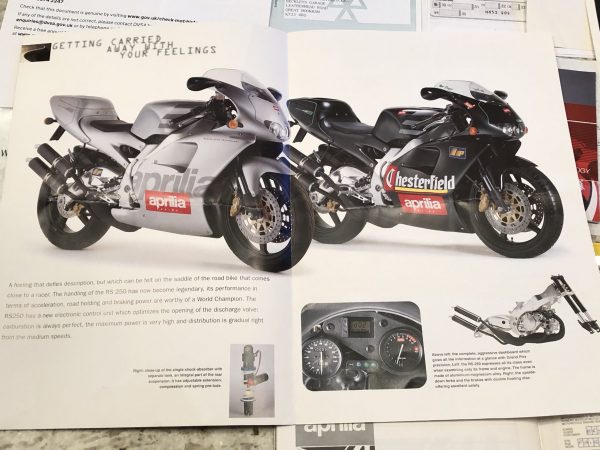
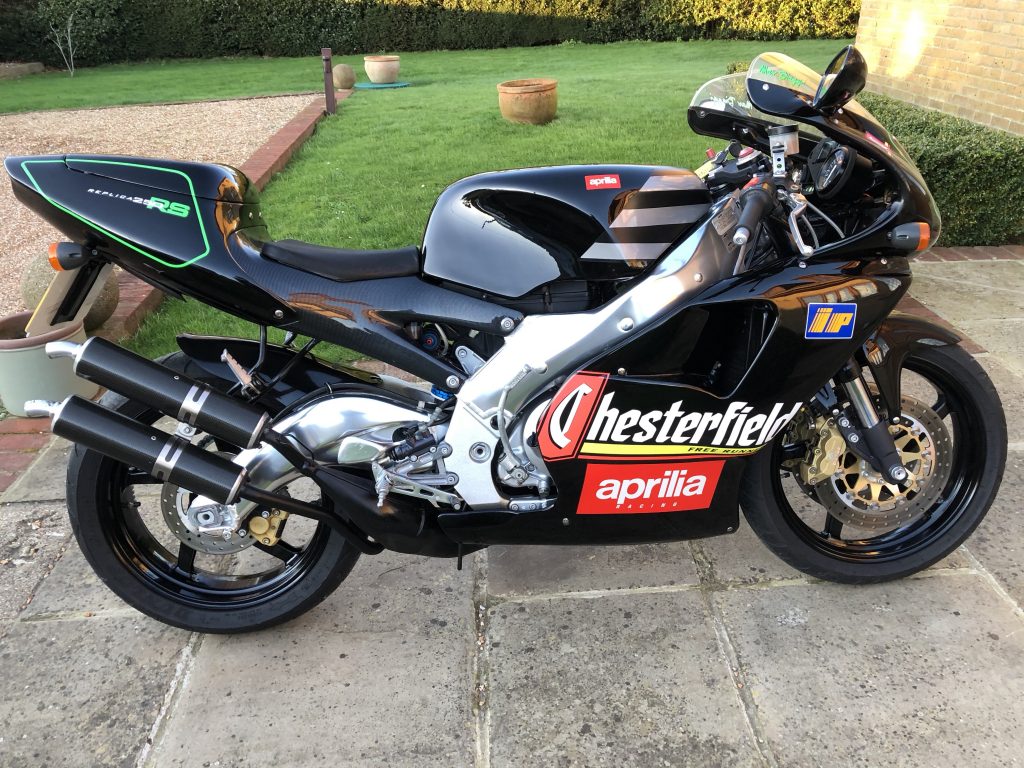
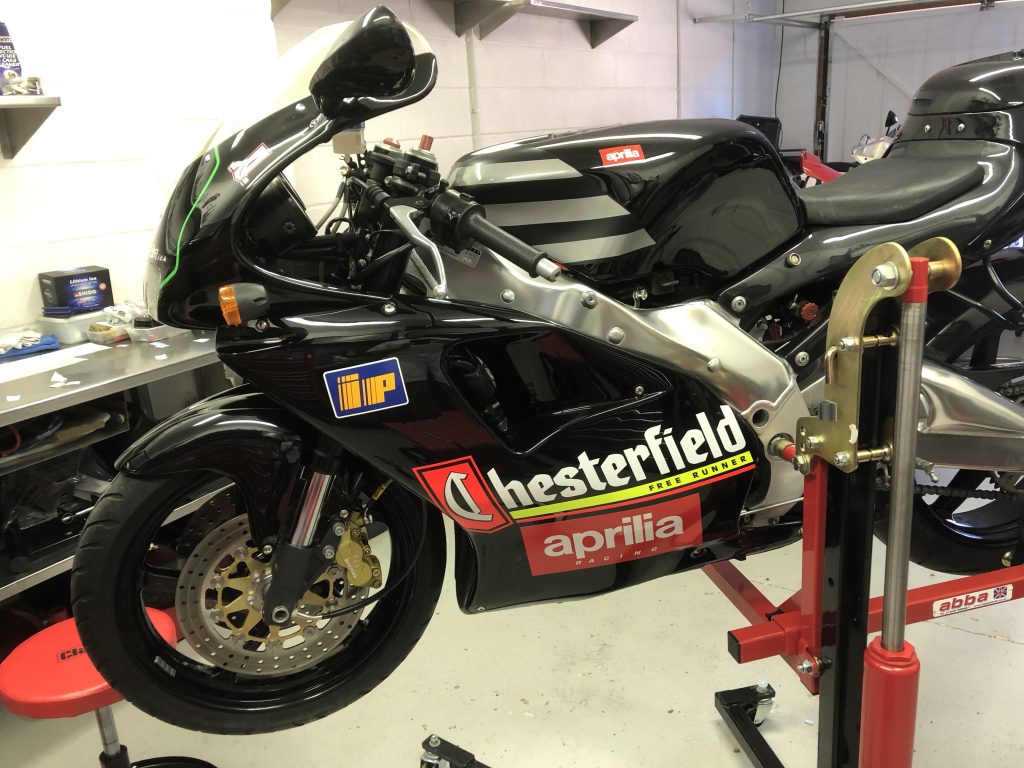
The 1996 Aprilia RS250 Chesterfield Mk1 was the racing replica tribute to the 250GP Aprilia racer that took Max Biaggi to three consecutive World Championships from 1994-1996.
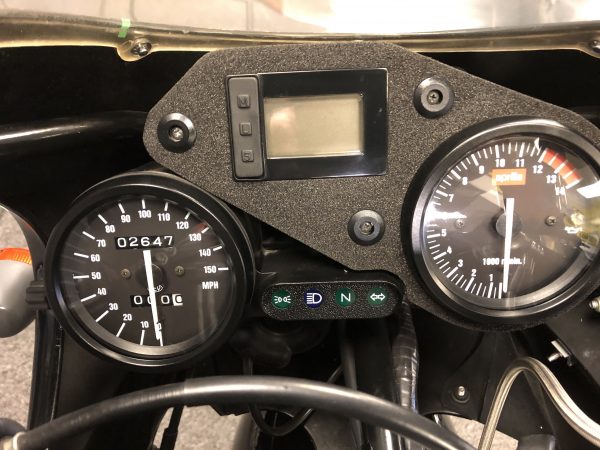
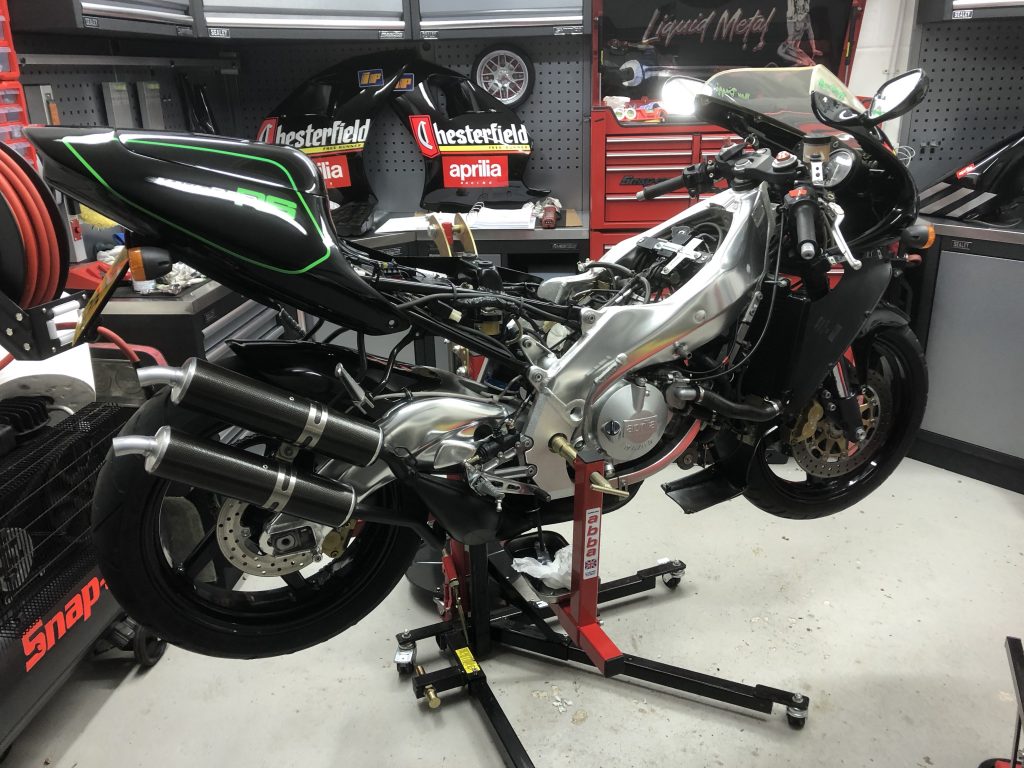
Fast forward 24 years (and many RS250 enquiries over that time), it’s fitting that finally, a 1996 Mk1 RS250 Chesterfield becomes available with a mere 2,647 miles, this dealer pre registered +1 lady owner example is meant to be.
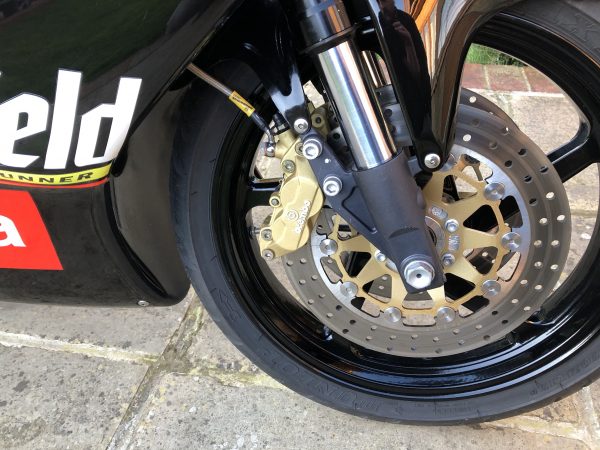
It’s for sale at a motorcycle dealer advertising on Ebay. I call, and by the end of the day the deed is done. When I go to collect two days later, I am shown a long list of prospective buyers who have left their numbers should the sale fall through. A scrutineering walk around the bike reveals that at some point in it’s low mileage life it has been down on its left side, this is evidence by a randomly placed sticker on the tail fairing and a non genuine decal on the front side fairing which by the looks of it must have received a new panel back in the day for which I’m grateful. Otherwise, the running gear looks as new, brakes, callipers, suspension look to have been nurtured and the right hand side of the bike is unmarked. The ultra low mileage engine should still be good for some time still along with all the running components.
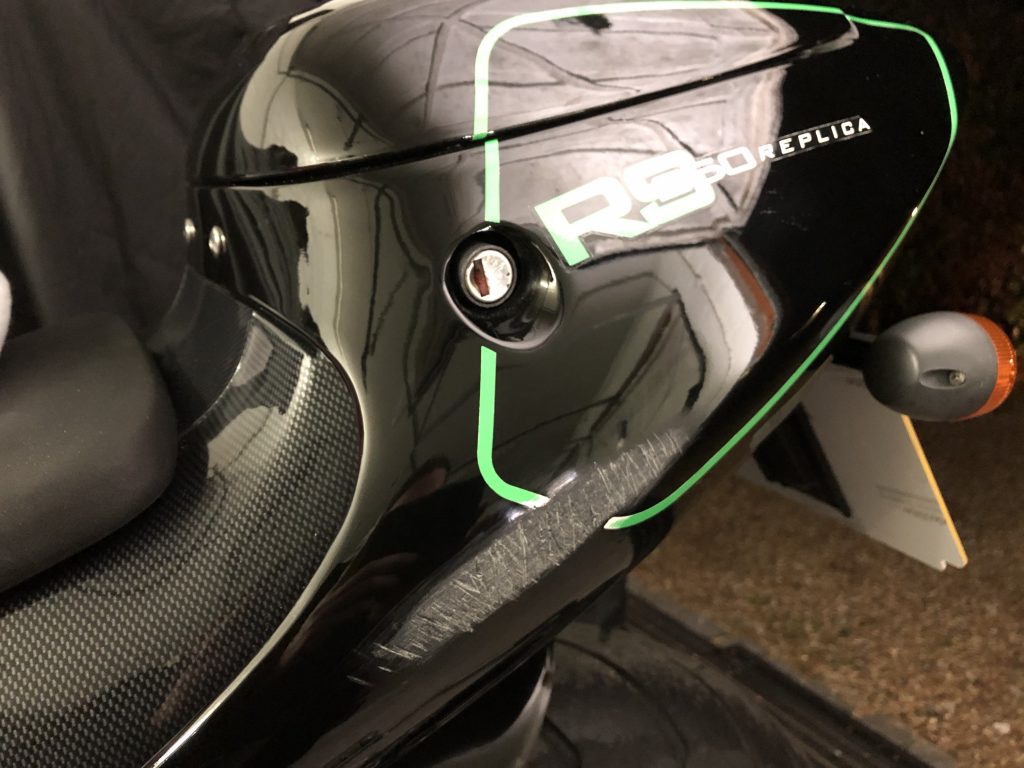
Goodrich hoses another bonus when the bike was recommissioned and MOT’d by the previous owner in 2007 after sitting in the garage unused for a few years…where it subsequently went back to being unused.Hello! What’s this hiding?
I have to wait until I get home to find out what that sticker may be hiding…
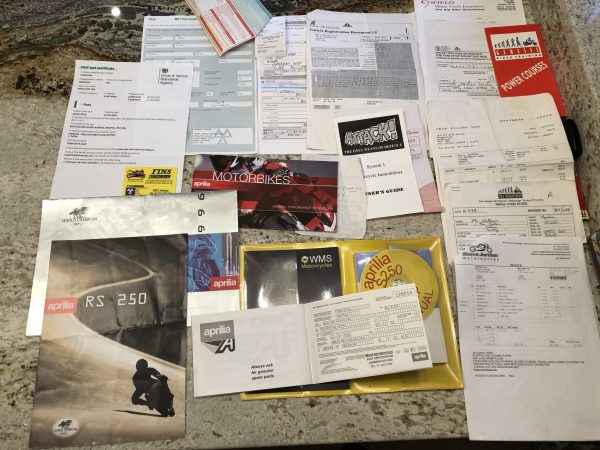
A full history with no gaps is always wonderful to find. The original sales brochure a bonus!
I can’t wait to check over the rest of the bike and enjoy taking her for a trip down memory lane. The current Covid 19 lockdown means that for now she remains on SORN. Meanwhile the 3 month warranty that came with the bike is slowly counting down to nothing!!!
So now that it’s home safe and sound, it is time to address any issues…
First up, this is what the decal was hiding beneath it. The good news is, it obviously didn’t go down too hard. I track the Lady owner down from all the paperwork in the file. She confirms it was a sub 20mph drop and that she was on tippy toes. It was her first bike after passing her test and her baby.
A part of the same tumble seemingly resulted in a new fairing panel however the decal is of dubious quality since the OEM ones have been unavailable for some time. This sticker simply won’t do, it’s not even close to the original in size, details or anything and has been poorly applied. The remainder of this poor quality decal kit is with the parts that came with the bike, along with the rear cowl to replace the pillion seat for that racier look.
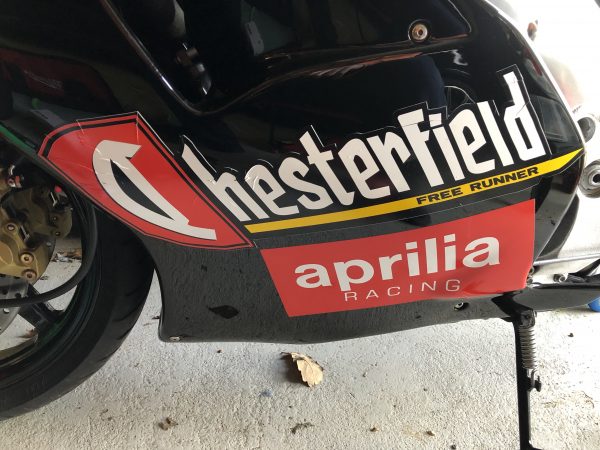
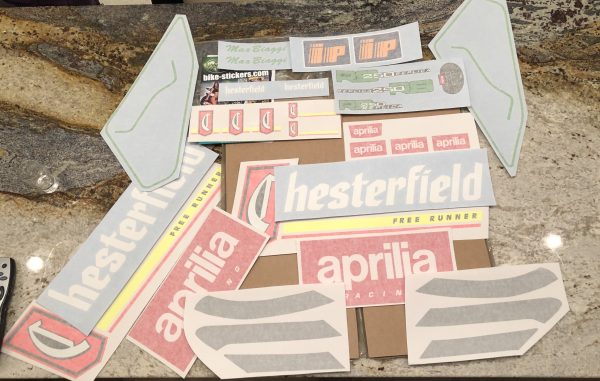
The Chesterfield decals are notorious for UV fading. There’s a little of this in evidence around the rest of the bike. Most of the owners group swear by ‘image works’ for their RS250 decal kit as the oe ones are no longer available. A call to Graham there and a new decal kit is on it’s way.
A lovely image works replica decal kit…
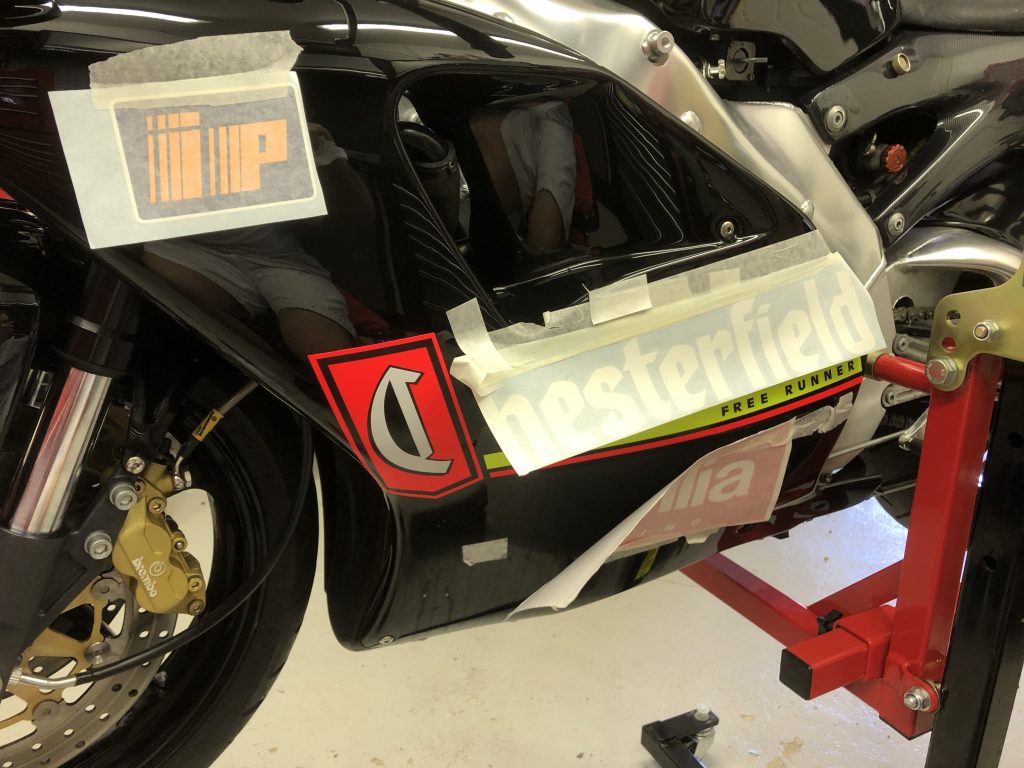
It’s not the easiest of decals to apply, the side fairing one which is one piece on the original, is in three pieces as separate decals.
I carefully measure off from the original side to ensure that the spacings are all correct and symmetrical , and lo and behold a few hours later…
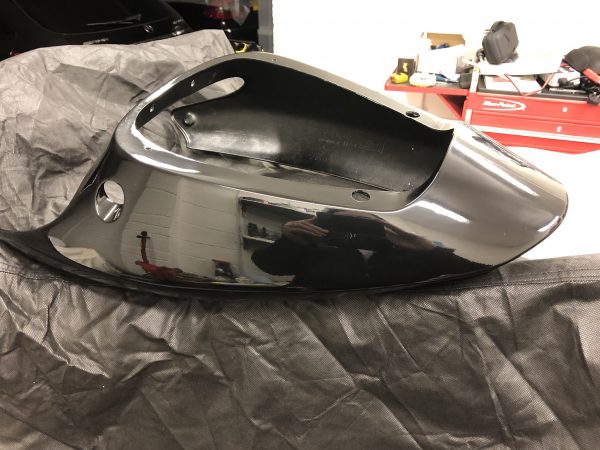
I’m very pleased with the result! The rear fairing needs attention also and will be next for some treatment…I manage to source a NOS one on Ebay to replace the grazed original;
The image works decals are duly applied to the new rear fairing.
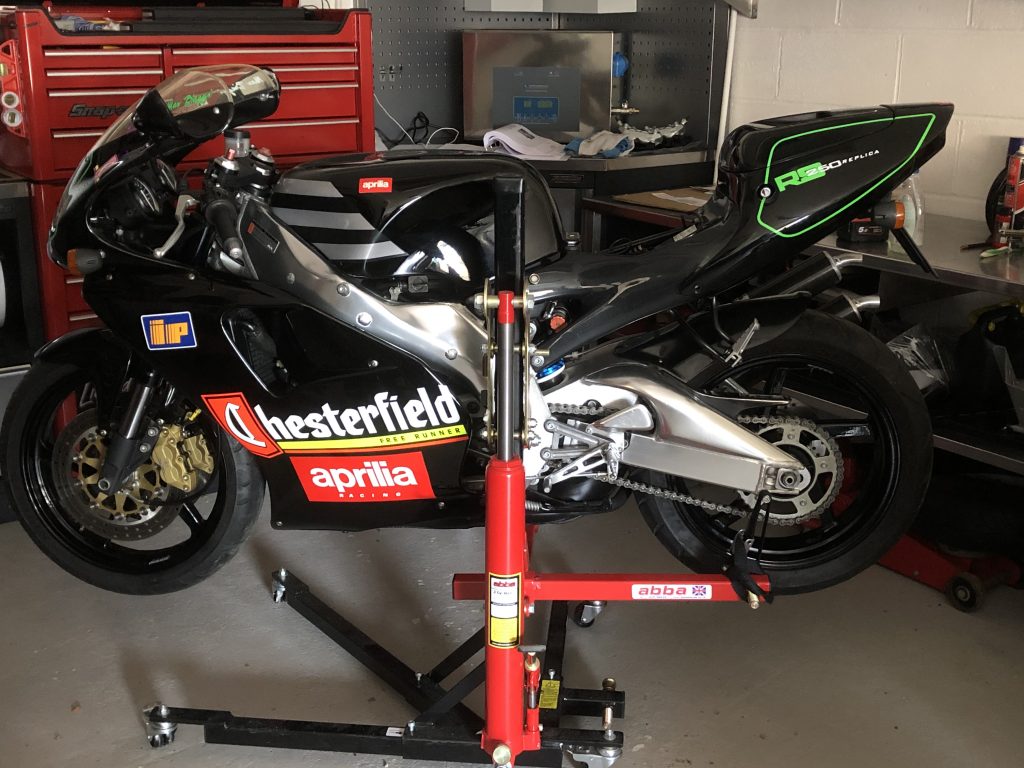
I’m in two minds whether to replace the decals on the good side, I like the fact they are the originals, however they have some light scuffing on the red Chesterfield ‘C’ no doubt from being kickstarted and the yellow is a little faded so it’s likely that I’ll replace this side also in due course.
The tyres are the originals from 1996!! These will be requiring replacement before it’s used in anger however surprisingly they still feel soft and have no cracking evident.
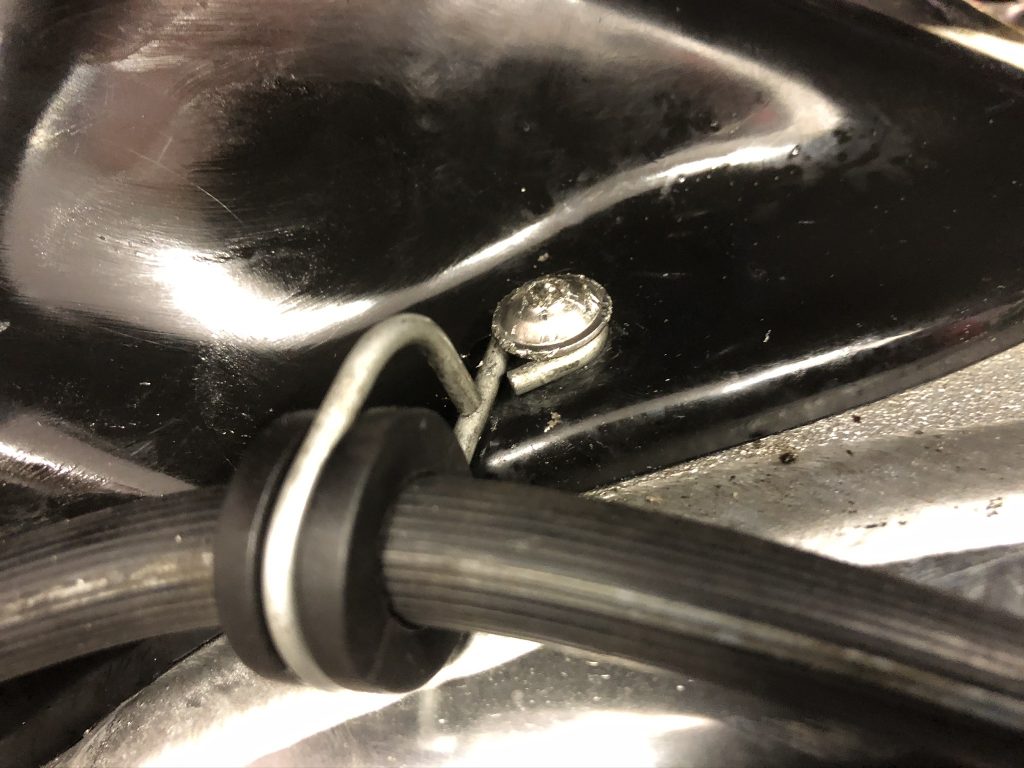
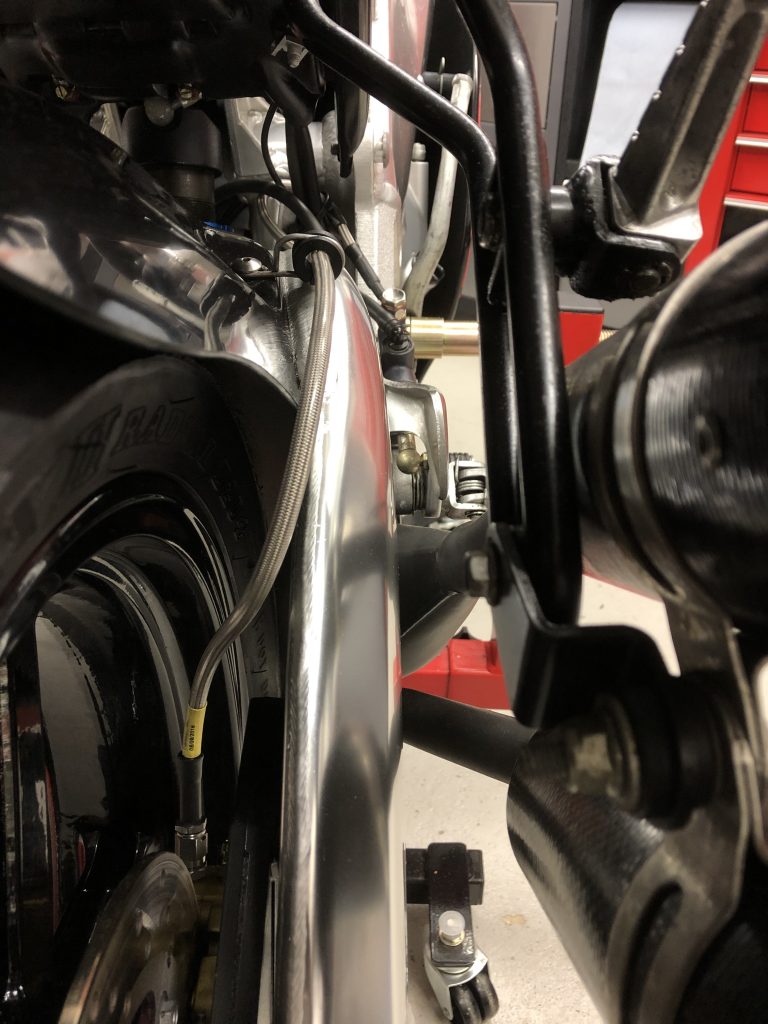
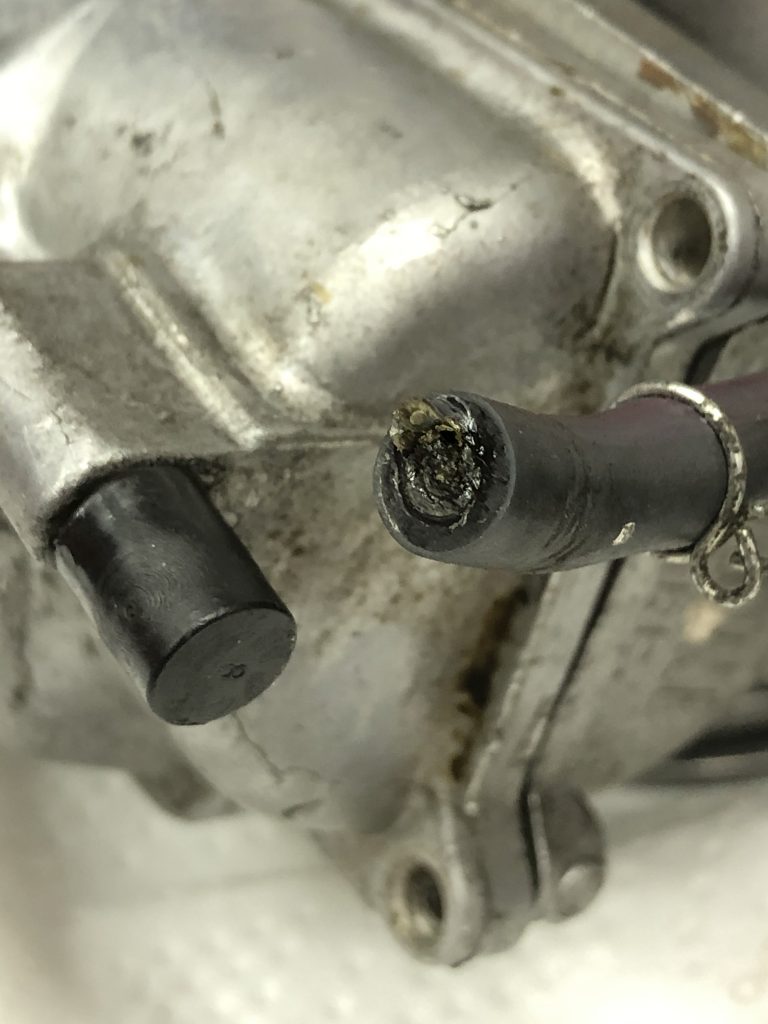
I look over the rest of the bike and discover that the rear brake hose has an old piece of black gaffer tape covering a part of it. I peel it off to discover a nick in the rubber brake hose.
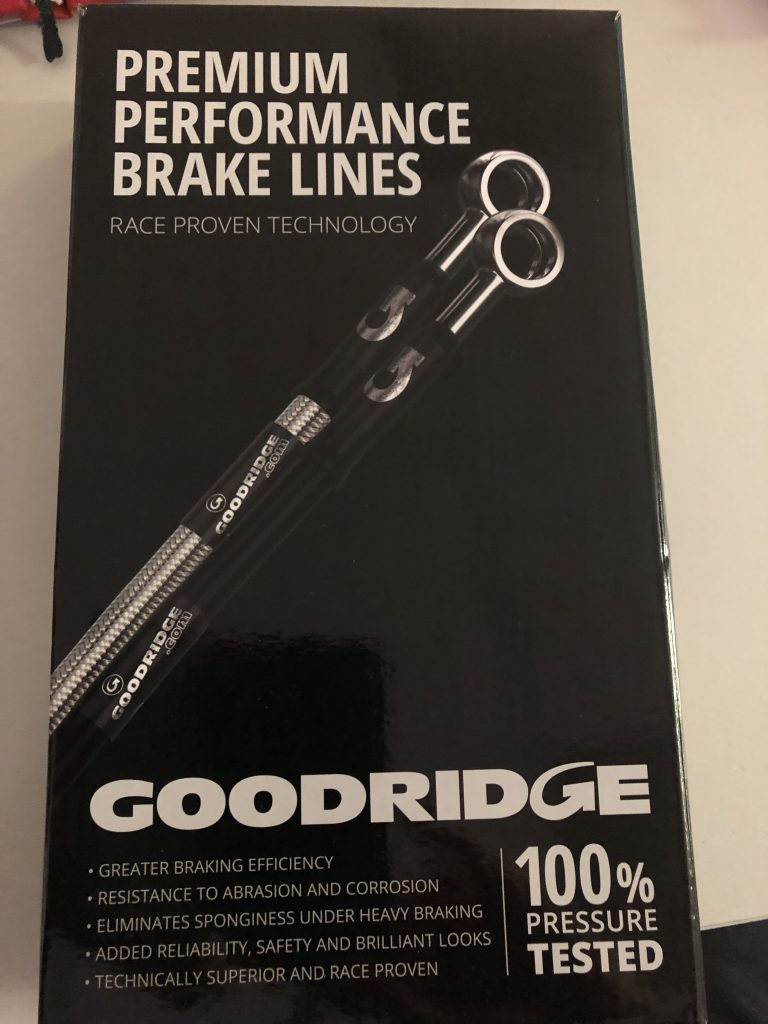
I called the supplying dealer up who MOT’d the bike and mentioned that they MOT’d the bike and this should be an MOT failure and I felt that it would only be correct on principle for them to at least cover the cost of a Goodrich rear hose which I would gladly fit. They apologised and kindly ordered one up straight away for me. A shiny new Goodridge hose duly arrives to match the braided front lines which will be the next job on the list…
The new Goodrich braided hose arrives and looks great. It should be a simple mornings work to fit and bleed this up…
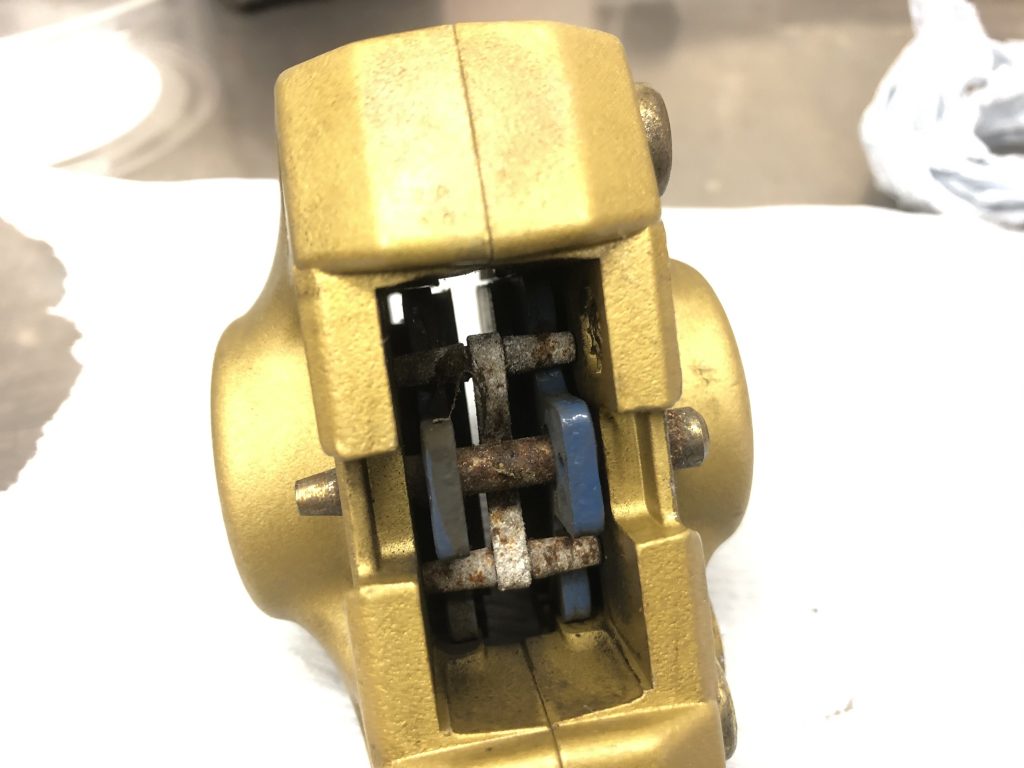
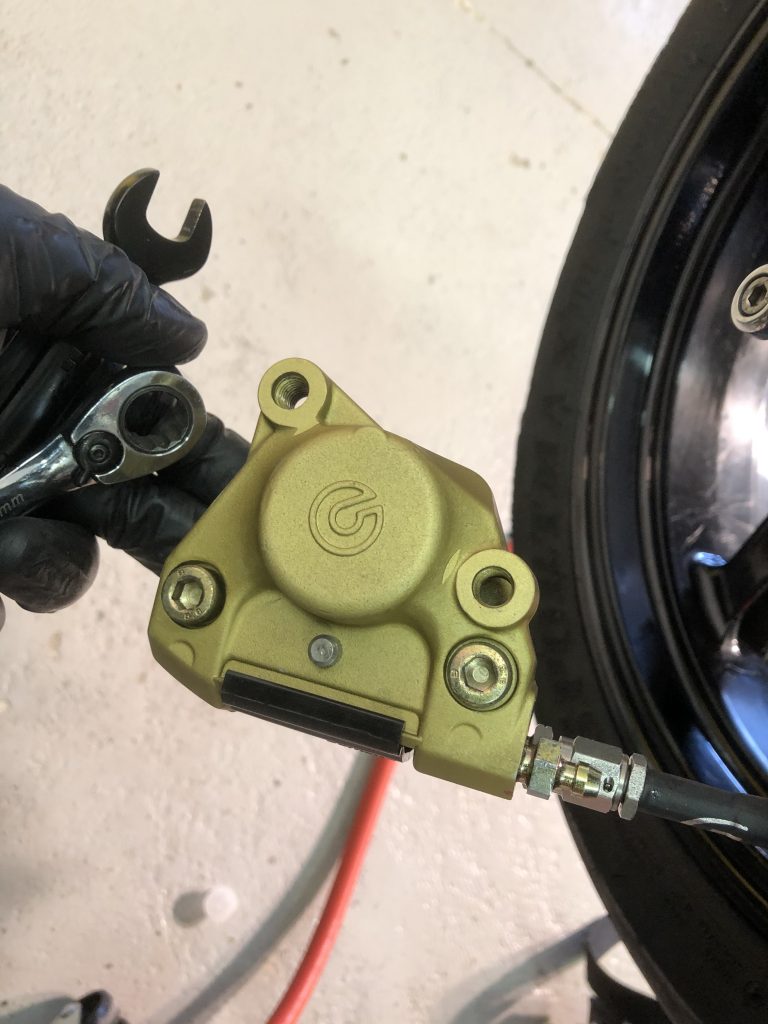
First snag! The rear hugger bolts that carry the bracket for the rear brake hose, one of them has seized through bi-metallic corrosion. After using a number of different methods, hammering in an oversized torx bit, when this failed, it did loosen it a bit enough to enable me to get some pliers onto it. One slip and that beautiful swingarm finish would be ruined. Fortunately there were no further issues and the bolt came out.
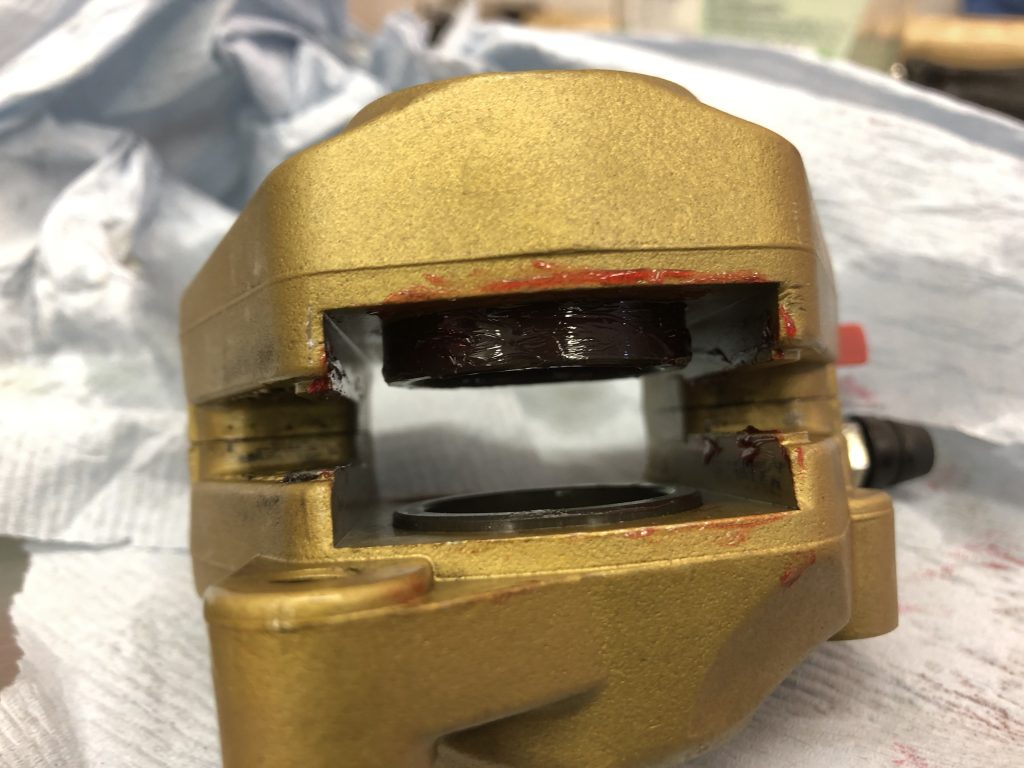
With the bolt out, the hose is released and replaced with the new one. However I made the error of releasing all the fluid to prevent the possibility of any spillage. As such, pump as I may I’m unable to build up pressure. I’ve tried all techniques. I decide to remove the rear caliper, and check the pistons all work correctly. I should have done this anyway.
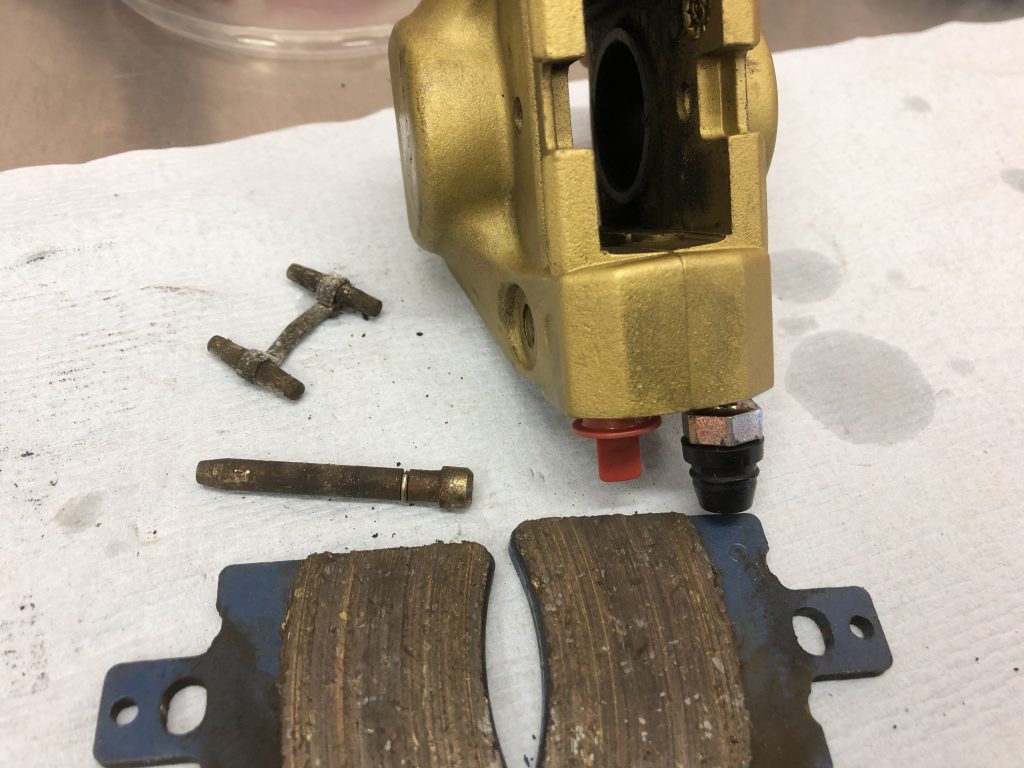
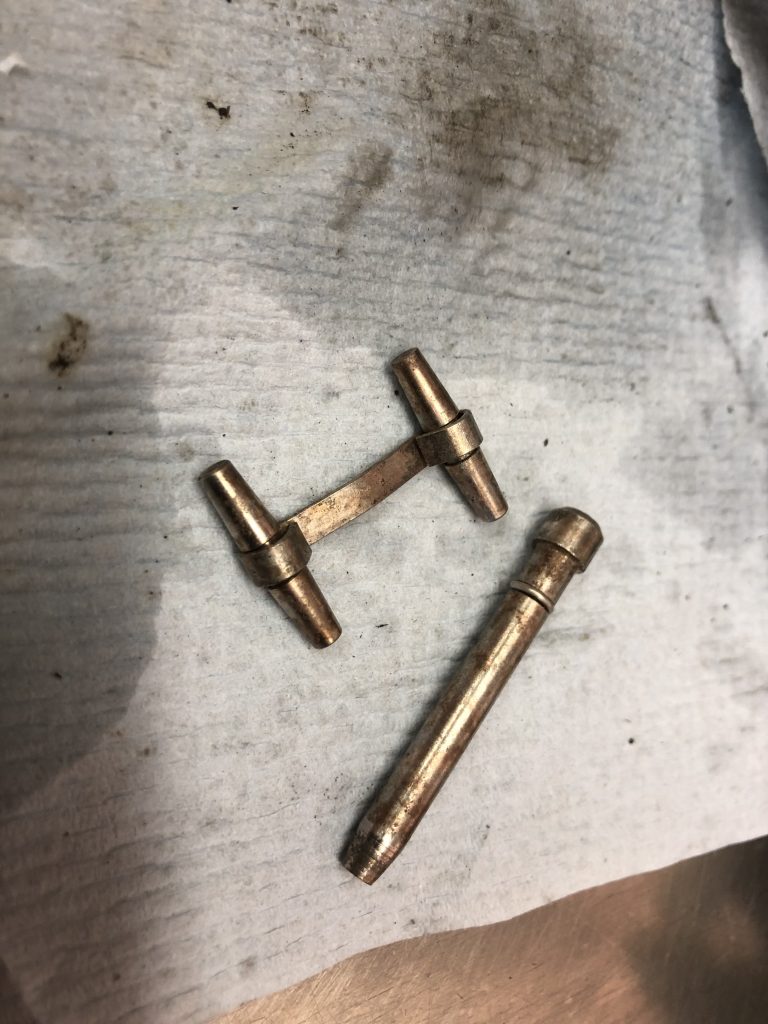
After 24 years with at least 20 of those spent standing, it looks a bit corroded. The pistons are fine, nothing more than a clean and regrease, the pin and anti rattle plate however represent a good opportunity to try out the Ultrasonic cleaner.
With no further prep other than 15 minutes in the tank, these is how they come out…
Finally the pistons are shown some light attention and all is as new;
Pads are also cleaned up and it’s time to bolt it back up.
The pedal still cannot build sufficient pressure. After hours spent pumping, I put it down to the master seal. The rebuild parts do not seem to be separately available, fortunately at £62 it’s not unaffordable and the old one had the reservoir seal drying up in any case…
New master cylinder arrives…
Fortunately, this pumps up perfectly and the rear brake pedal is now rock hard and ready to roll!!
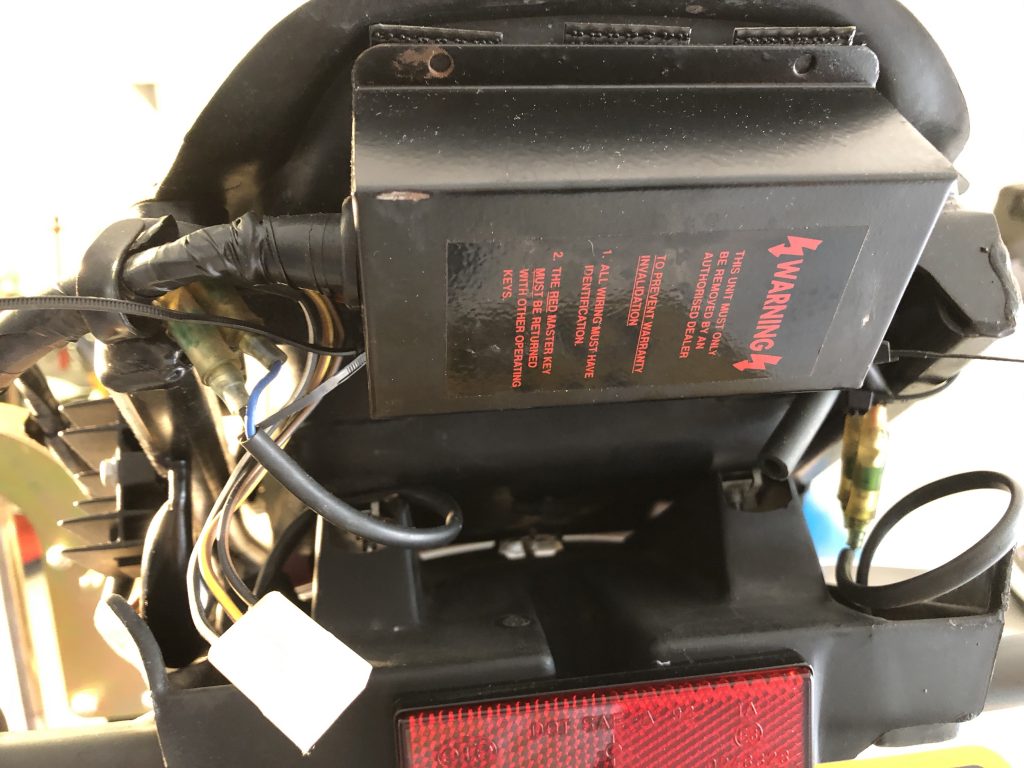
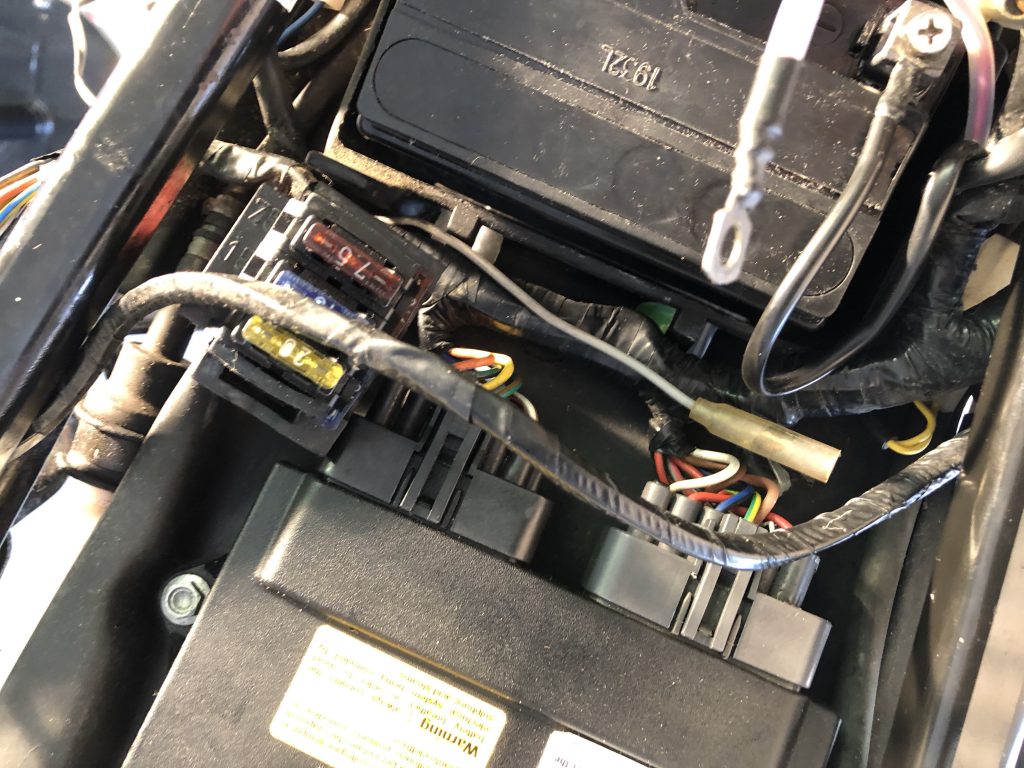
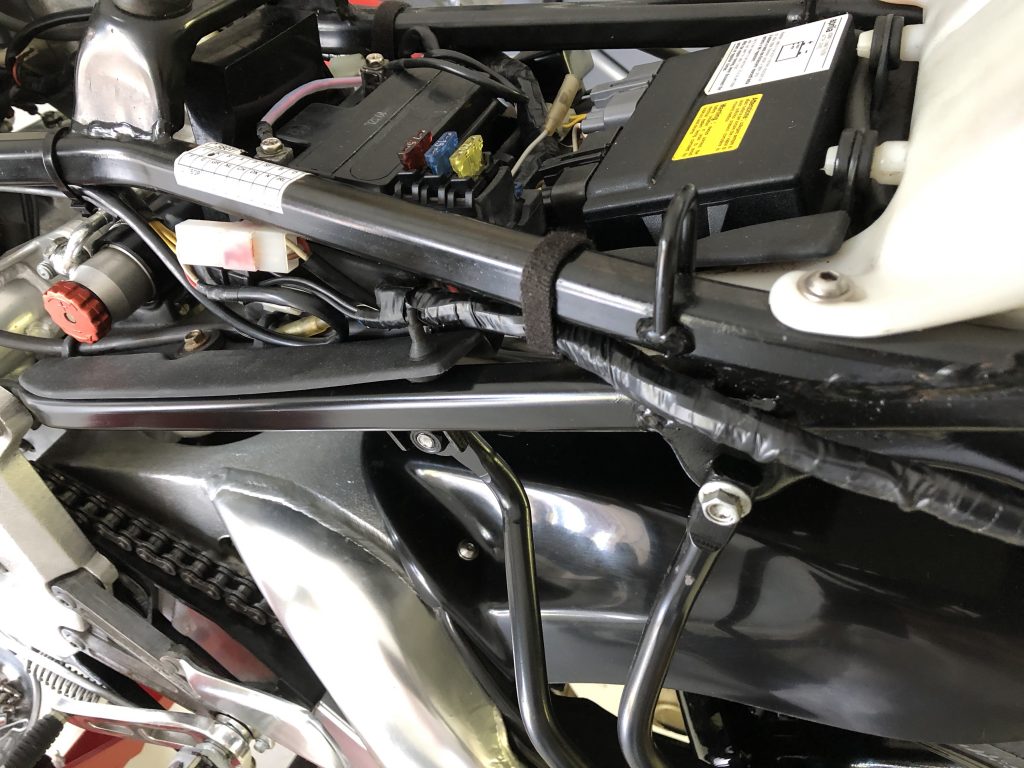
Back in the day, some may remember these hateful little devices. Security was all the rage and some insurers demanded they be fitted to everything.
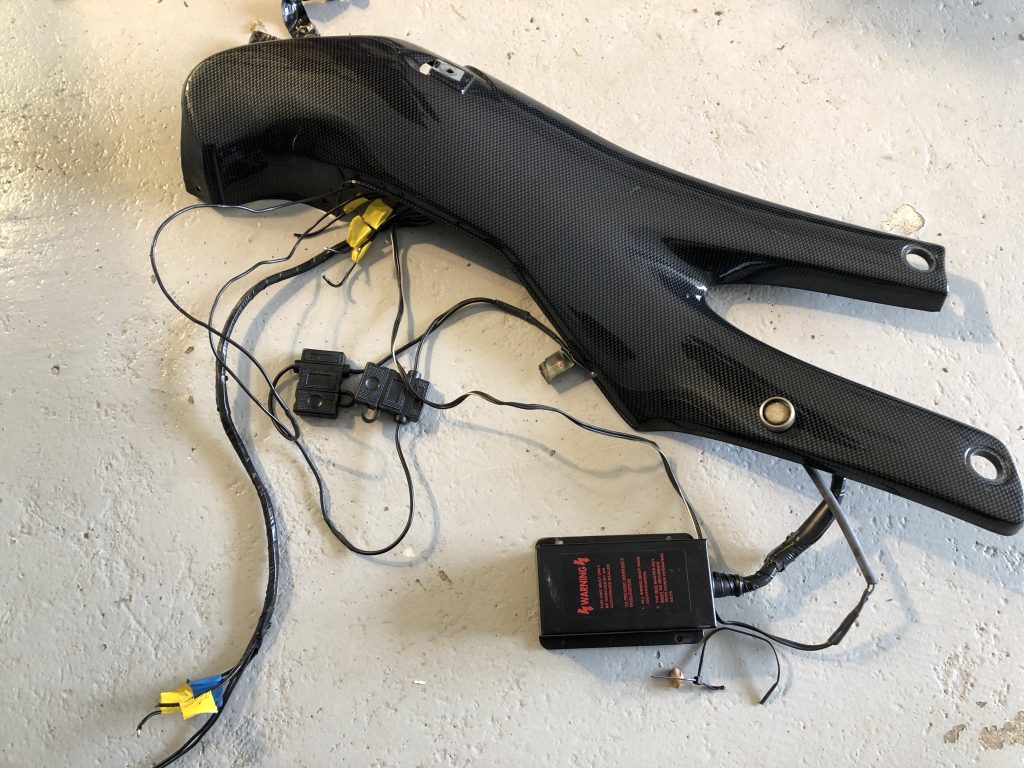
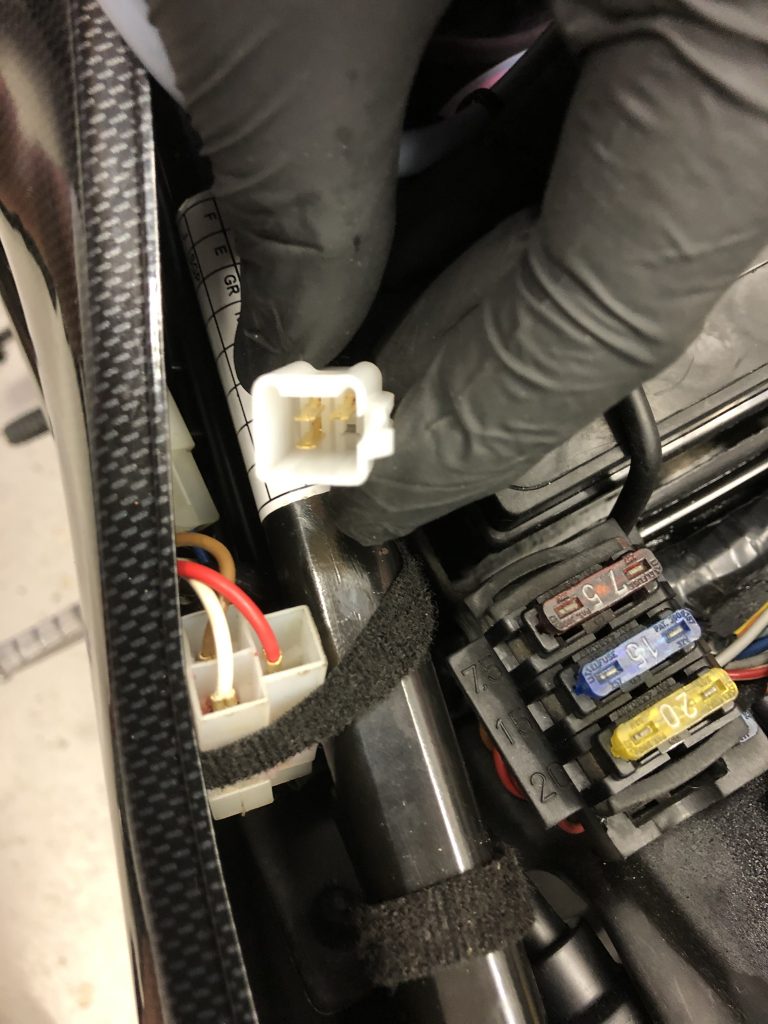
While the bike is stripped, I’ve taken the opportunity to remove the old immobiliser eliminating any chance of it failing and returning it back to it’s factory condition. This had an old 90’s GT immobiliser which featured the little button tab coin transponder that you press to the metal plate. The gubbins are housed in a big heavy metal box!
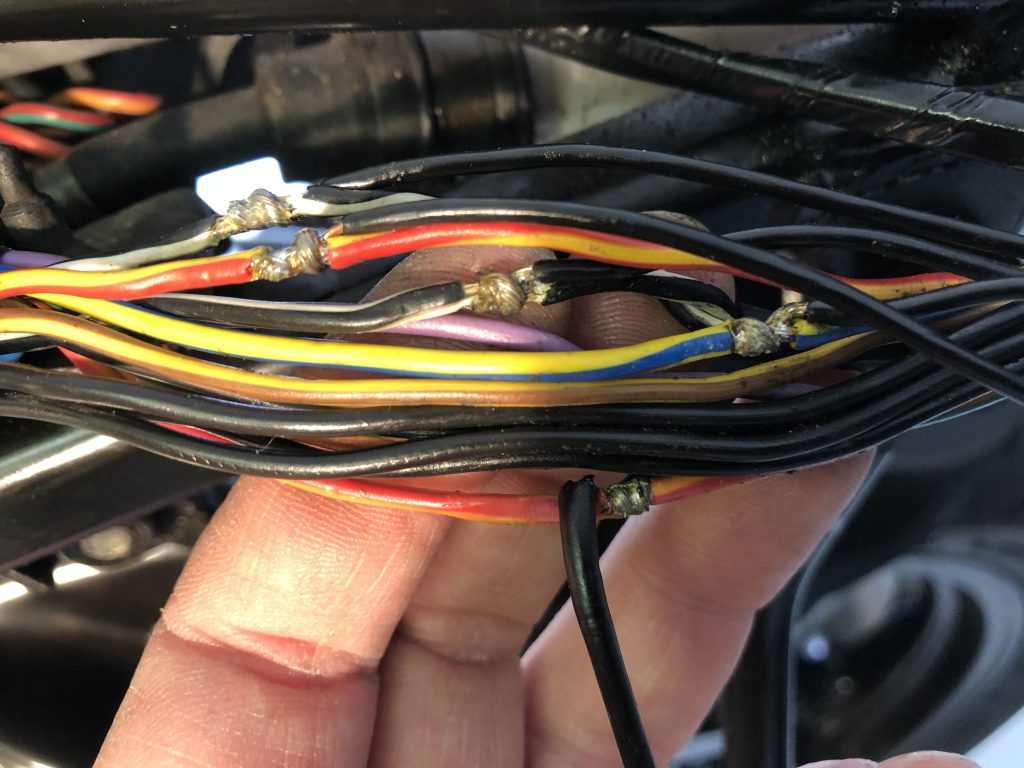
The wiring was also quite messy and unsightly.
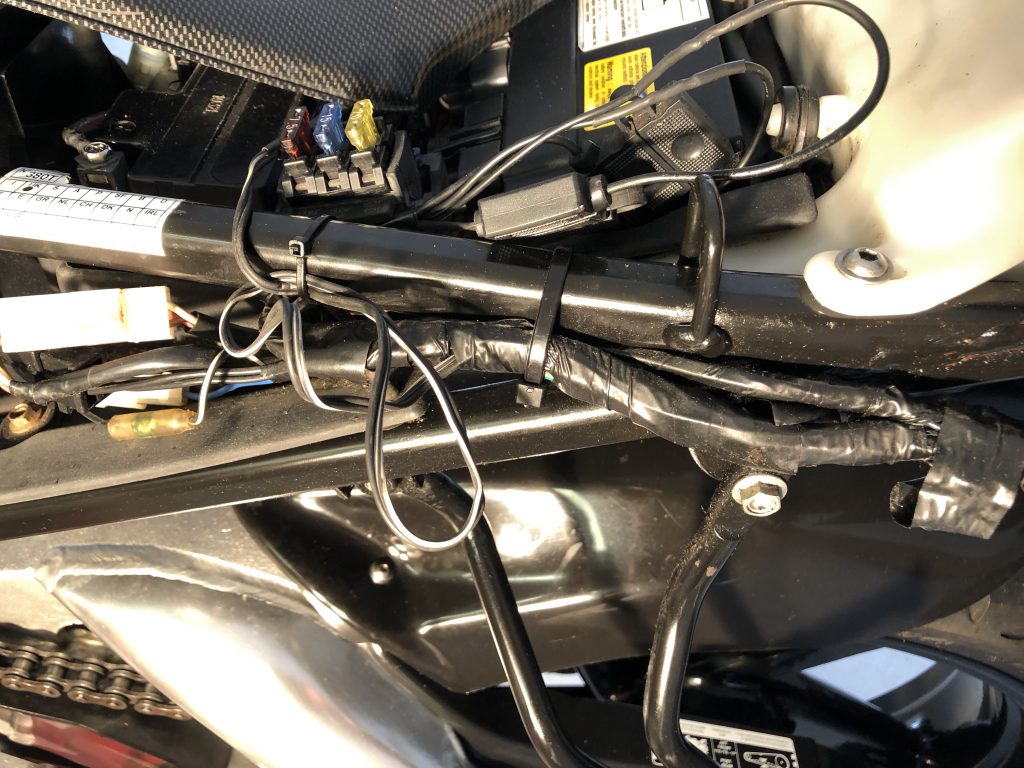
This gave me the opportunity to clear up all the wiring…first off, exposing the connections;
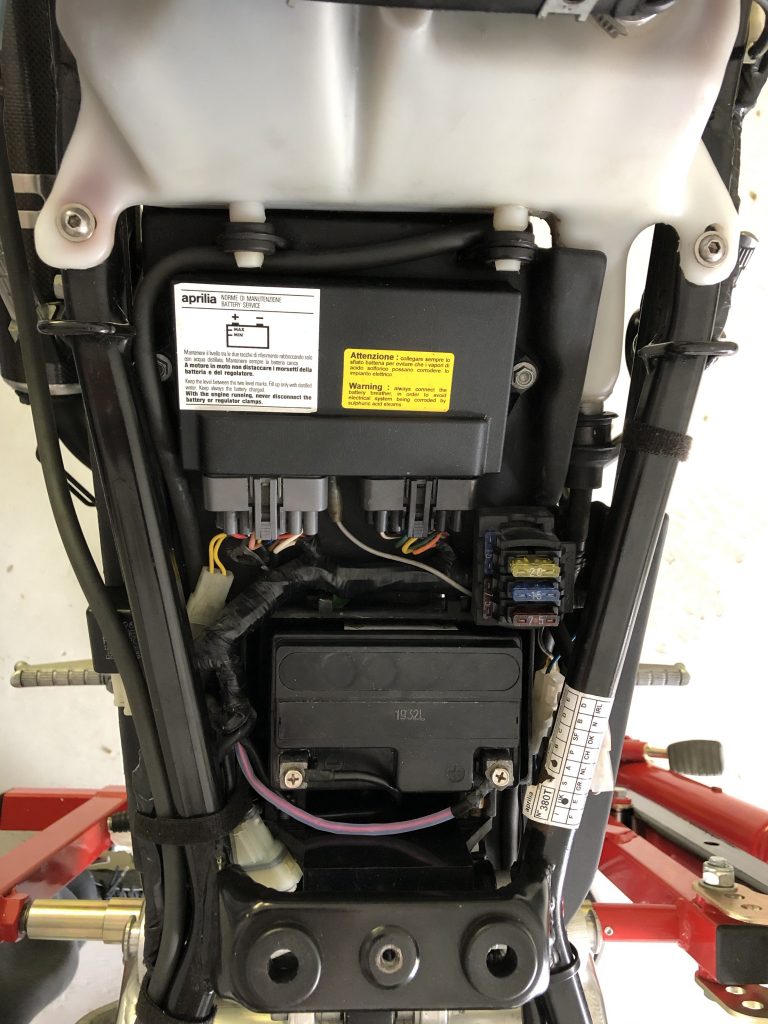
Tracing all the immobiliser wires back…note battery positive is disconnected to prevent any accidental electrical system damage.
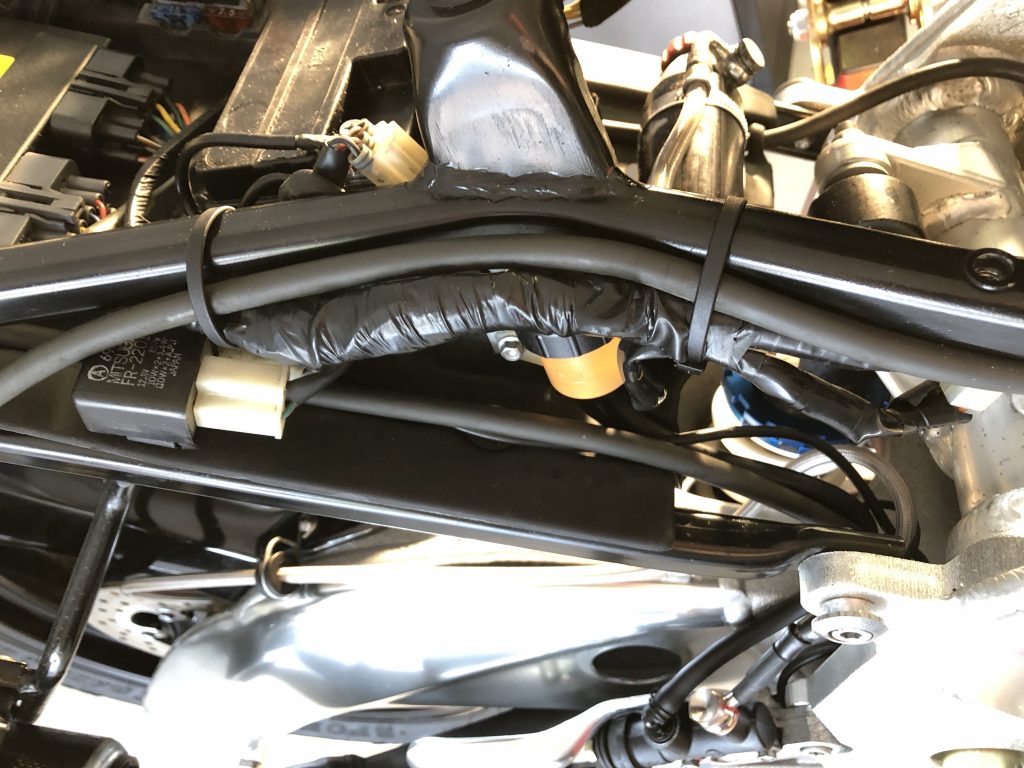
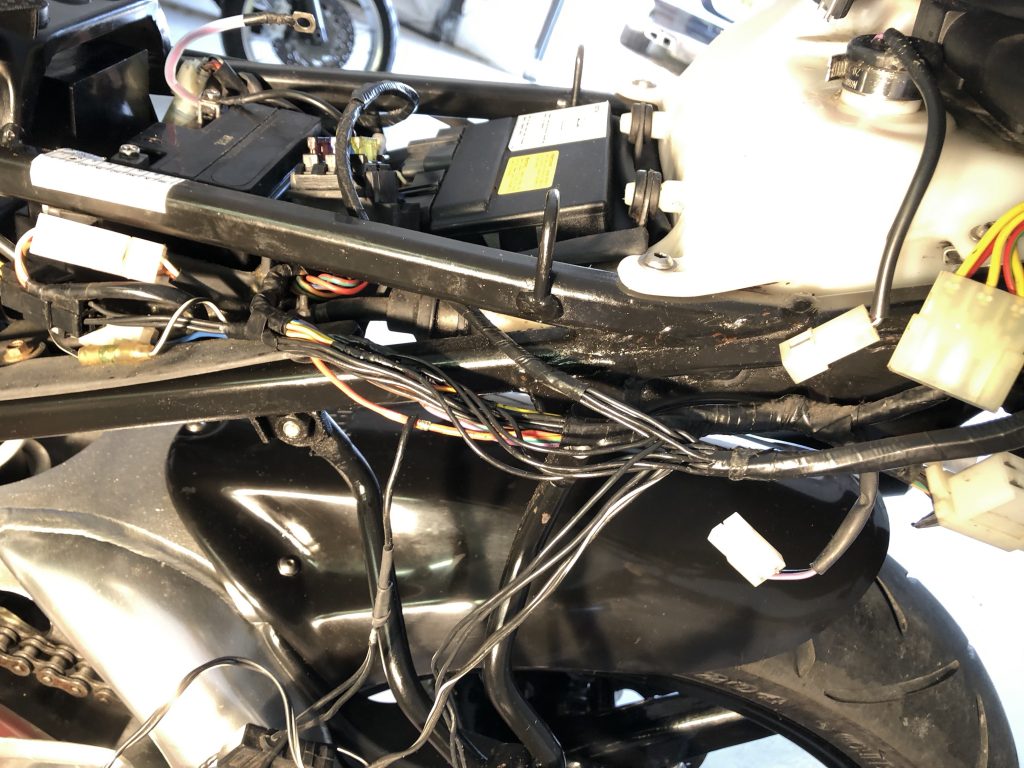
Below, the immobiliser wiring is removed and the factory wiring has been re-taped and neatened up, I have used velcro securing straps instead of zip ties so they don’t scuff the sub frame.
That’s much better!!
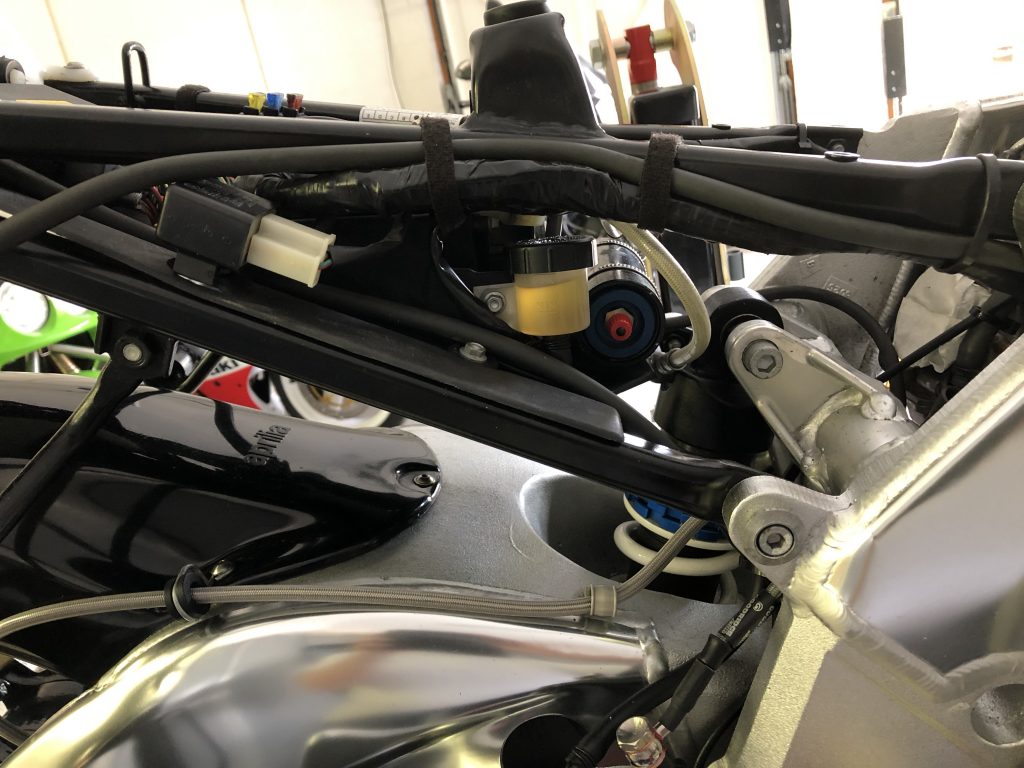
Out with the old!! I’ve managed to source a new OE carbon effect side panel to replace this one which has had the immobiliser receiver drilled into it!
I feel so much better with this all taken out, the bike is now returned to it’s factory condition 🙂
I must admit, one of the reasons I have waited so long to pick up an RS is because deep down, I always had this fear that they would require far more fettling than a regular four stroke.
With 2,600 miles, this example would hopefully have a few years of engine life left in her. It has had three services in its life, 2 were Aprilia main dealer, of which the last of those being in 1998, and the last service a ‘local to the previous owner’ renown motorcycle shop that recommissioned her in 2018 (8 miles ago!). Fortunately this should mean that the bike hasn’t been messed with too much. However being overly cautious, I have been going through her checking everything and renewing anything that I’m not 100% sure about before it hits the road to stave of any disasters.
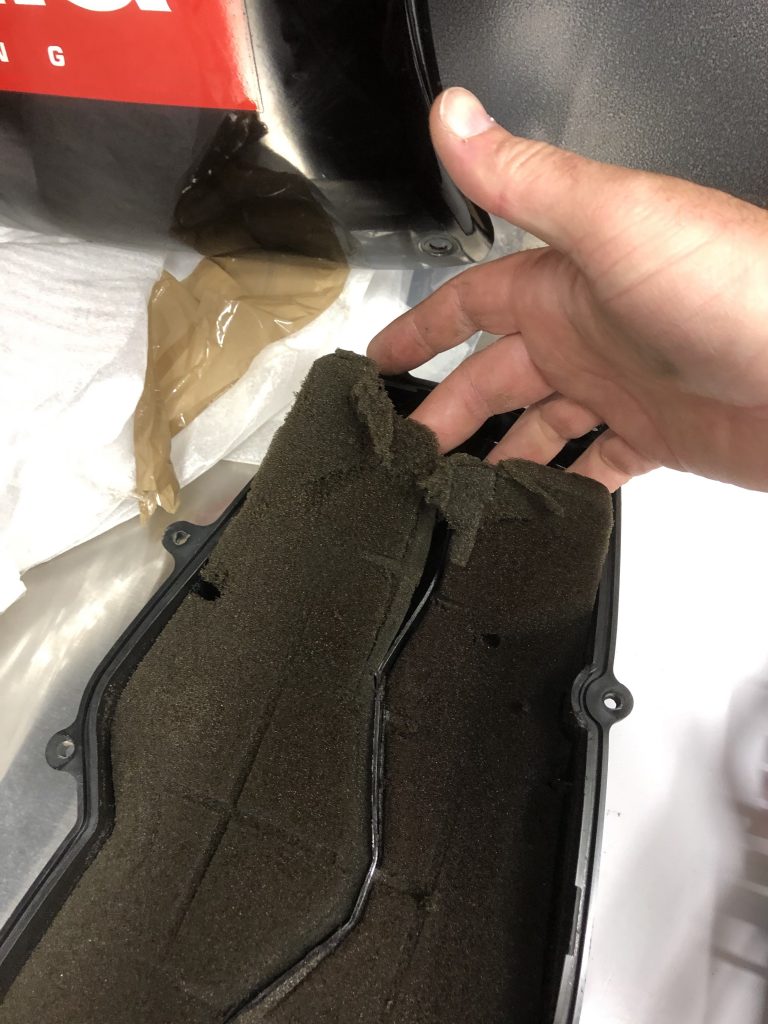
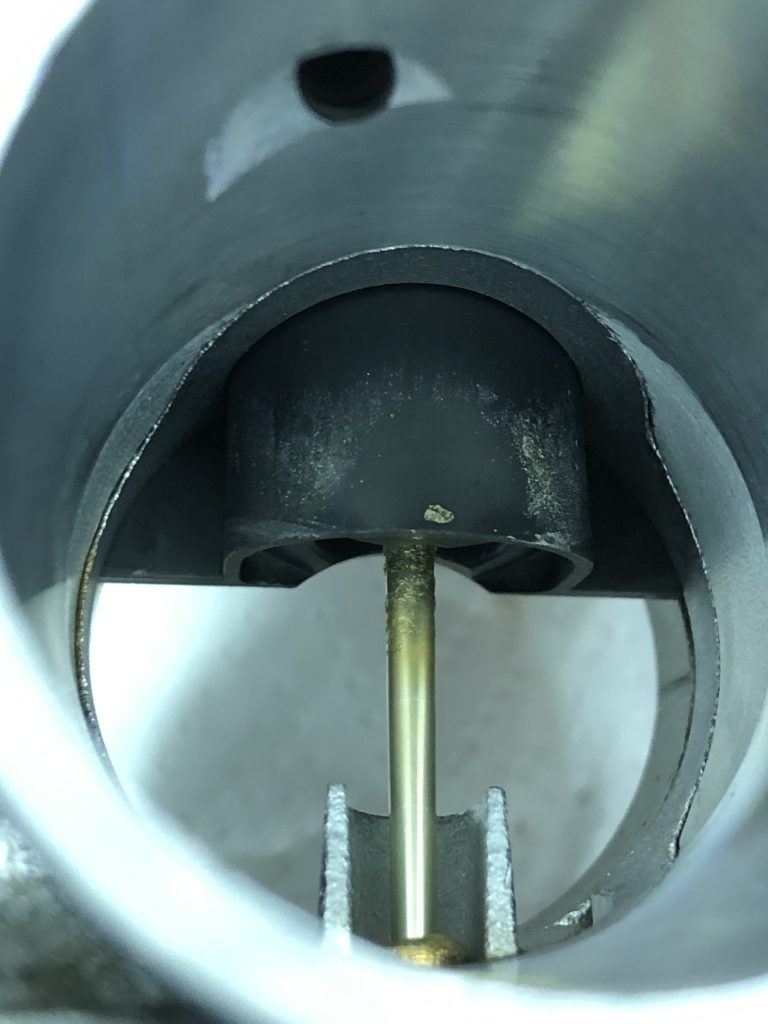
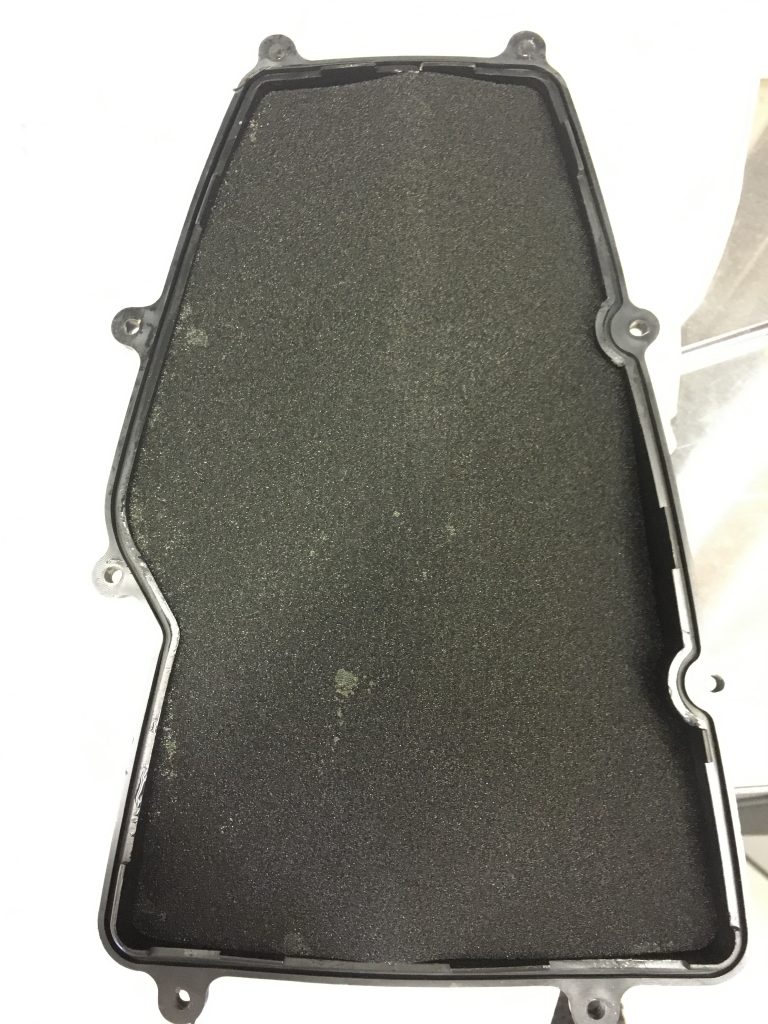
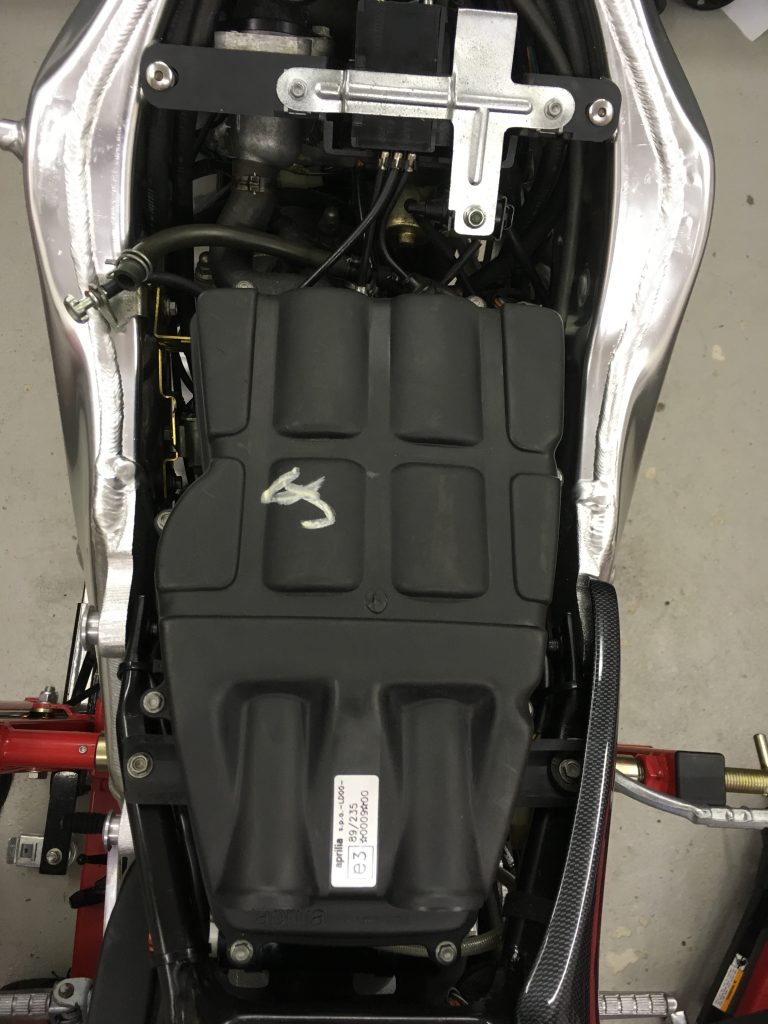
It doesn’t take very long to find the first eye opener! To be frank, this is why I like to carry out my own maintenance. The air filter literally falls apart in my hands.
Thankfully it was complete when I removed it, but whether this would have held up under 11,000rpm load without the bike ingesting lots of crumbly foam; I doubt it. I also find a mismatched bolt on the airbox so in the name of OCD, a replacement matching bolt has been ordered.
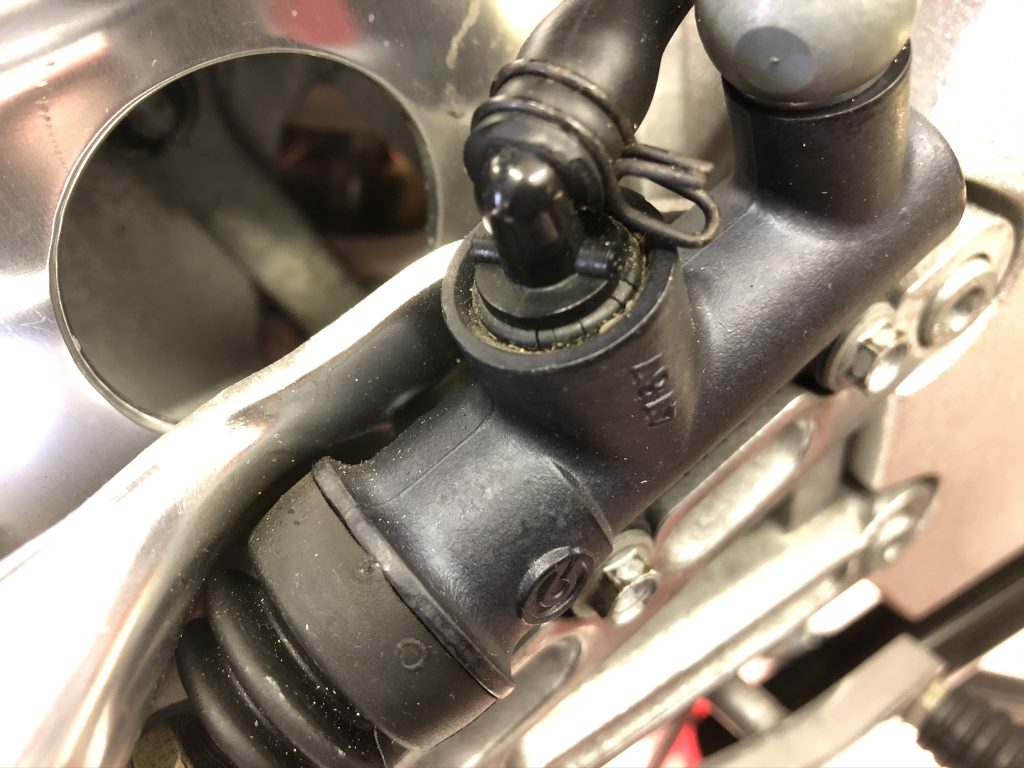
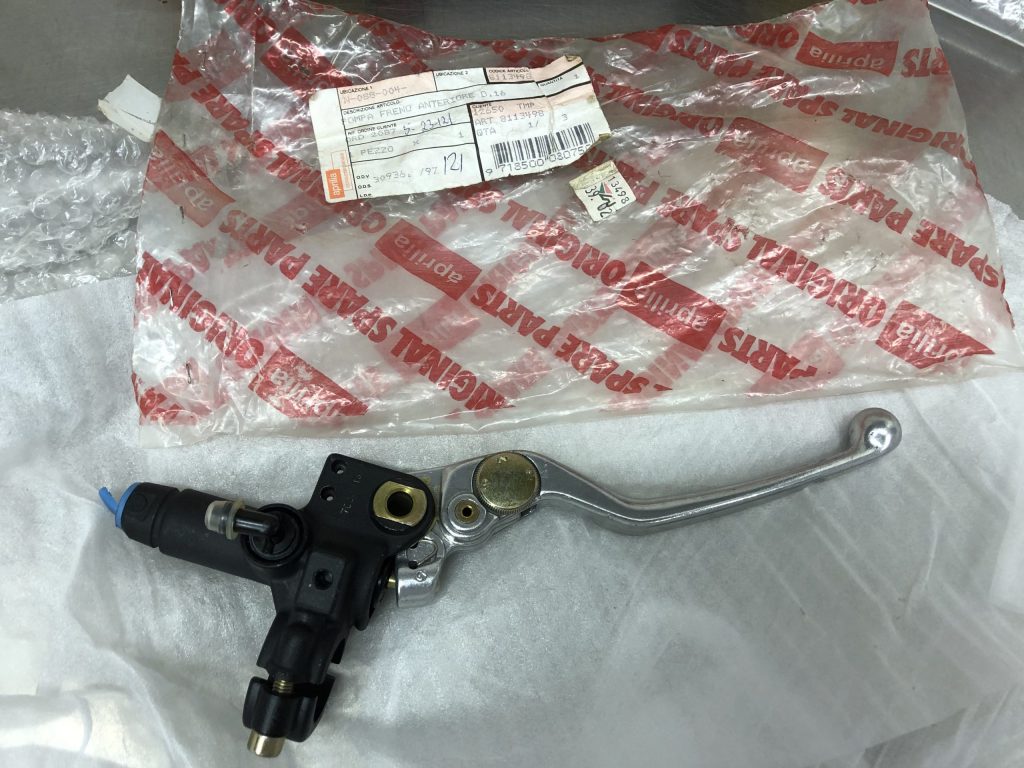
Perhaps the highest priority is that the brakes are up to scratch, after the rear master cylinder bleed failure, I’m not taking any chances with the front one, so managed to source a NOS front master which includes the brake lever.
While there I’ve also picked up a matching clutch lever so everything looks shiny and new on the control front since these levers have a tendency to corrode over time. A front caliper overhaul kit has also arrived to compliment the new front master so they will function like new once the calipers have been overhauled.
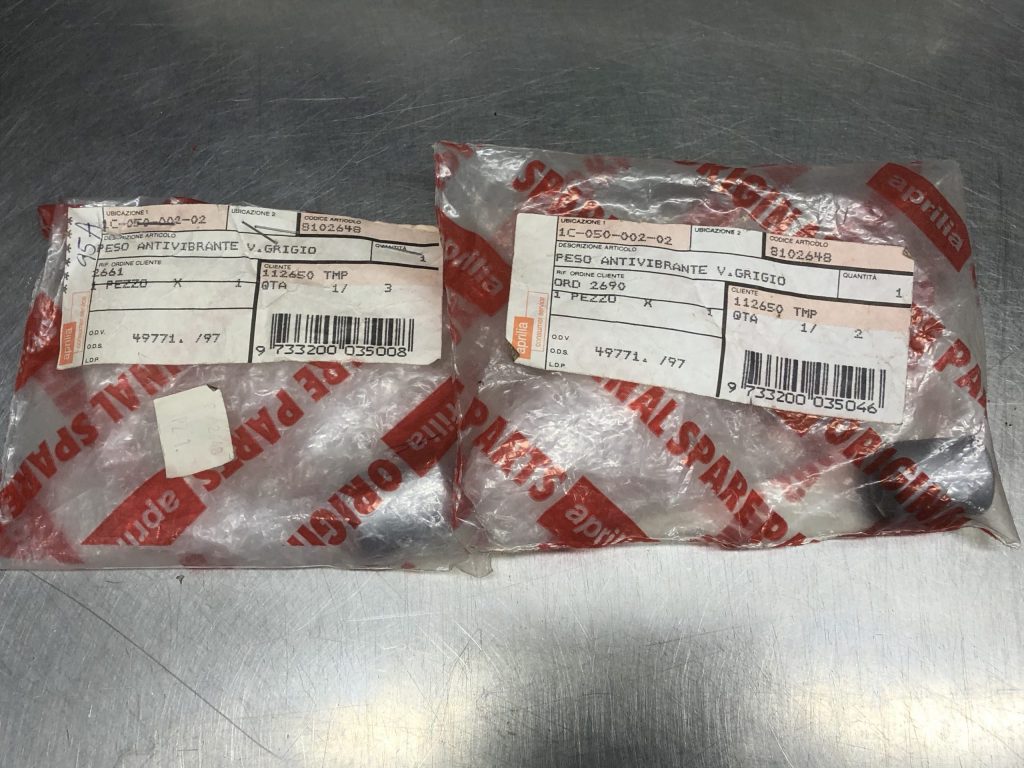
In general tidying, a pair of no longer available bar ends in the correct 1996 grey colour has also been sourced.
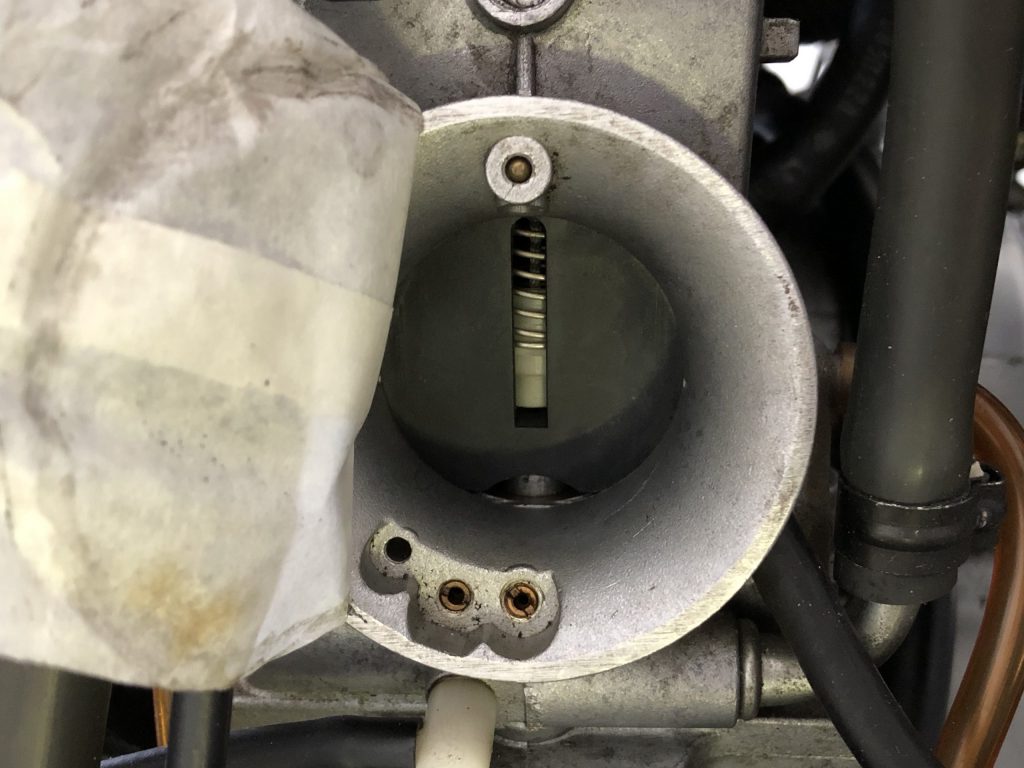
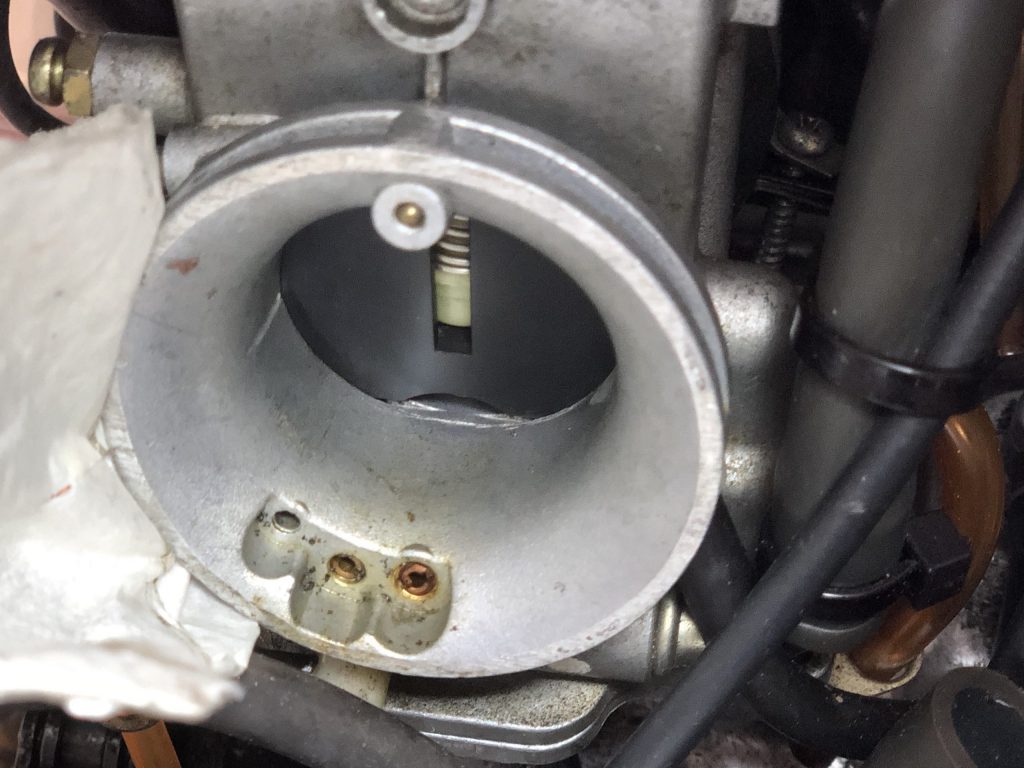
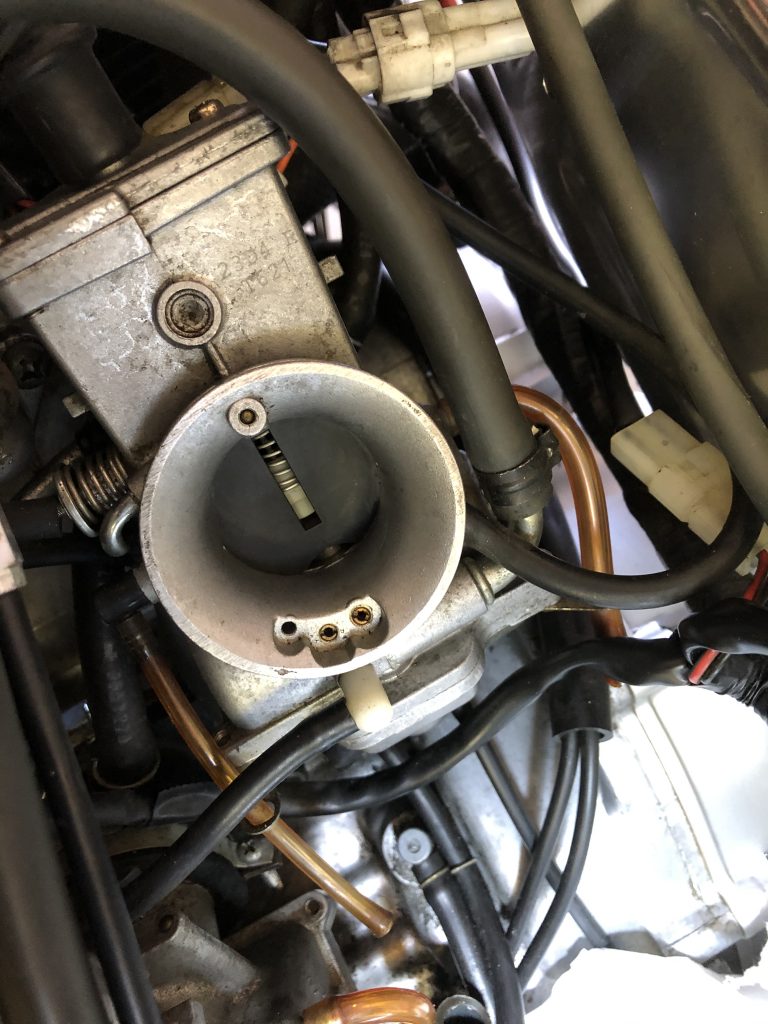
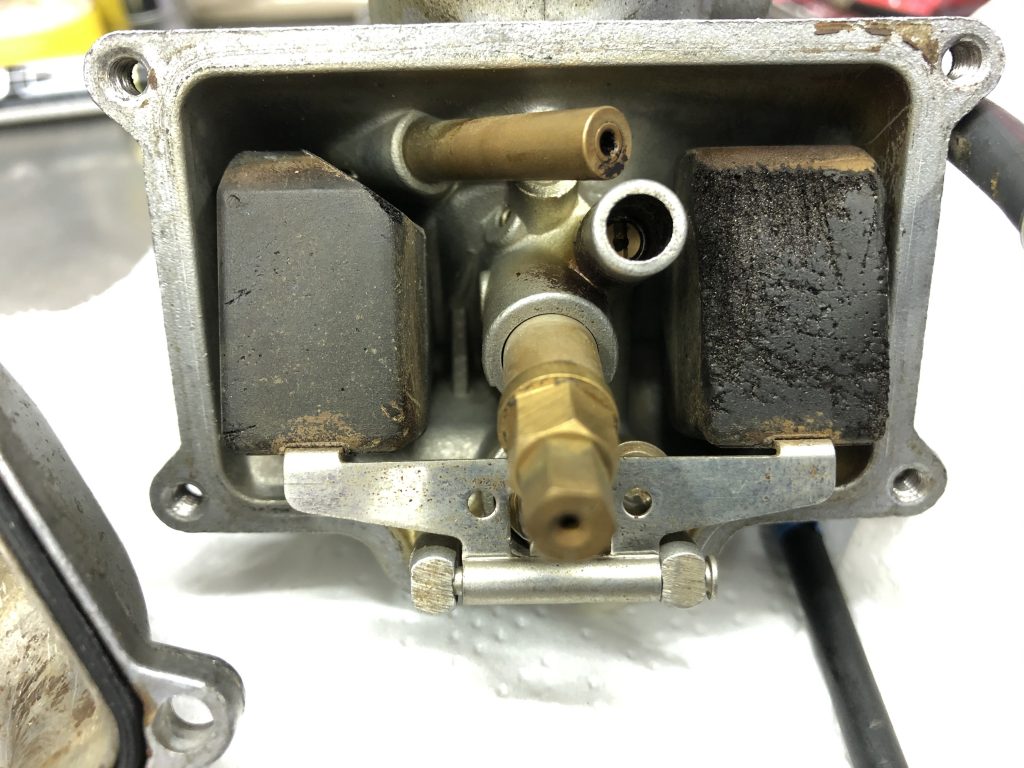
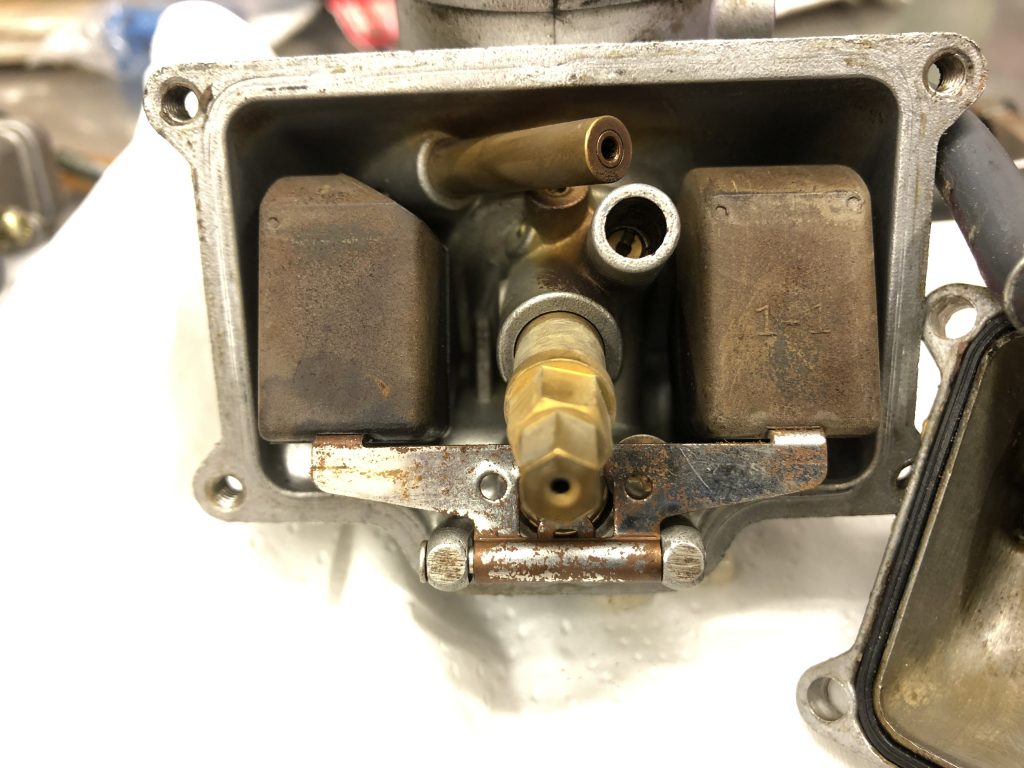
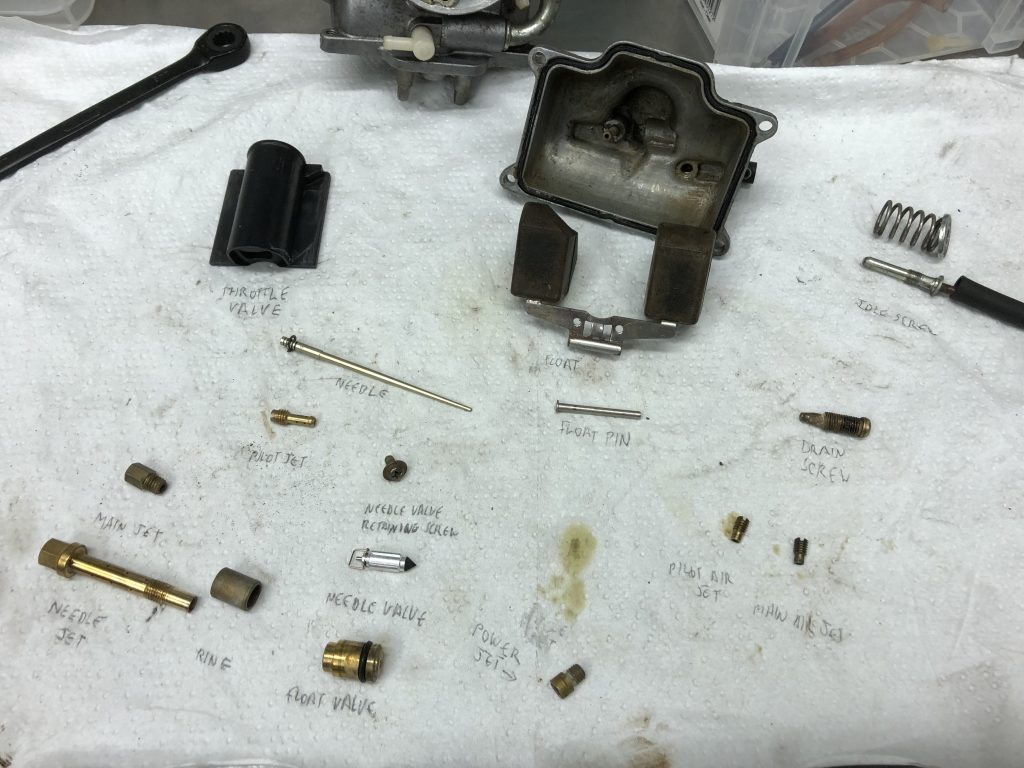
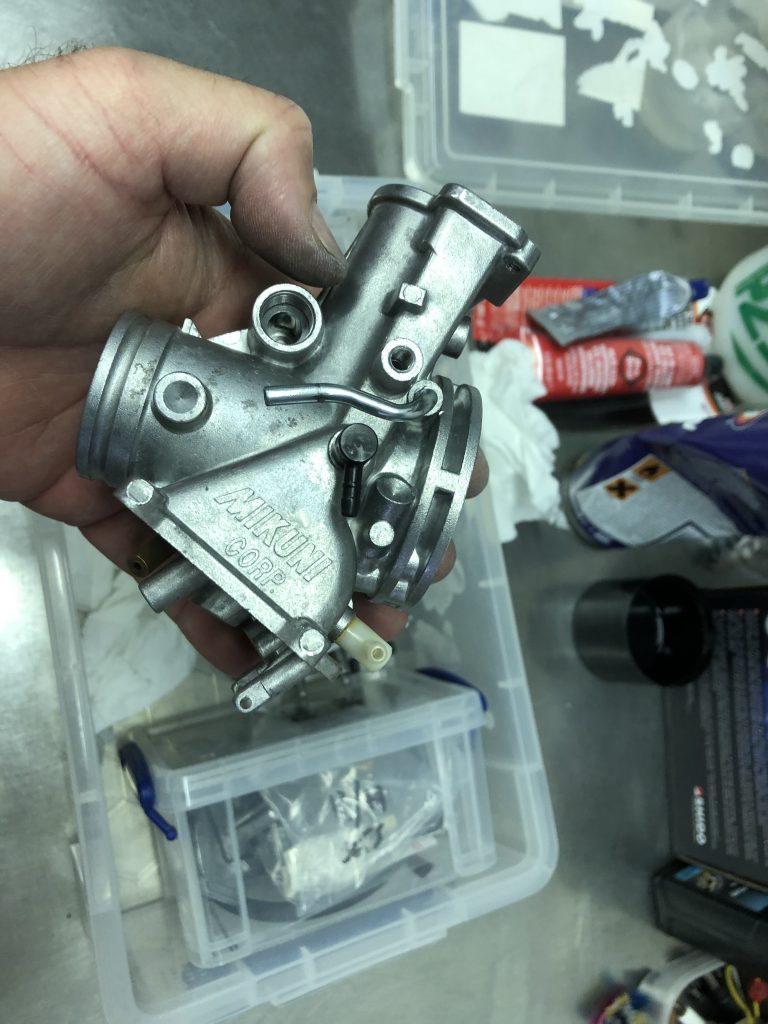
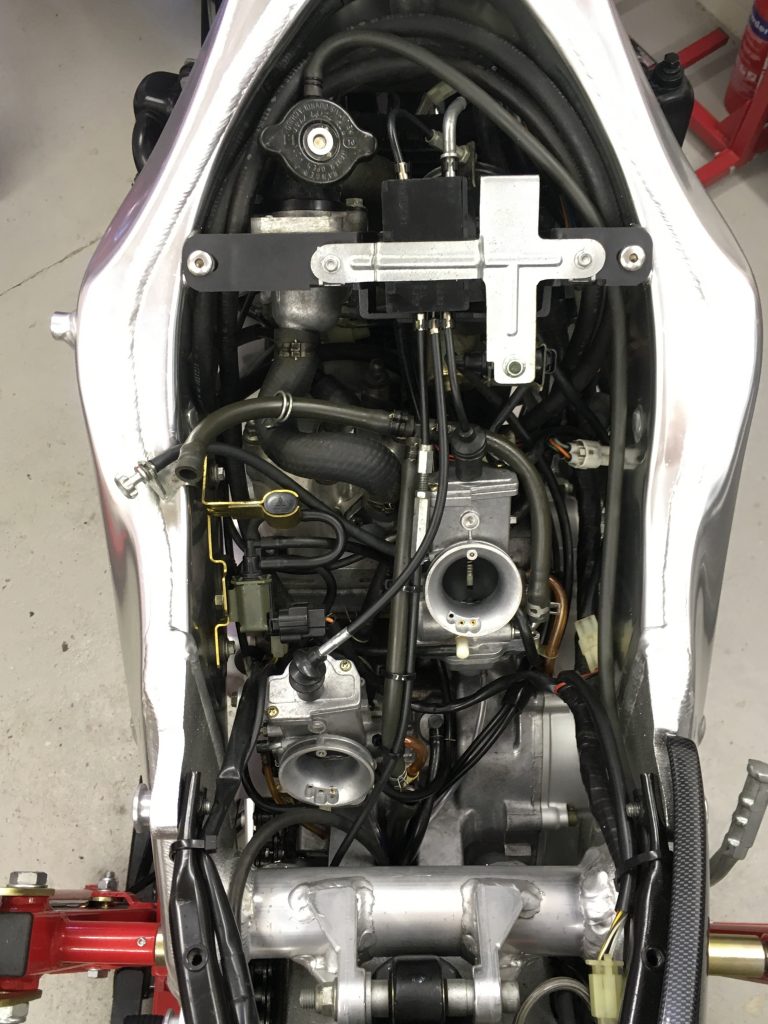
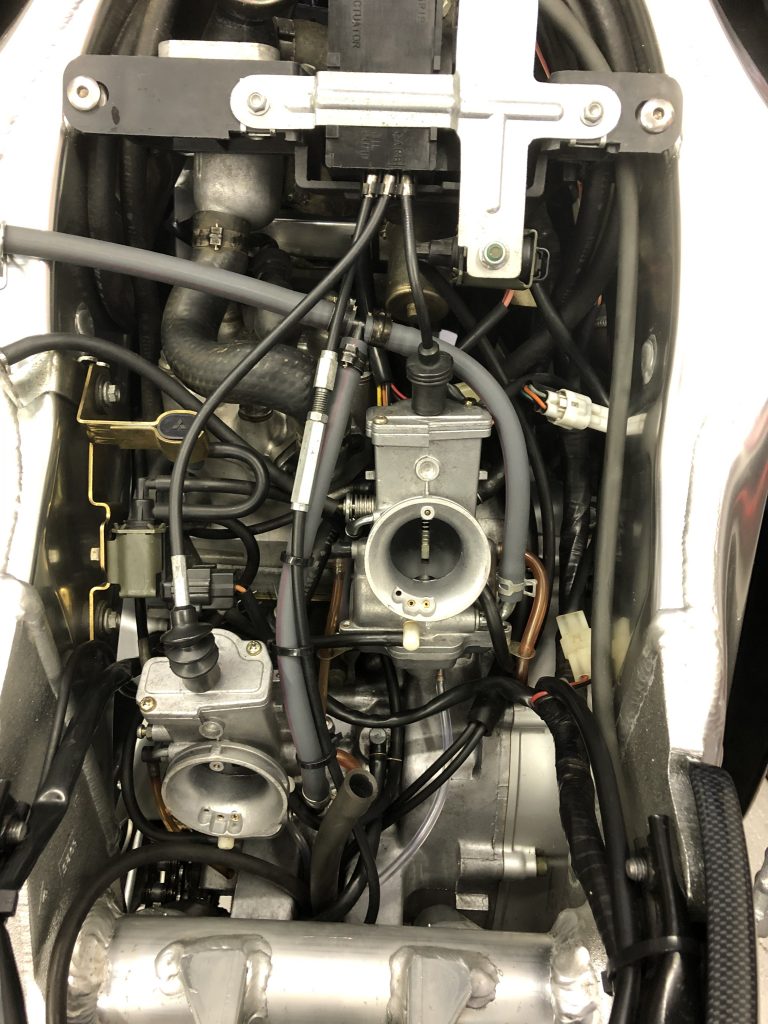
Before hitting the road, it’s time to look at the engine. Spark plugs are checked, carburettors were apparently ‘overhauled’ a mere 8 miles ago/2 years ago. The invoice charges for a carb rebuild kit. I’m hoping a cheap rebuild kit has not been fitted and the customer was either overcharged or only select parts were used. This picture shows the right carb. During this supposed strip, clean and carb rebuild, the factory fuel feed clips are still in place, so it doesn’t look like the carb has been removed from the bike. It’s possible that maybe the carb was visually cleaned and new air jets fitted at the front opening.
I don’t know if this is the factory needle, I’m hoping it is!
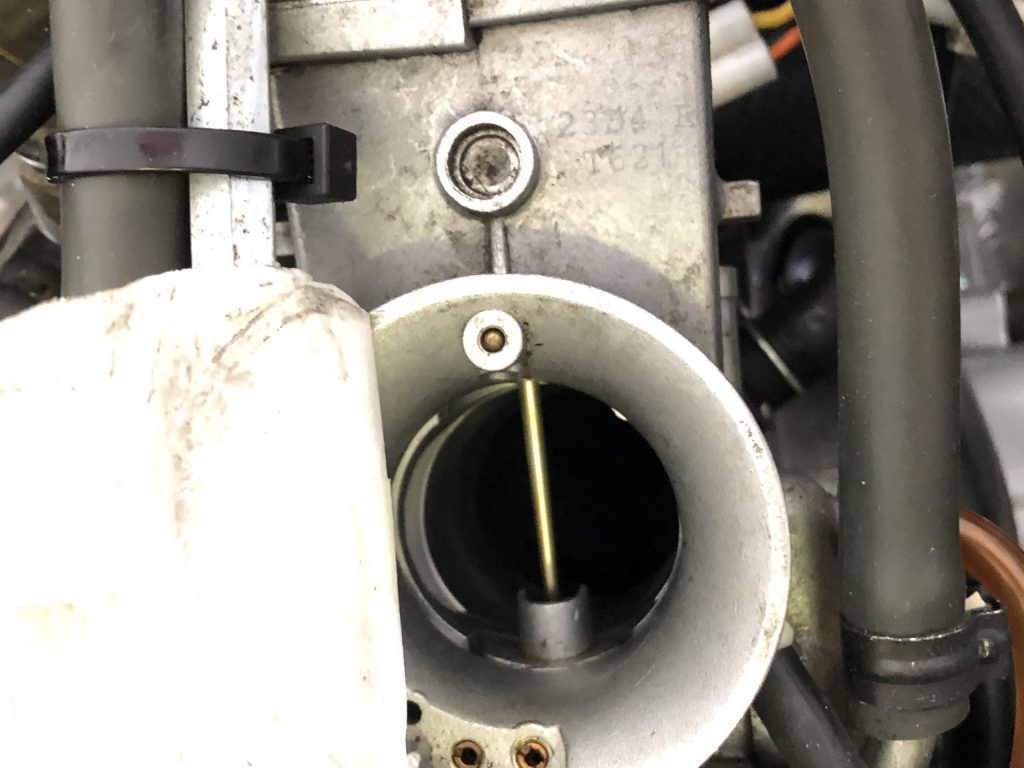
The left hand carb on the other hand, has had the feed pipe removed, evidence by it being secured with a zip tie and not a factory connector. The fuel filters are within this pipe at this point, which looks like the other carb fuel filter hasn’t been checked, perhaps the left carb was the worst of the two and the filter was clear which negated removing the hose. Either way, I won’t be taking chances and have ordered two new fuel filters.
I don’t believe the carbs have been removed or rebuilt and I’m rather hoping that they haven’t. I plan to ultrasonically clean them and would far prefer them to have the oe parts. With the fuel hose not removed from one of the carbs, I can’t see how the carb could have been rebuilt in situ with float bowls removed etc. The £580 invoice to recommission also states that the bike was running on one cylinder which was traced to a bad connector with a new one invoiced. All the ignition connectors are still original, so again it appears work has been invoiced which may not have been carried out and was little more than plugging in a bad connection or spark plug cap.
The gearbox oil is as clean as a whistle. In the last 400 miles it has been serviced twice, the first of which was 22 years ago when the gearbox oil was changed! The last service was for the plugs and a carb overhaul and ‘light’ service whatever that means on a two stroke. I’m sceptical about how thorough the work by the bike shop was carried out. I figure the only way to have true confidence is to start fresh with the servicing in my ownership, which means new Silkolene ‘light’ gearbox oil in and new sump washer going on.
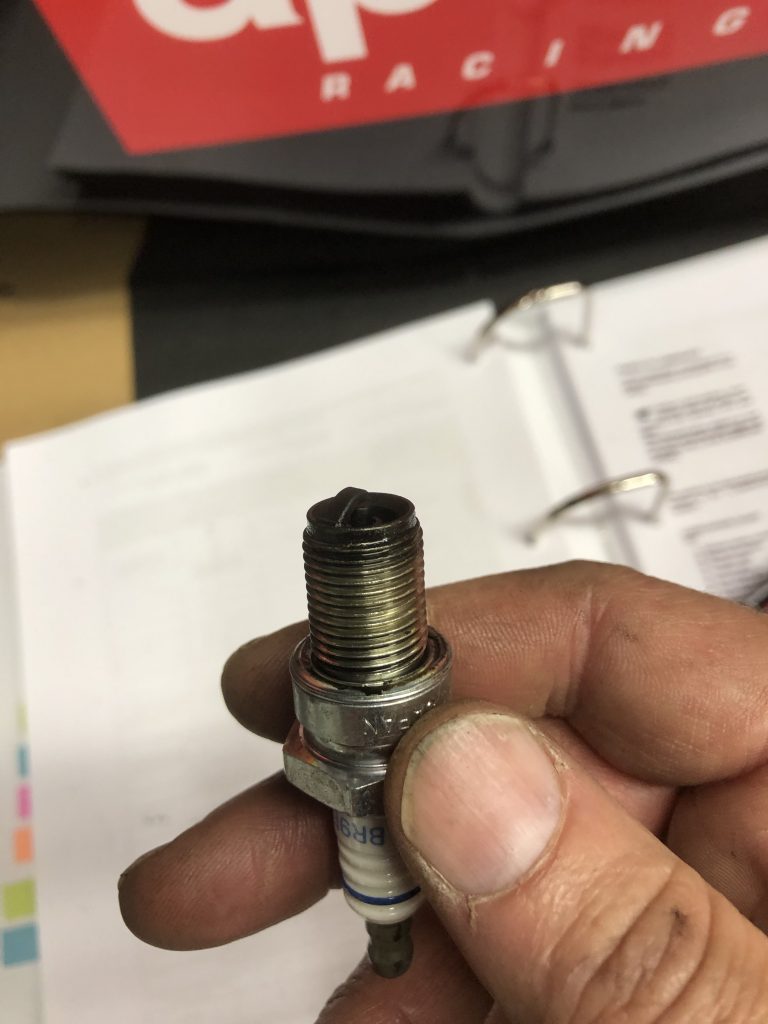
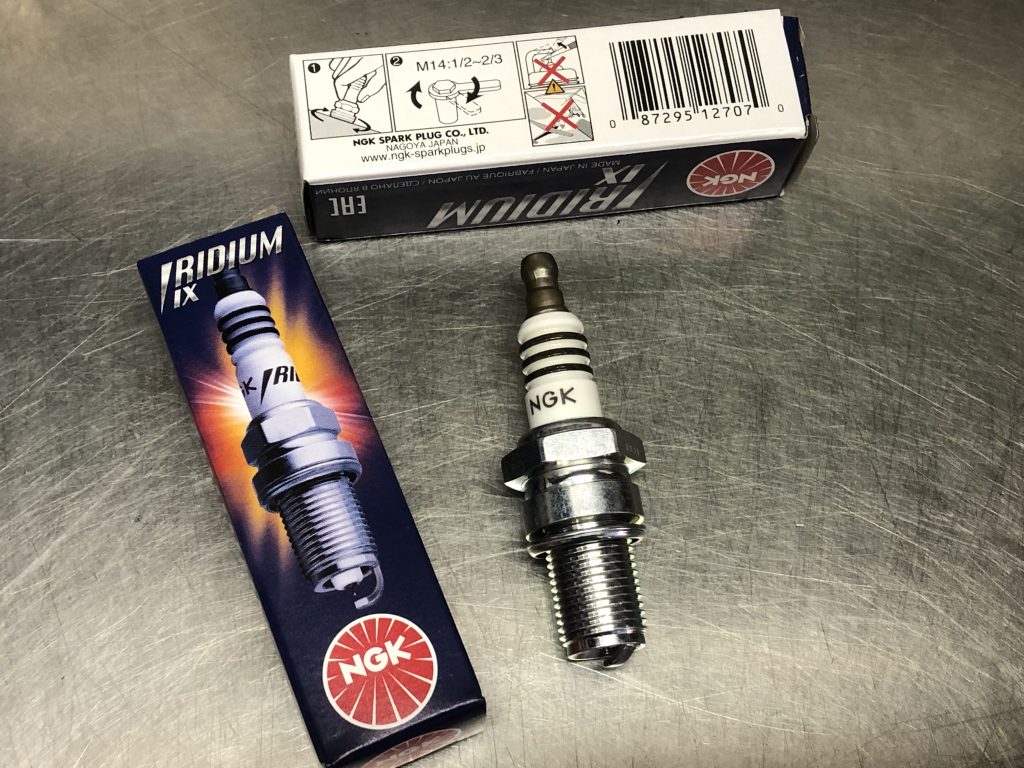
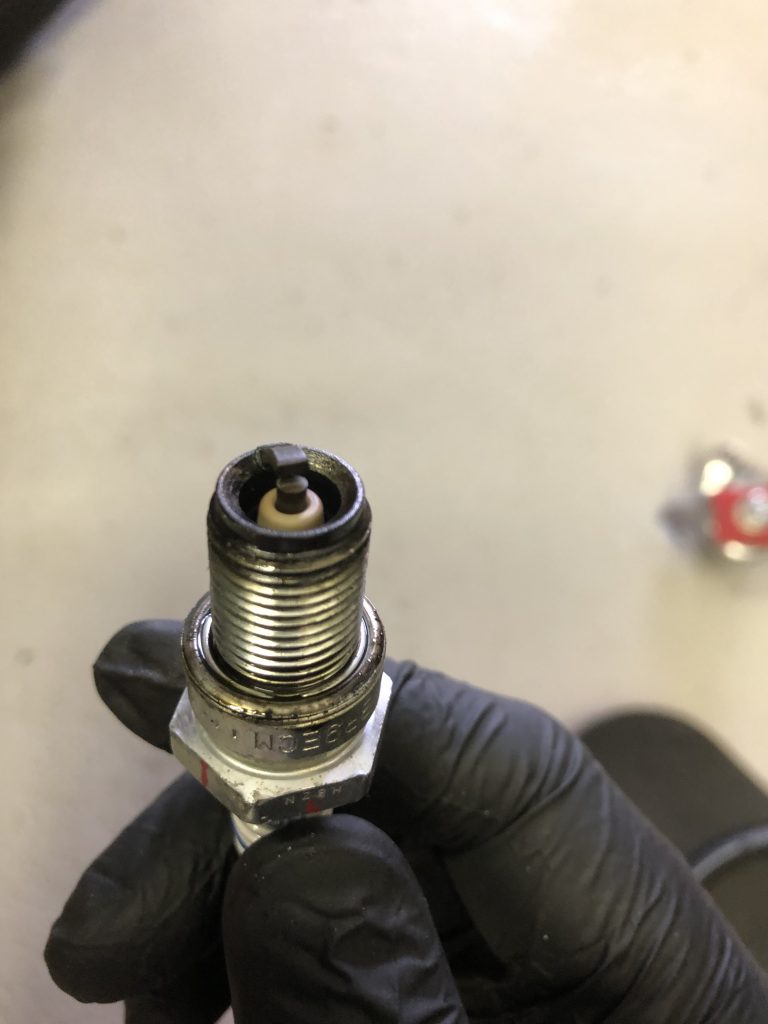
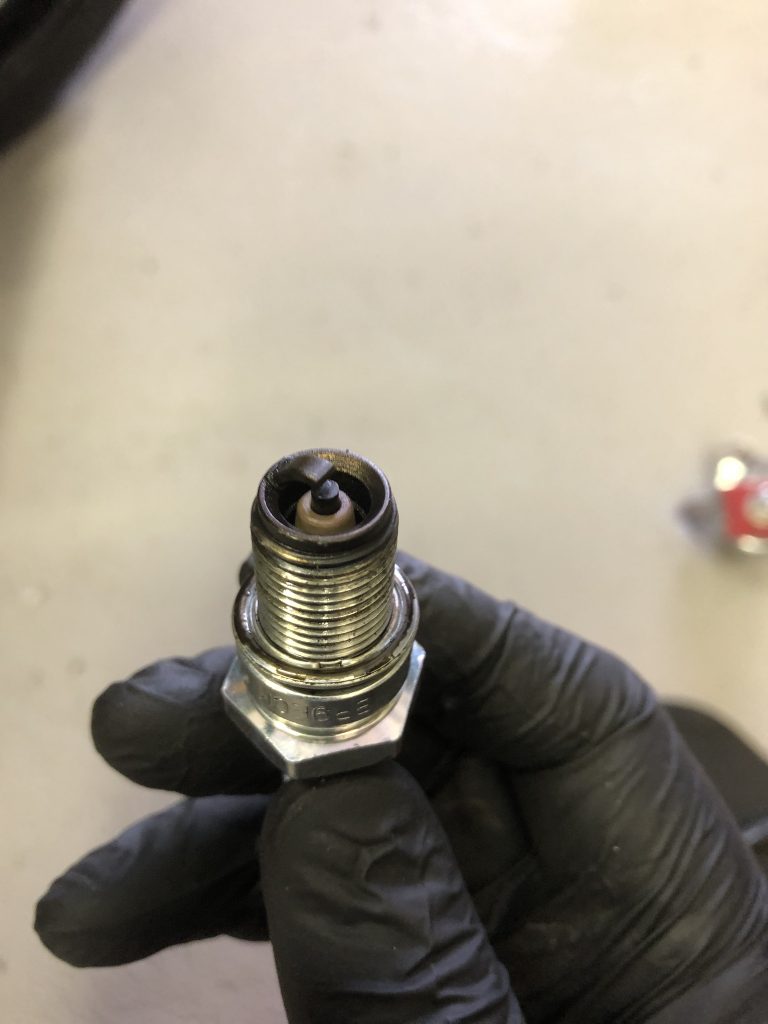
These regular NGK plugs were fitted 8 miles ago, or were they?
New Iridium replacements spark plugs for a cleaner burn, greater longevity and to help against plug fouling, also twice the cost.
A Pipercross ‘road’ air filter has been ordered, which doesn’t flow more air so as to alter fuelling requirements but is made from far higher quality materials, than the stock which just falls apart.
The two stroke oil will be drained and the recently added Silkolene comp2 replaced with a fully synthetic Silkolene Comp2 ‘Plus’ along with a new oil tank filter to give the engine its best chance of survival.
On this same theme, it is apparent from research that power valves can be problematic, they can stick, seize or disintegrate causing catastrophic engine failure as they can contact the piston. I don’t want to take any chances, this means removal and clean of the power valves and investigating the condition of the pin, which when worn causes the valve to fall apart and drop into the piston!! Many owners fit aftermarket Cougar Red valves which are an improved design making this failure impossible. A sticking valve can also cause the solenoid to fail prematurely, as powerful as the solenoid is, it can apparently still move a very sticky valve so this can go unnoticed. Due to the low mileage of this bike, I don’t plan to replace the valves just yet, I’ll defer any decision making until I can assess the condition of them first however. The relevant gaskets and seals have been ordered for this, as well as some valve retainer hex bolts as the oe philips screws can round of very easily making it a poor design. This will facilitate future valve removal.
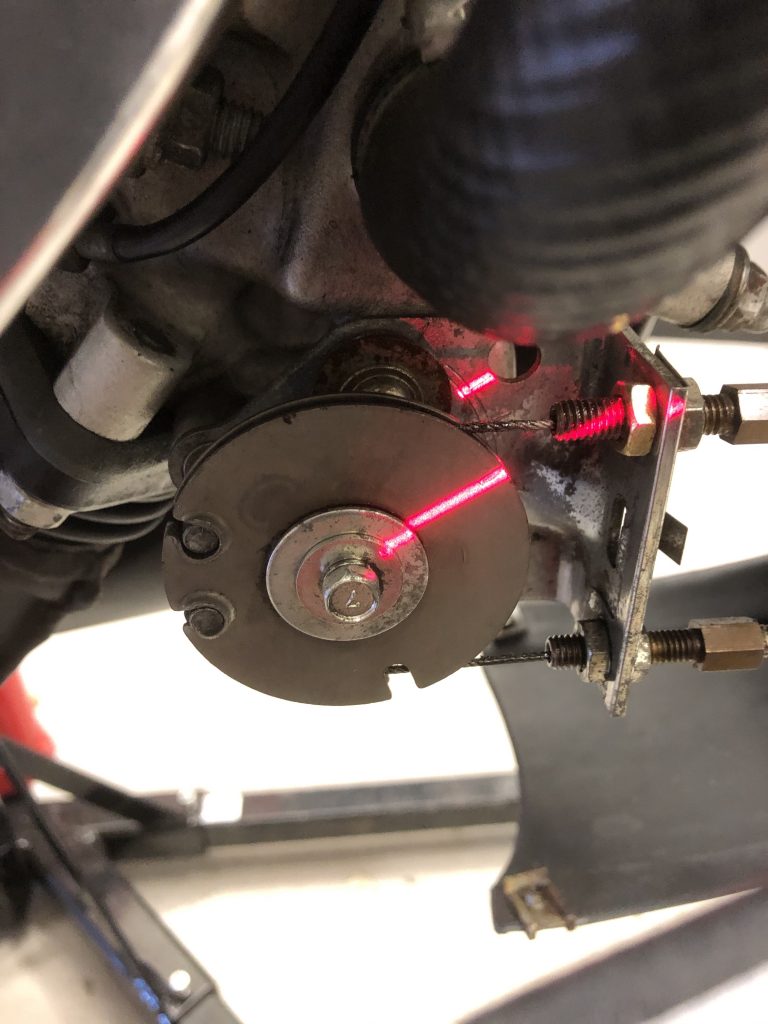
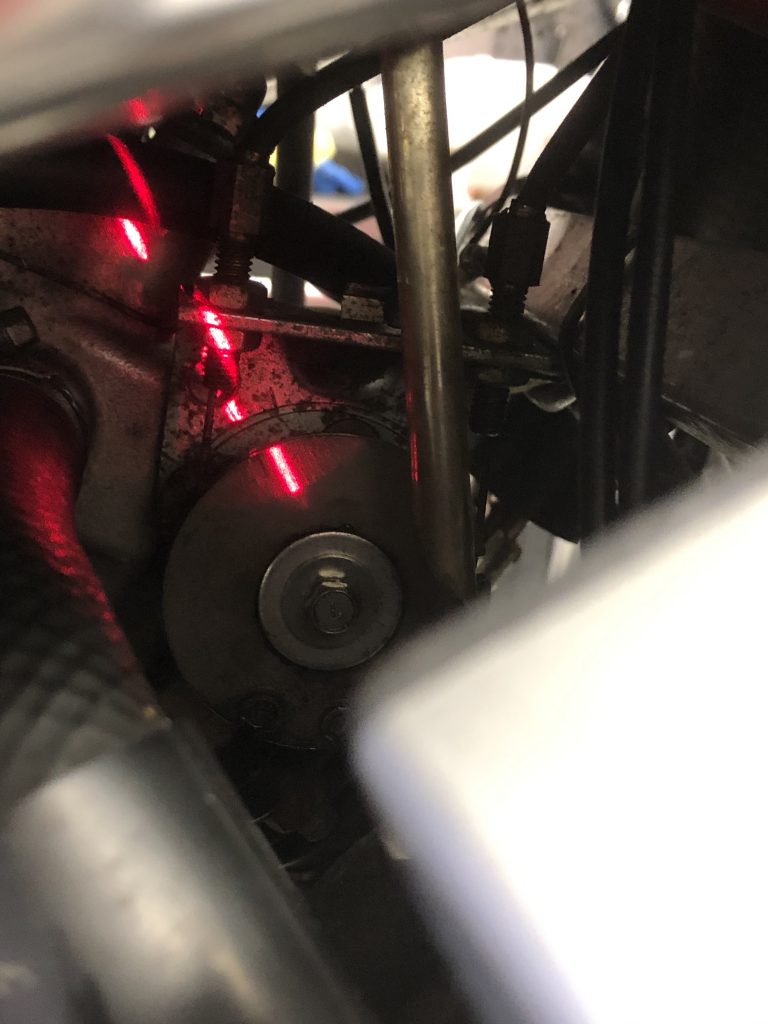
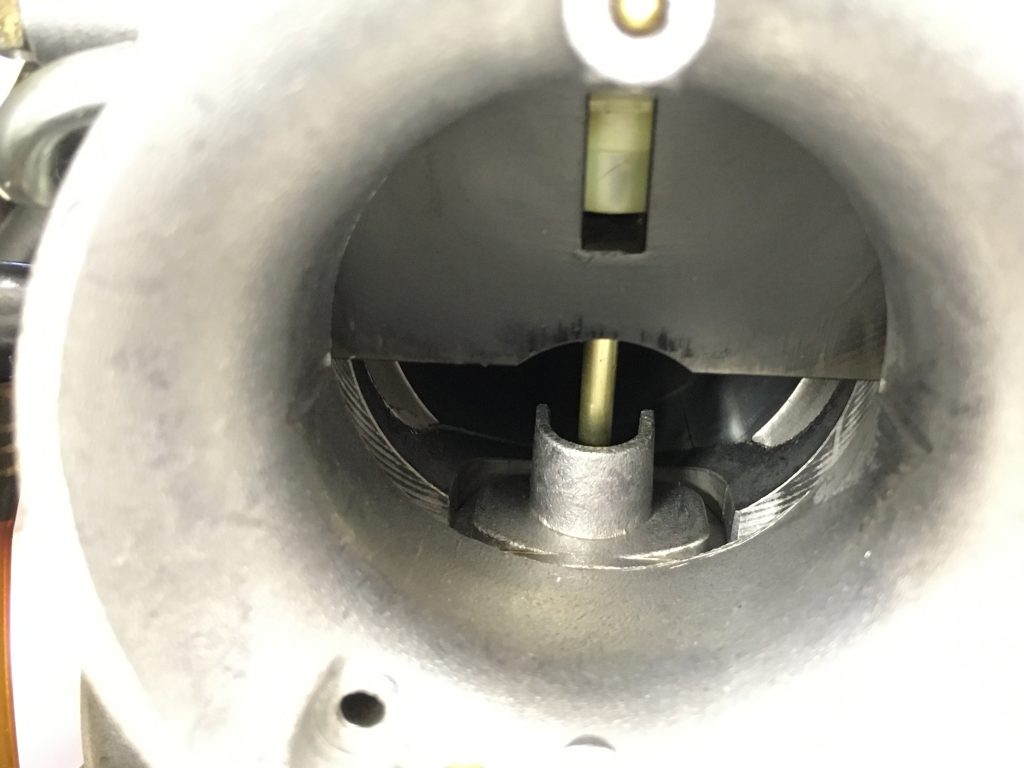
A first check on the valves means everything looks good and appears to be moving and alignment appears pretty much there. Grounding the grey ignition wire puts the valves in calibration mode and it’s a case of checking the alignment against the markings. Apparently the markings aren’t all that accurate, nevertheless…the lower cylinder markings/valve adjustment looks spot on.
The lower cylinder looks a little out with the photo below showing the laser demonstrating where the pulley marking should be aligned to.
This has left me ordering a Zeeltronic ignition checker, this will allow me to set the valves up far more accurately by effectively setting them to the third wide open position which is the most accurate way to set these up, it means removing the exhaust and looking up the port to ensure the valve fully clears the port when fully open, but not that it hits its stop which may cause the servo to strain itself as the potentiometer in the circuit will keep the pressure on all the time there is resistance. By default the valve will then be in the correct position at its middle opening which is where the grey wire test puts it.
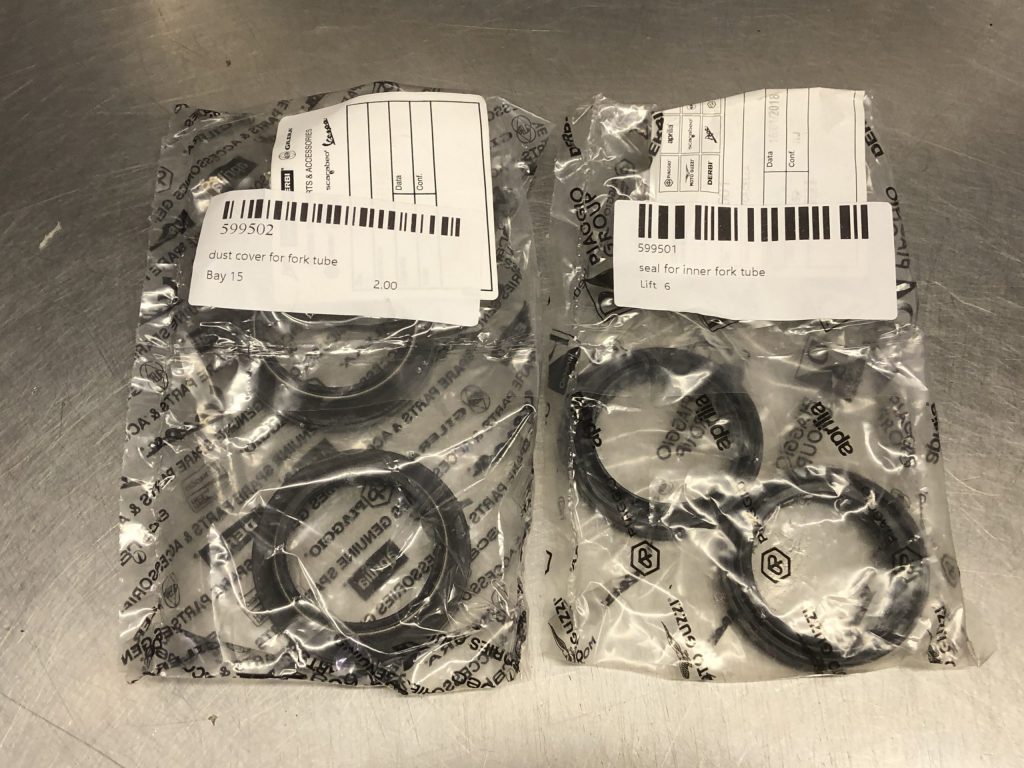
Finally, there is misting on the one of the front forks, a bike of this age is highly likely to require fork seals, these have arrived. I’m hoping to get through the season on these leaving a fork overhaul for the winter.
By now I have spent a small fortune on mainly mundane parts, no glossy shiny tuning parts or any of that ilk. I have sought some advice from Sean at the Tuning Works who has been dealing with RGV250 and RS’s for over 20 years and supplies many of the OE engine parts. He has a a tasty catalogue of proven tuning parts offering real benefits to performance, power and efficiency without compromising reliability which means there may be more spend yet down the line. For now I intend to get everything running as it should for the correct baseline.
No, we’re not talking about too much sugar!! Rather, bad carburettors to be precise!
So the Carburettors were rebuilt 8 miles ago when the previous owner had the bike recommissioned in 2018 at a non Aprilia motorcycle dealership. The invoice shows 6 hours labour and a carb overhaul kit. I was hoping that they had just been cleaned out and new seals fitted. It turns out I was wrong and my worst fears were confirmed.
One of the carbs (the l/h) had been removed from the fuel delivery hose as this was now secured by a cable tie rather than the proprietary Aprilia click clamp. The fuel filter sits at the entrance to the carb, this one had come away from itself and would allow unfiltered fuel through.
The other looked to have never been removed.
The fuel filter shows some residue/sediment.
Unfortunately both carbs had been opened up, evidenced by some rounded off screw heads at the base of the carbs and further by some of the original (and very expensive) Mikuni parts having been junked in favour of Chinesium, one of the many Chinese full overhaul kits available on ebay, which include everything for both carbs for £32. I was dreading this! My view was the least done the better, unfortunately that wasn’t the case.
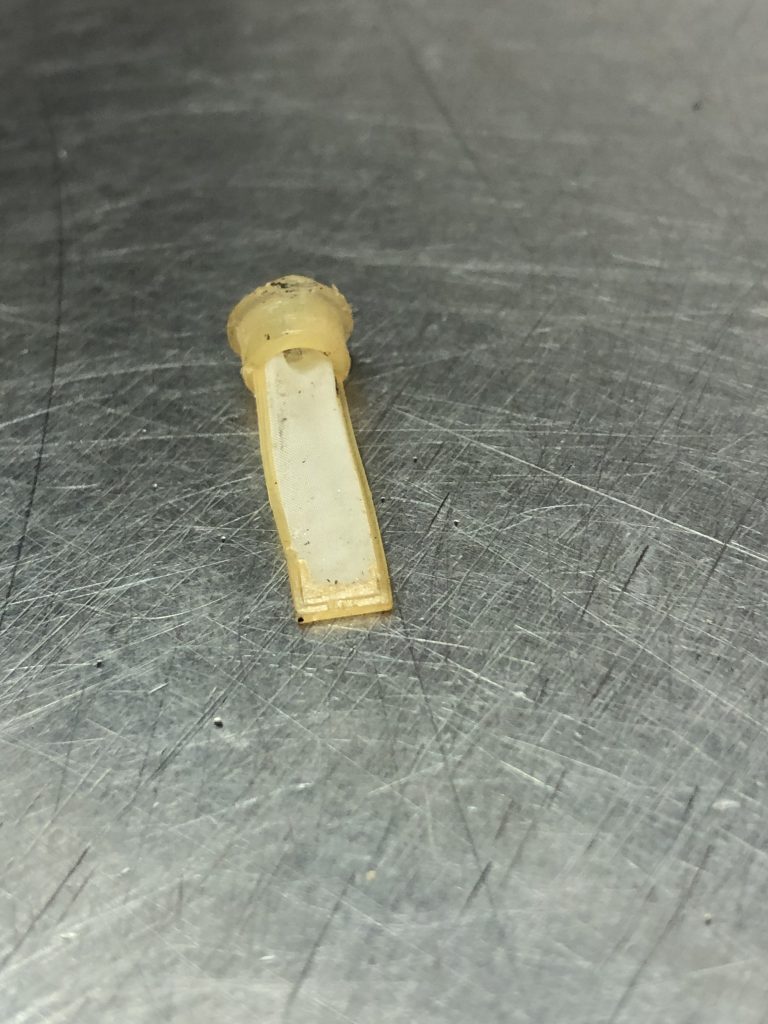
So it was time to identify what was original and what had been done. It’s not a great sight as I open the first carb, the fuel filter is split (this could have happened during the removal process) and the float looks eaten away on one side. This would be from the bike leaning on it’s side stand and probably came from being eaten away by ethanol which is corrosive.
The fuel had lots of black specs in it which had come from the corroded float, of course this is after the fuel filter so the muck could have found its way into the engine regardless. As with the air filter, I’m very glad that I’ve taken the bike apart first before being tempted to thrash it down the road. It seems like this approach is paying dividends in disaster avoidance. Curiously, this float does not ‘seem’ to have any oem markings on it, however the markings would have been on the corroded area so perhaps it is original after all! It would seem like a lot of damage for 2 years otherwise! The float furthest from the side stand is not marked despite being in the same float bowl suggesting it was not sitting in fuel.
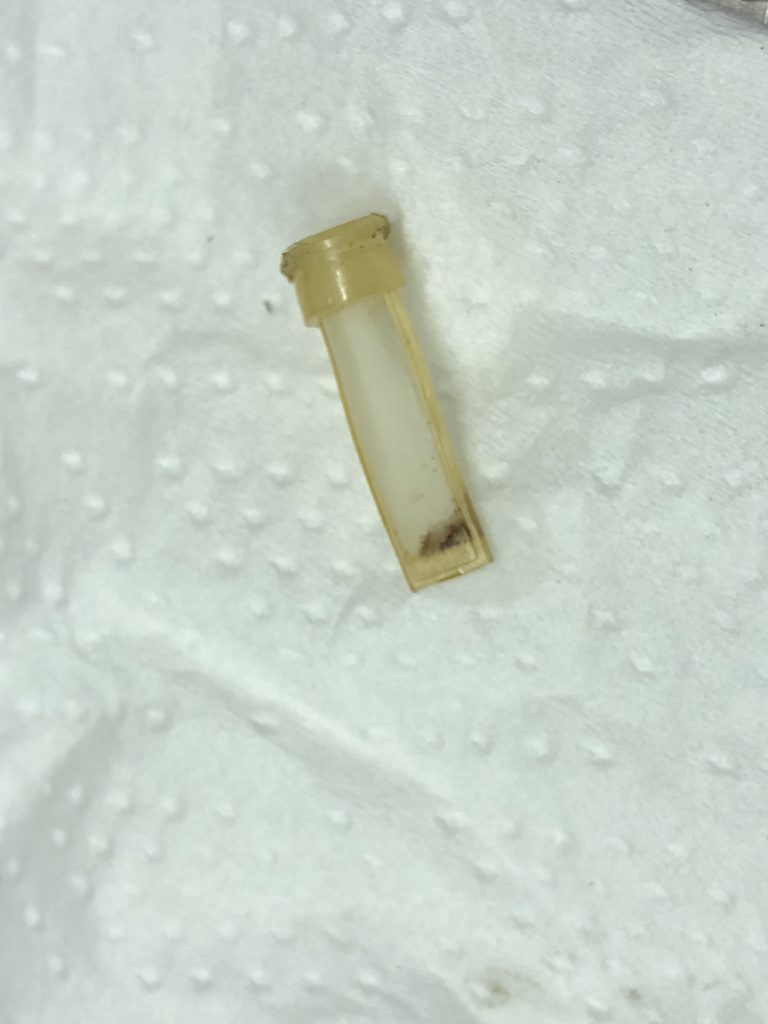
Of even more concern is the power jet circuit which performance 2 strokes are equipped with. According to Mikuni, this can provide extra fuel at high rpm full throttle. On removing the float bowl, the elbow to the hose connecting the power jet to the carb body snaps.
There was no force applied, it just came away with no effort. The hose was completely gummed up, I had to use a drill bit to clear the hose, clearly ethanol fuel had been sat here and had corroded the metal weakening it. Thankfully this is the left hand bowl which is still available, the r/h one is no longer available. The power jet circuit on this carb would have been totally ineffective potentially leaning out the mix at high revs/full power applications which is when you need it most, again I’m thankful I hadn’t been down the road with it. Sadly I’ll never know how bad it was suffering or not as I never rode it but better this way I think.
On to the r/h carb.
This would appear to have oem markings on the float, and was also rusty, suggesting it wasn’t sitting in fuel when the bike was standing. I guess if the fuel tap was shut off and the bike allowed to run until it stalled while on its side stand, it would have run out in the r/h carb first. This would have stalled the engine leaving some fuel in the left carb bowl with only one float dipped in the remnants of fuel, which is also where the power jet pick up was, explaining the corroded elbow.
The needle has some congealed fuel on it and the throttle valves could use a clean.
I strip the carbs down, on further examination, some of the jets are not original. Both pilot jets, one air jet, both needle jets as well as both float valves and needle valves are non oem.
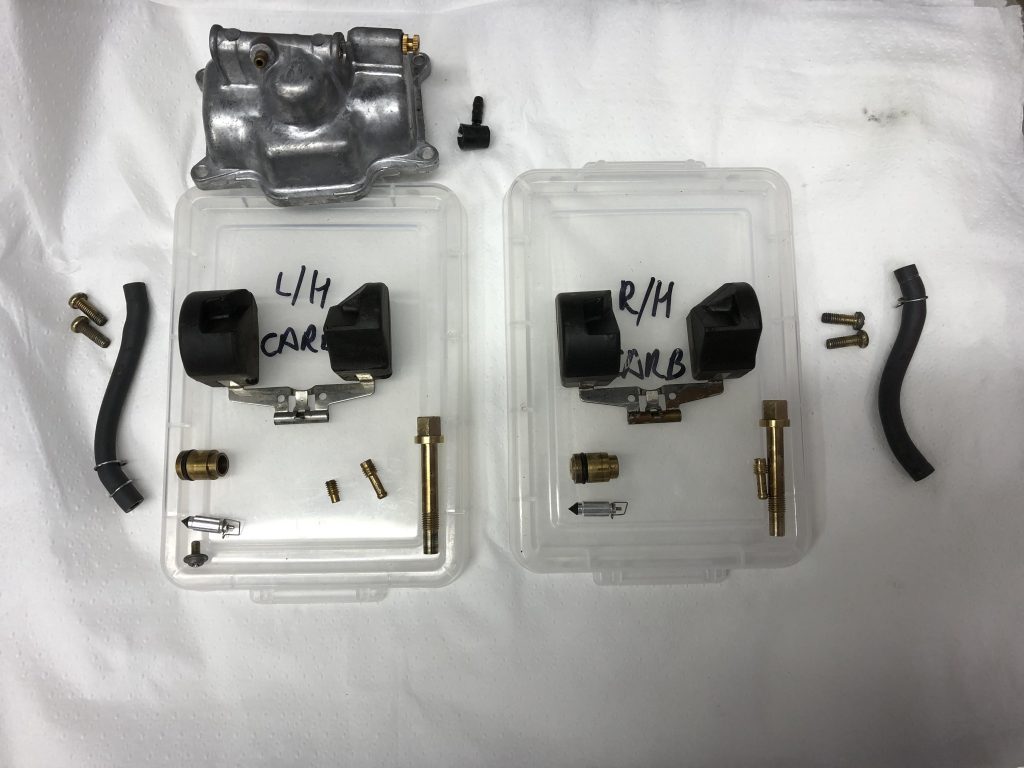
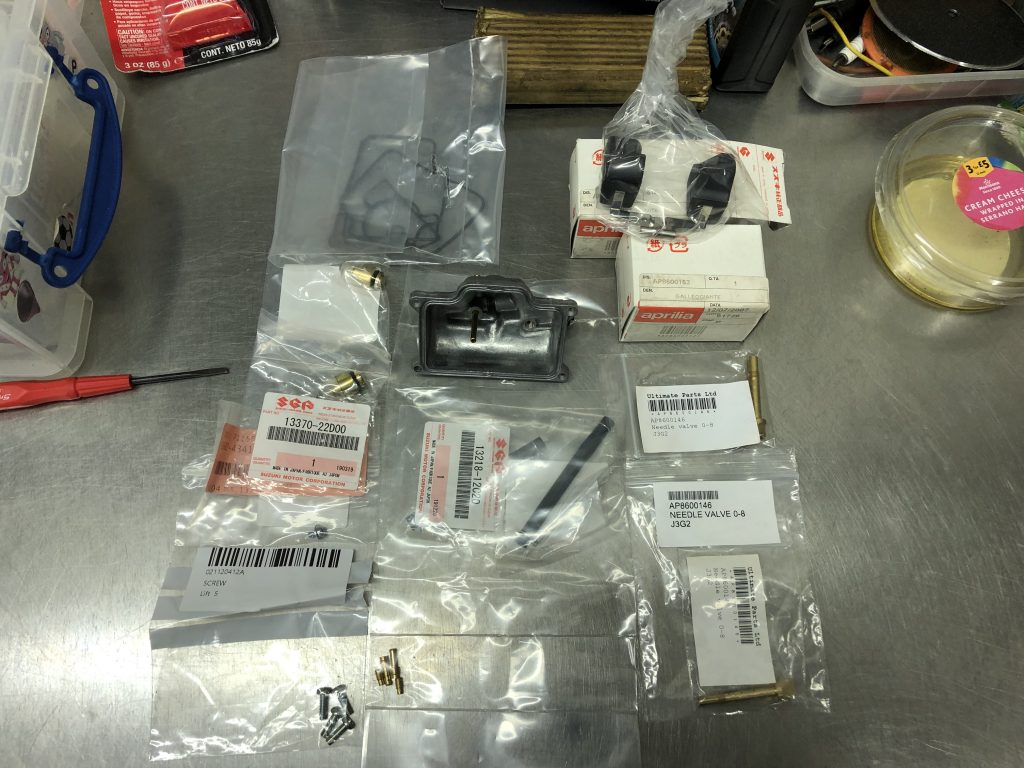
I lay out the parts which need replacing for oem, as well as the float bowl itself which will need renewing on the l/h carb. This little lot in the picture below represents £438 as a replacement value. Junking the Mikuni parts for Chinesium was an expensive exercise and probably an unnecessary one, I find it hard to believe they couldn’t have been restored with a little TLC. That figure includes obtaining parts from Suzuki where required as they are the same Mikuni carbs as used on the RGV and cheaper than sourcing them from Aprilia. I’m replacing the vacuum lines as they contain a jet, I have no way of knowing if they have the correct jet so decide to replace them as a matter of course. The unknown unbranded Chinesium items have no markings on them so I cannot even verify if they are the correct size.
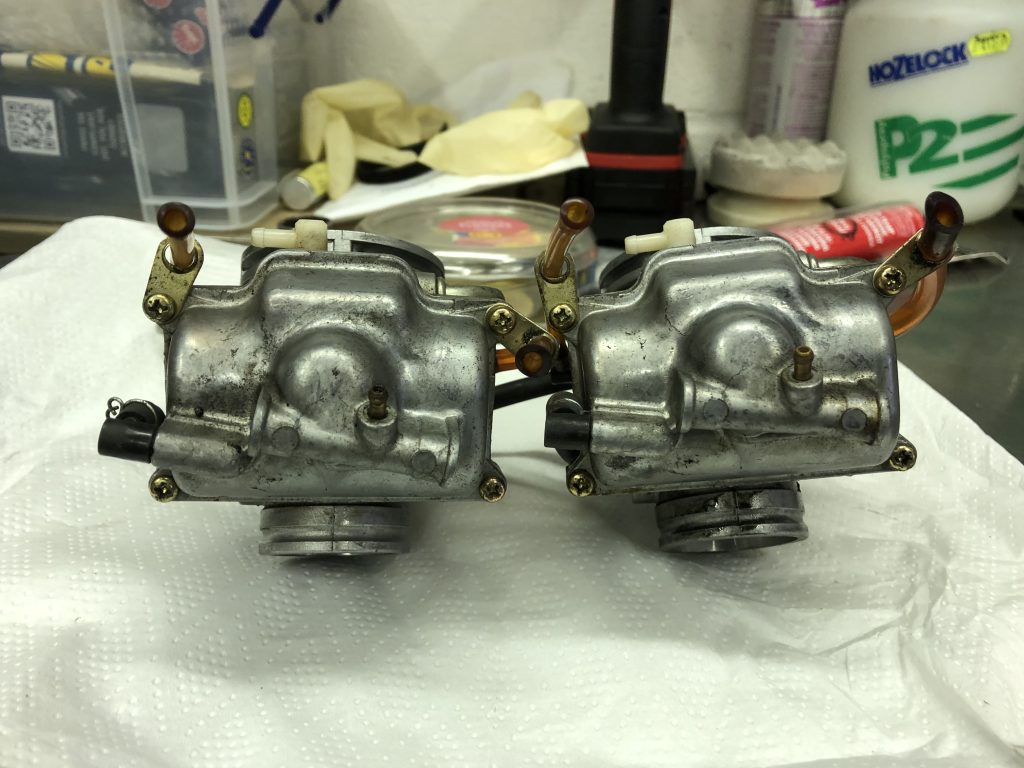
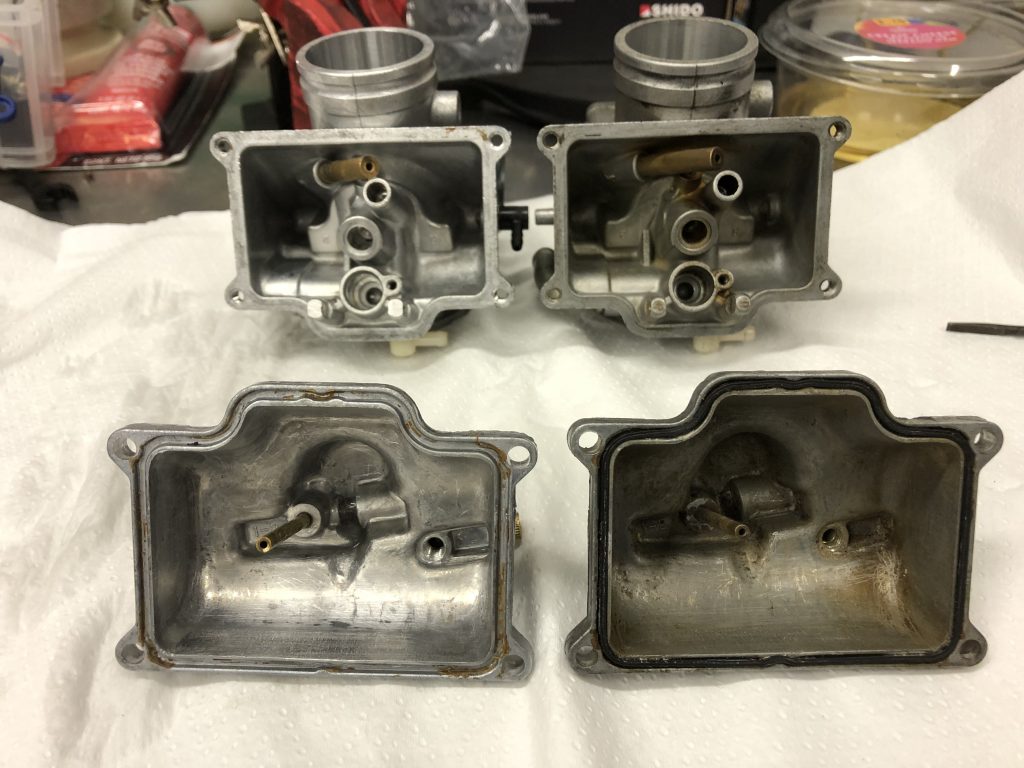
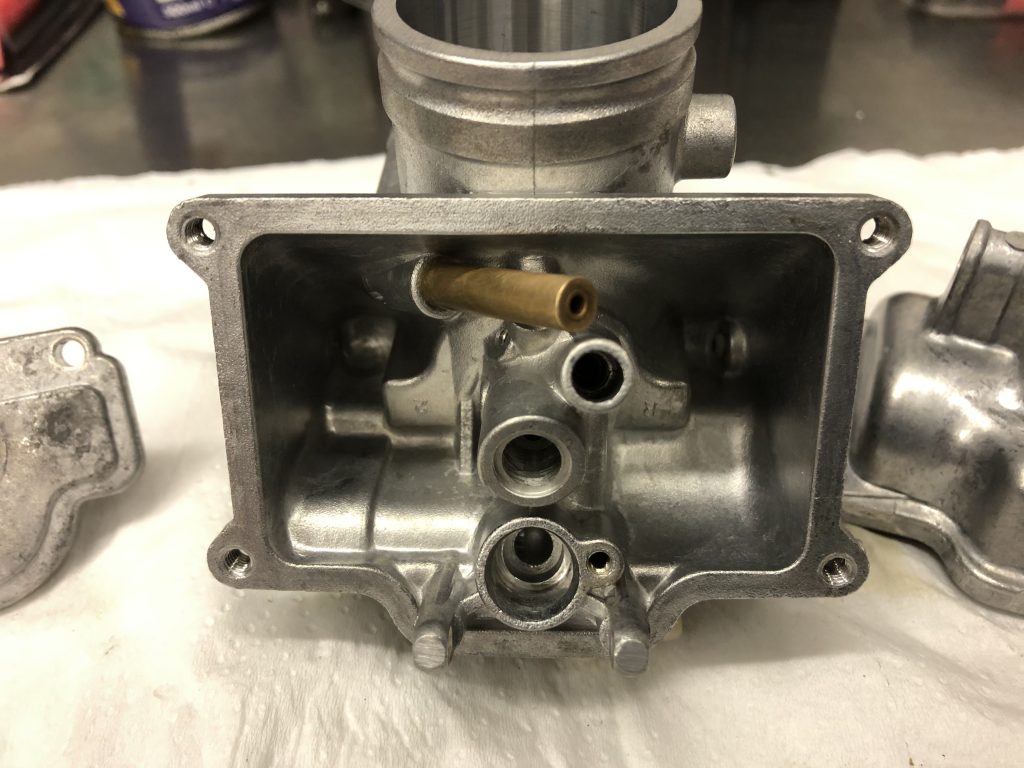
In the meantime, after stripping the carbs, they go in the ultrasound tank for cleaning.
Before and after…
They clean up as new/
I pack them up respectively while awaiting for new parts!
The new parts duly arrive. There is a marked difference between them and the non original items. Not least they all have the official Mikuni markings and sizings on them. The float valve and needle valve in particular are very much more robust and precise.
The carb rebuild process begins. New parts and cleaned up originals now installed.
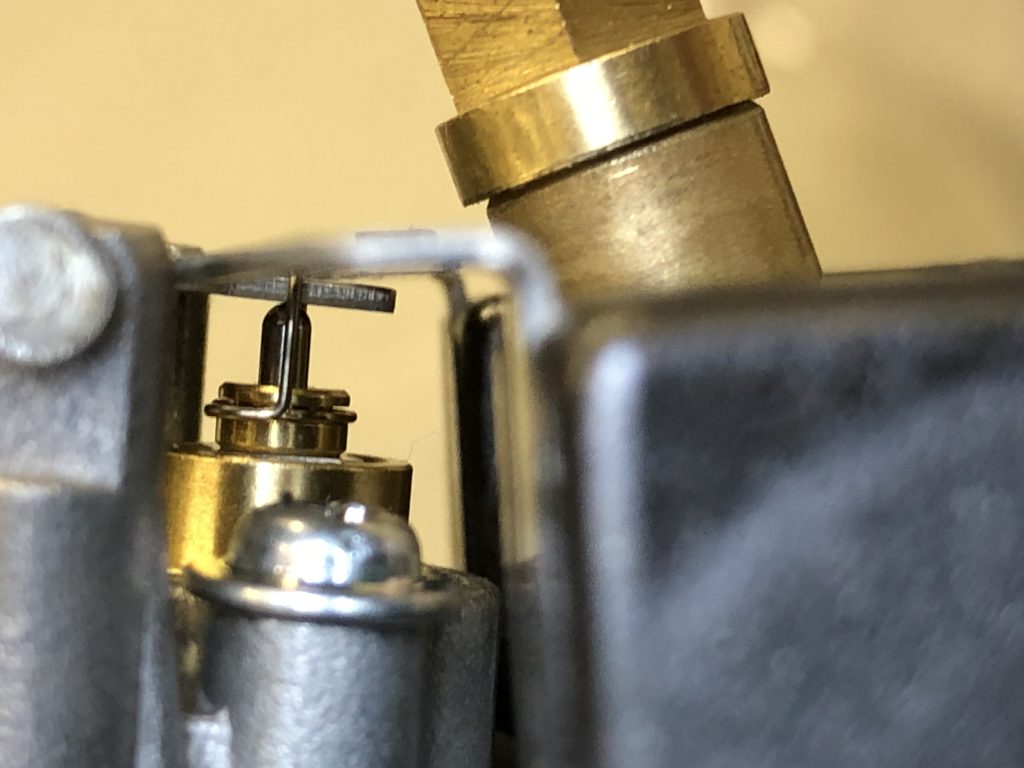
The Main jets, needles, power jets, spacers and float pin are the only originally retained parts, everything else is new. Pictured below is the new float valve and needle valve.
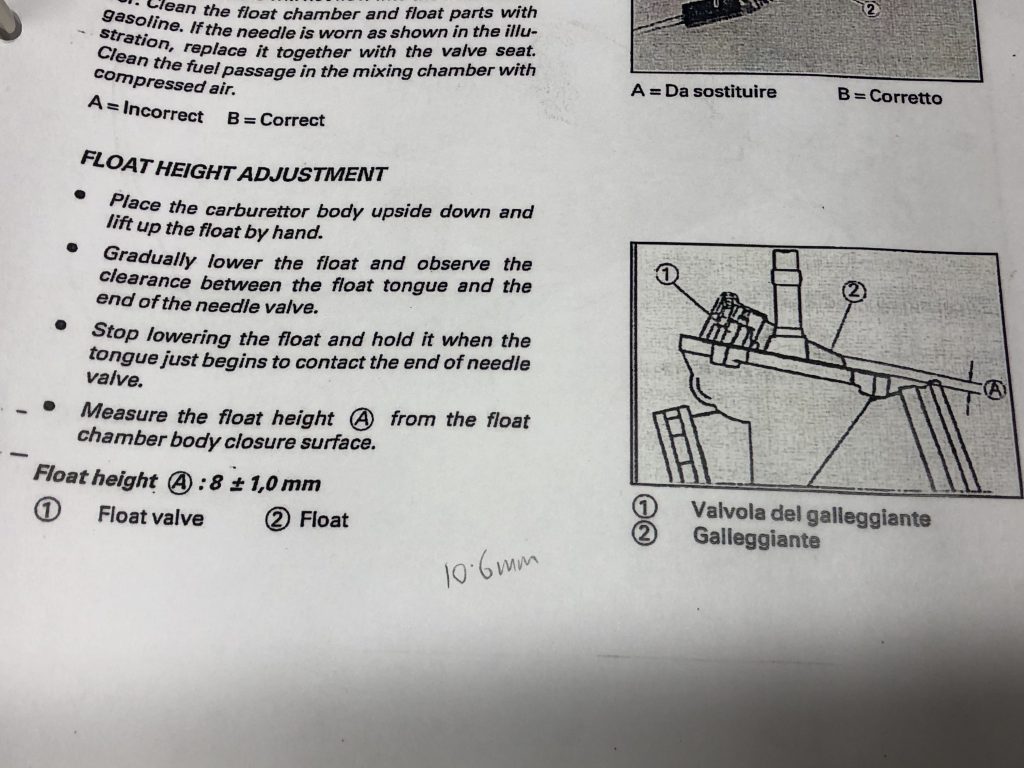
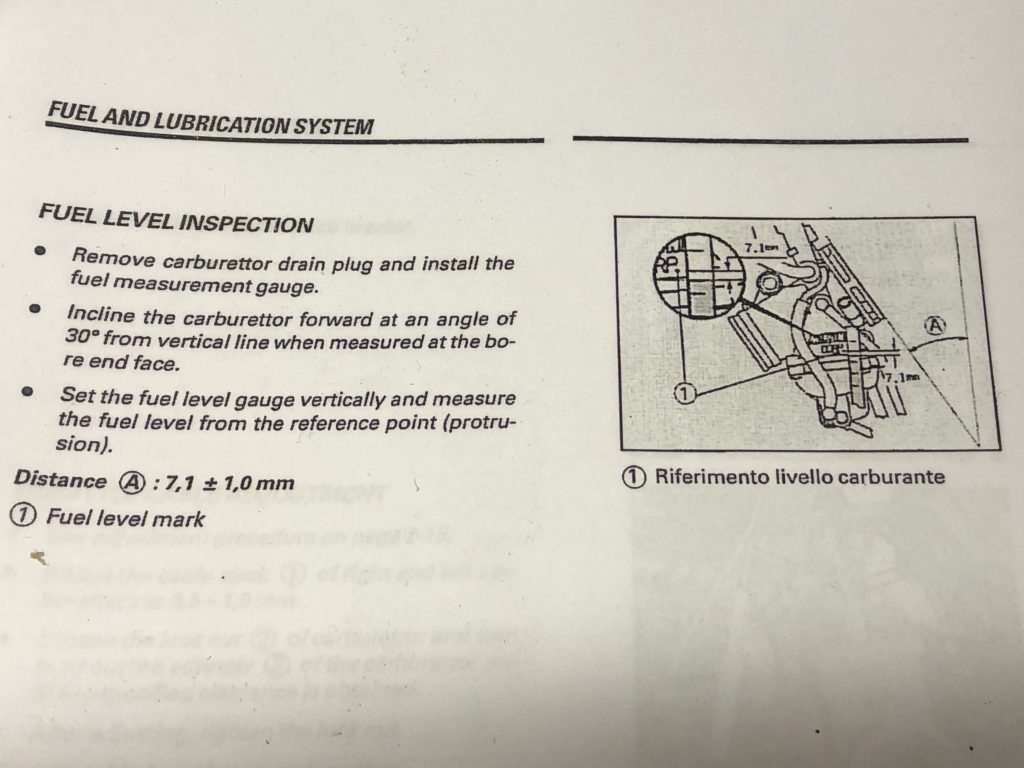
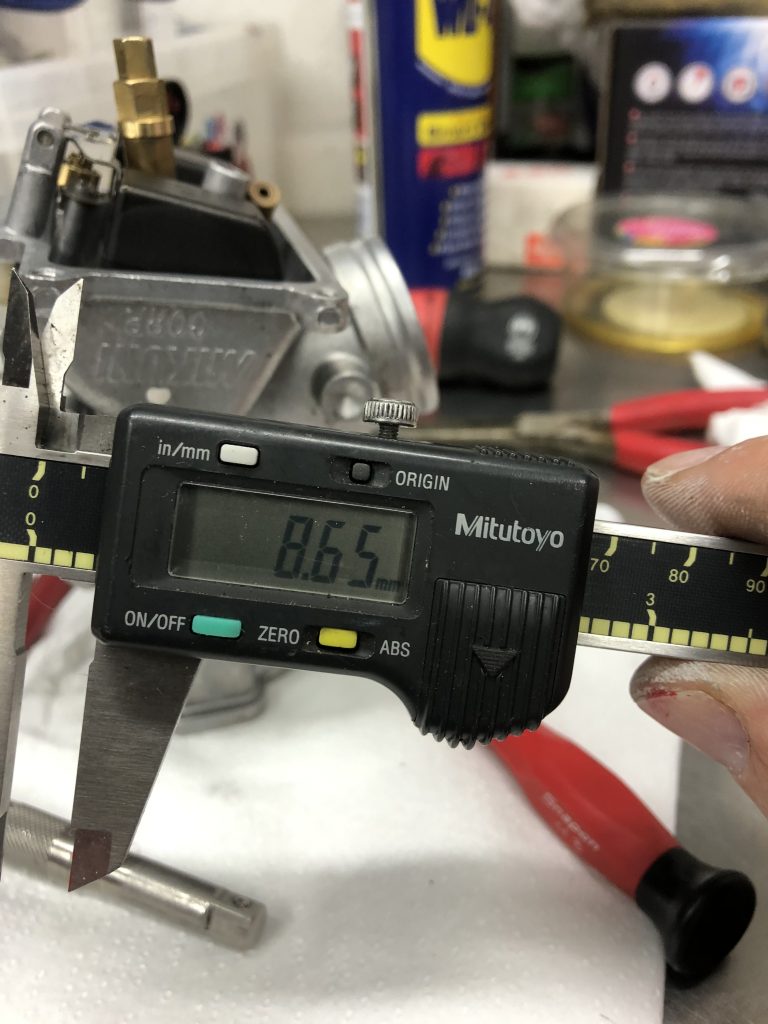
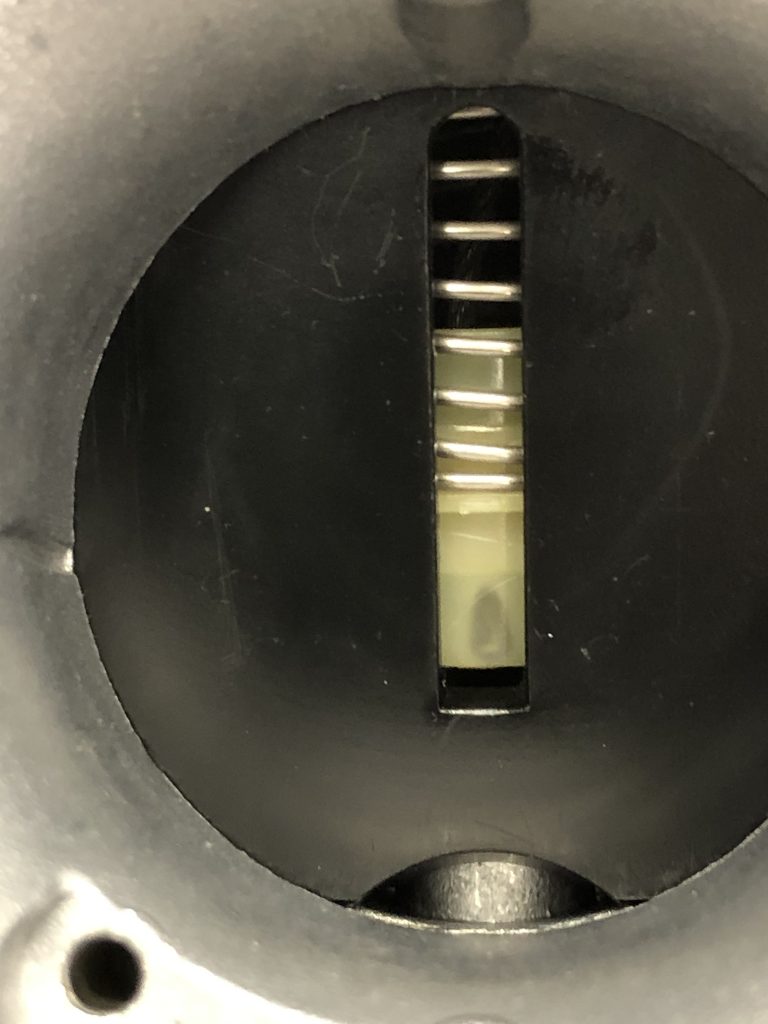
The float height needs to be set. As they are installed out of the box, the measurement is 10.6mm from the measuring point to the gasket surface. According to the manual this figure needs to be 8.1 +or- 1mm.
I adjust the float to the recommended height. There is a further test which is to measure the fuel level through a clear tube. The manual also provides this information, this is actually the more test and is the one I will be targeting for accuracy.
For this test, the tube should show a dimension of 7.1 + or – 1mm from the indicated points. To achieve this, I find the left carb requires a float setting of 8.65mm.
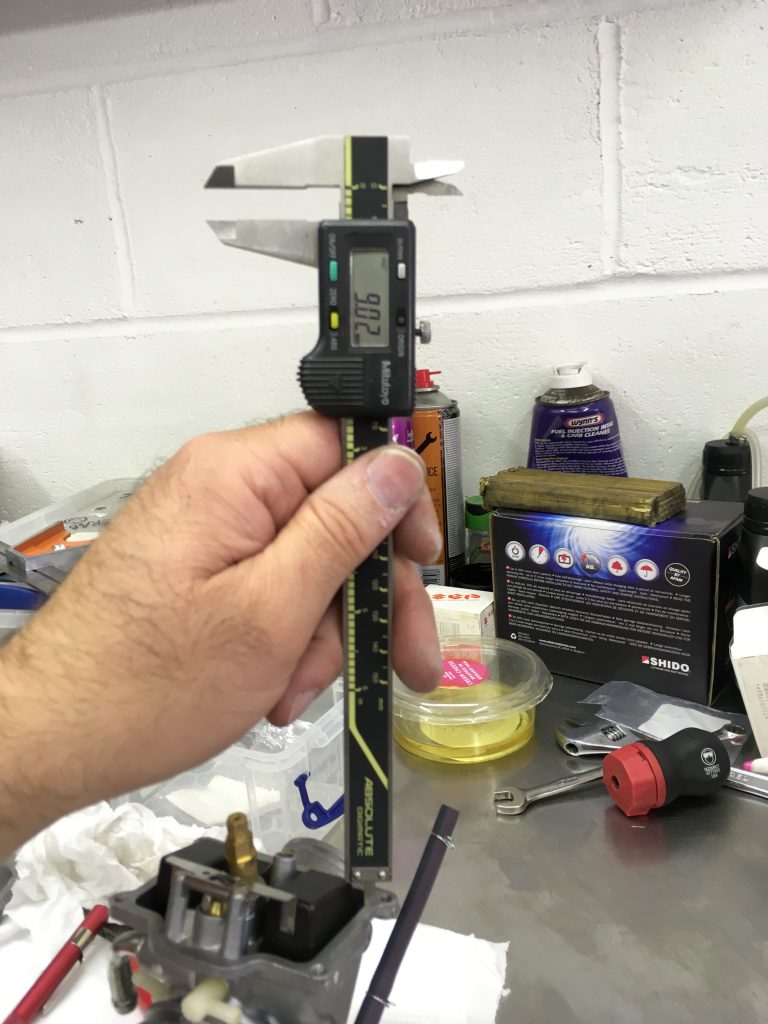
The right hand carb required a setting of 9.02mm.
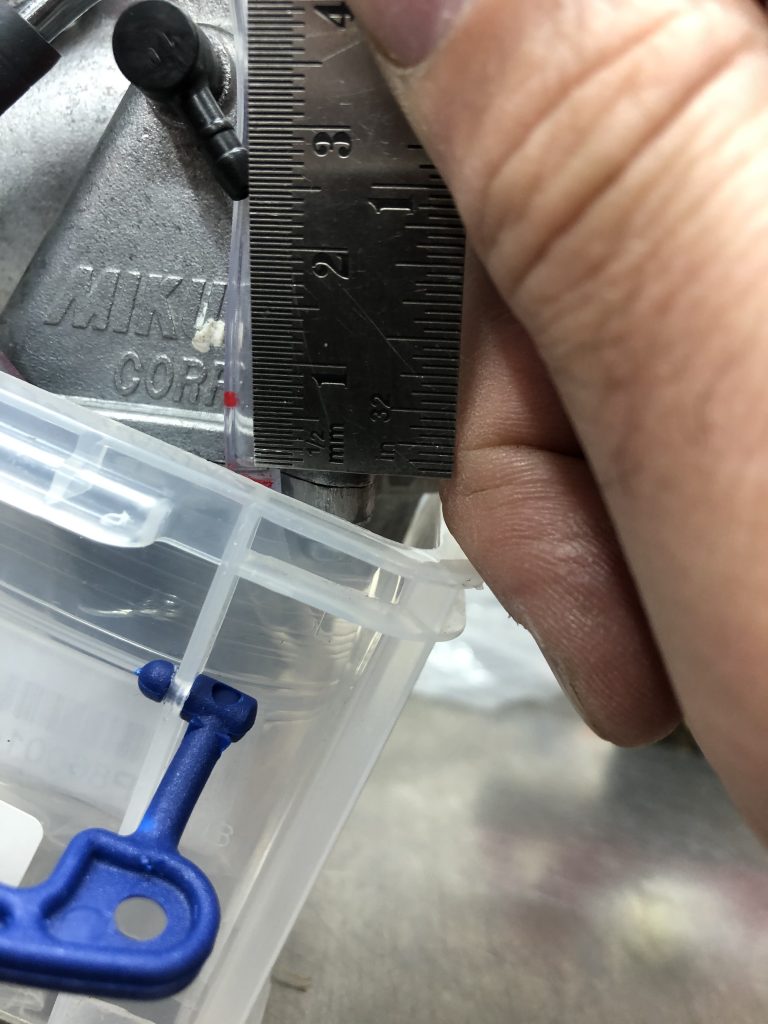
The carb needs to be carefully setup at the right angle and centricity for this test. My fuel level is within the tolerance of 7.1mm + or – 1mm.
With both carb float levels correctly setup and checked, it’s time to finally fit them and reconnect the chokes, fuel lines and throttle cables.
The throttle slides need setting up next to ensure that they are in sync with eachother. The throttle cable is adjusted so both are on the same mid marking together at half throttle.
The idle position is also adjusted to a 0.7mm gap, this was pre adjusted off the bike using a cable tie that was conveniently 0.7mm thick!! This must be done off the bike as the measuring cable tie meeds to be inserted in the back of the mouth of the carb (engine side).
The new air filter is inserted, air box cover back on and all ready to go!!!
Edited to add, I have since been back and renewed all the fuel lines with new as well as replaced the carb drain hoses.
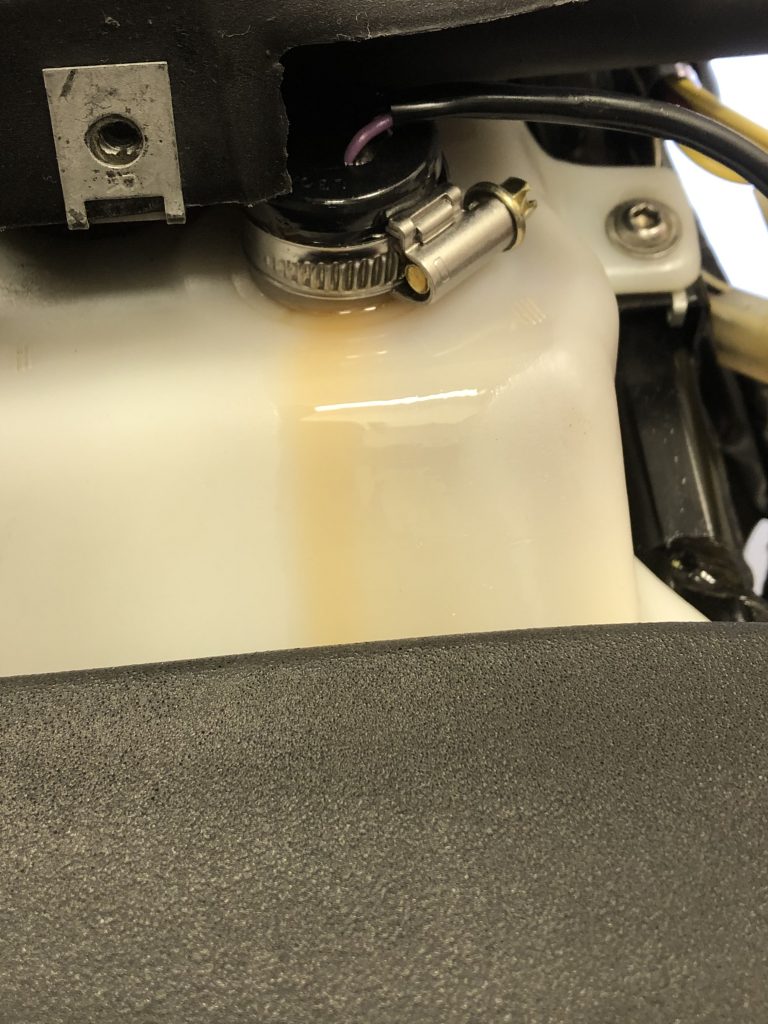
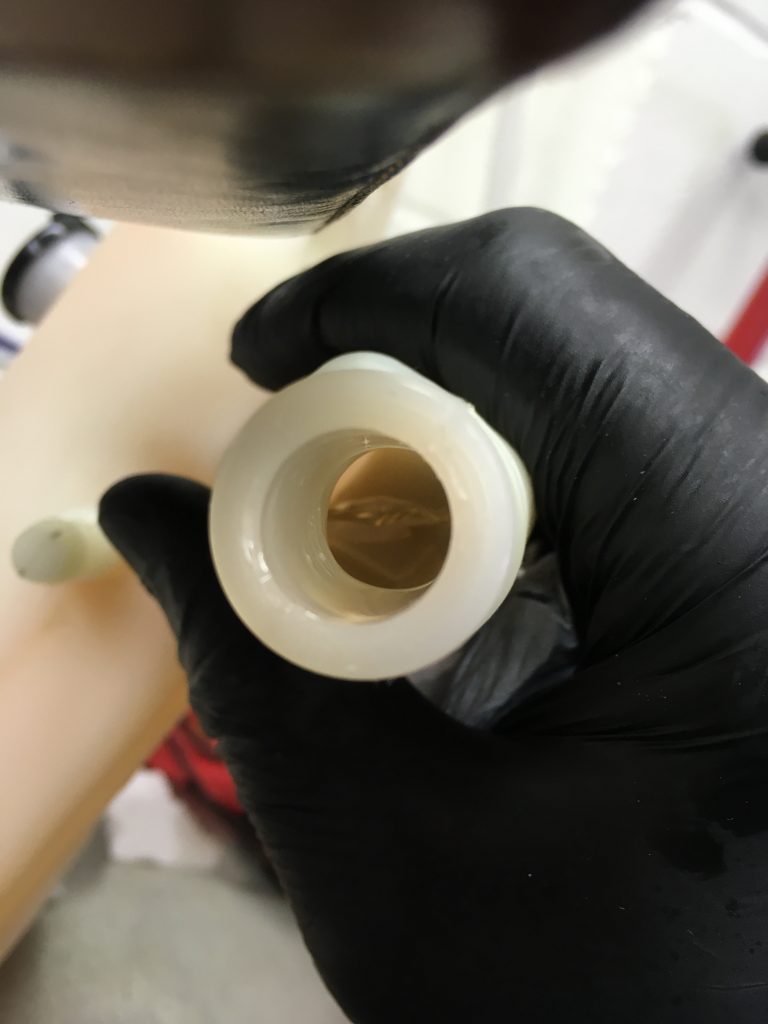
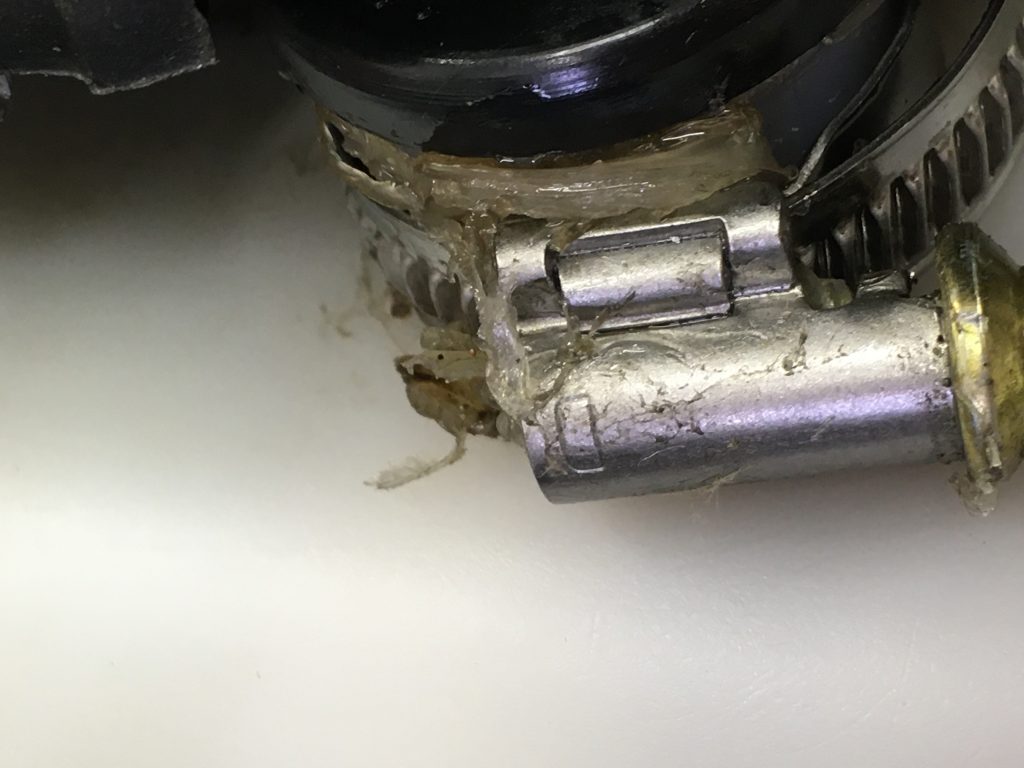
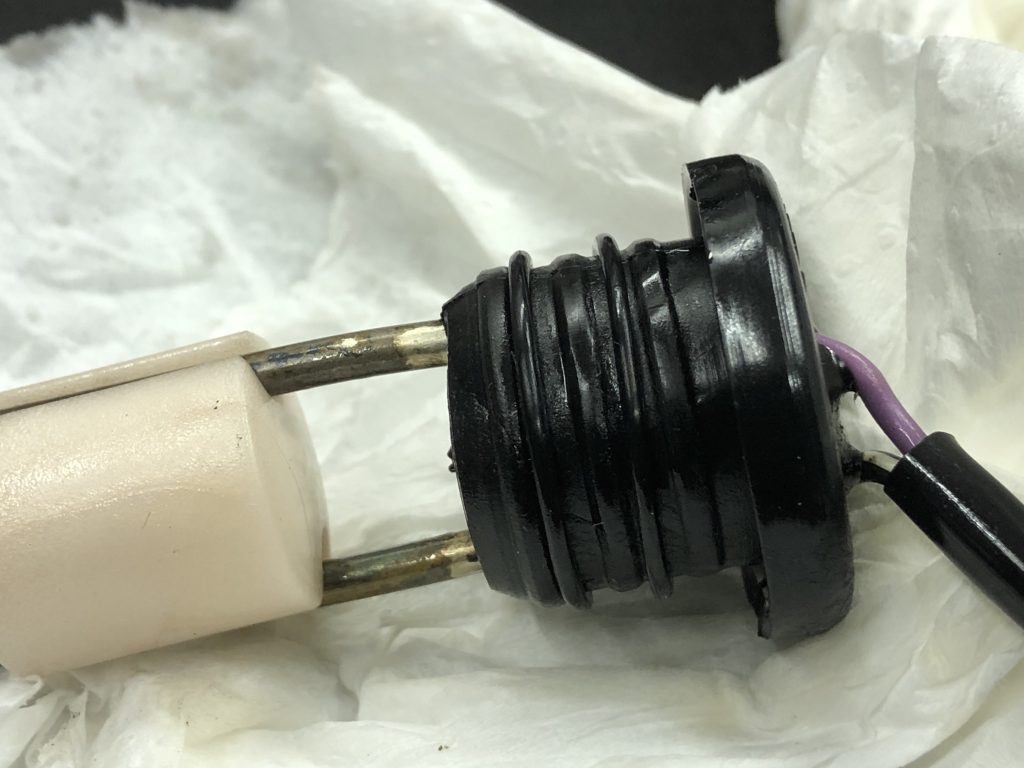
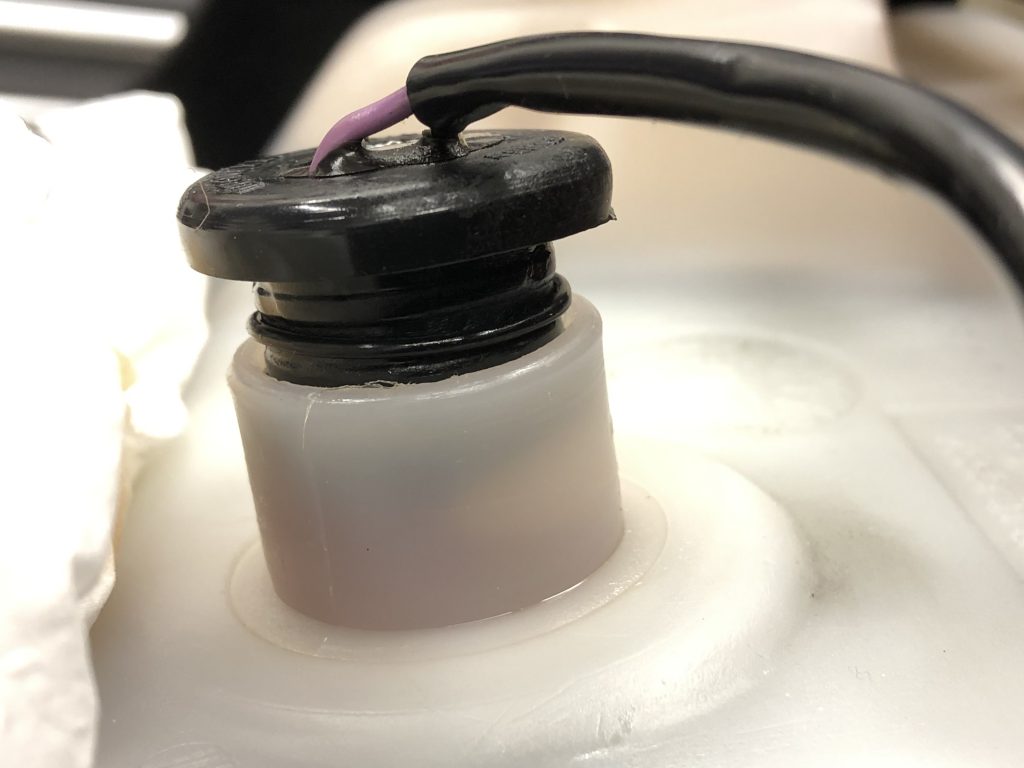
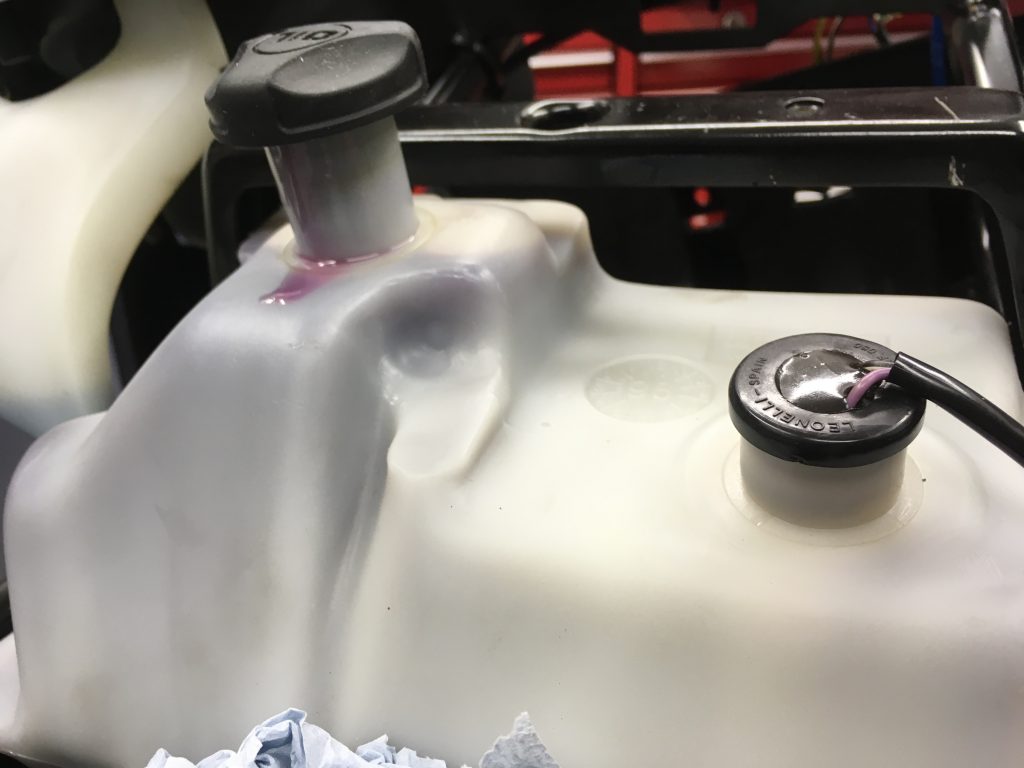
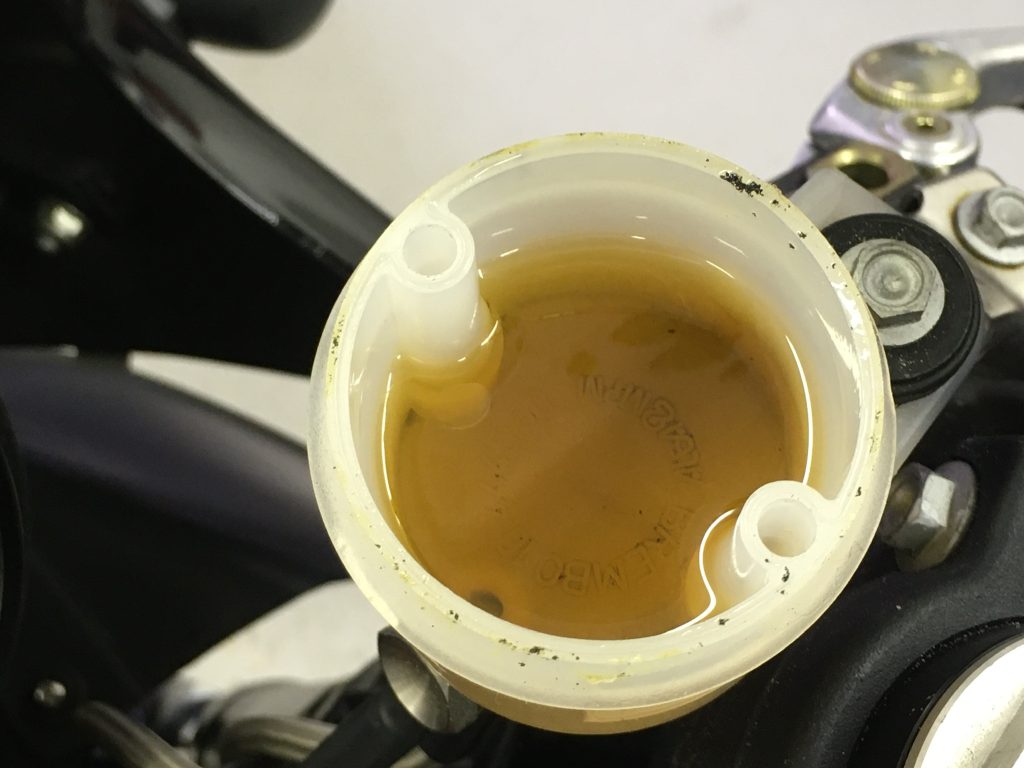
Yes, here we are again, this time, having topped off the 2T oil tank, I discover a leak from the level sensor. This will explain the out of place looking jubilee clip!
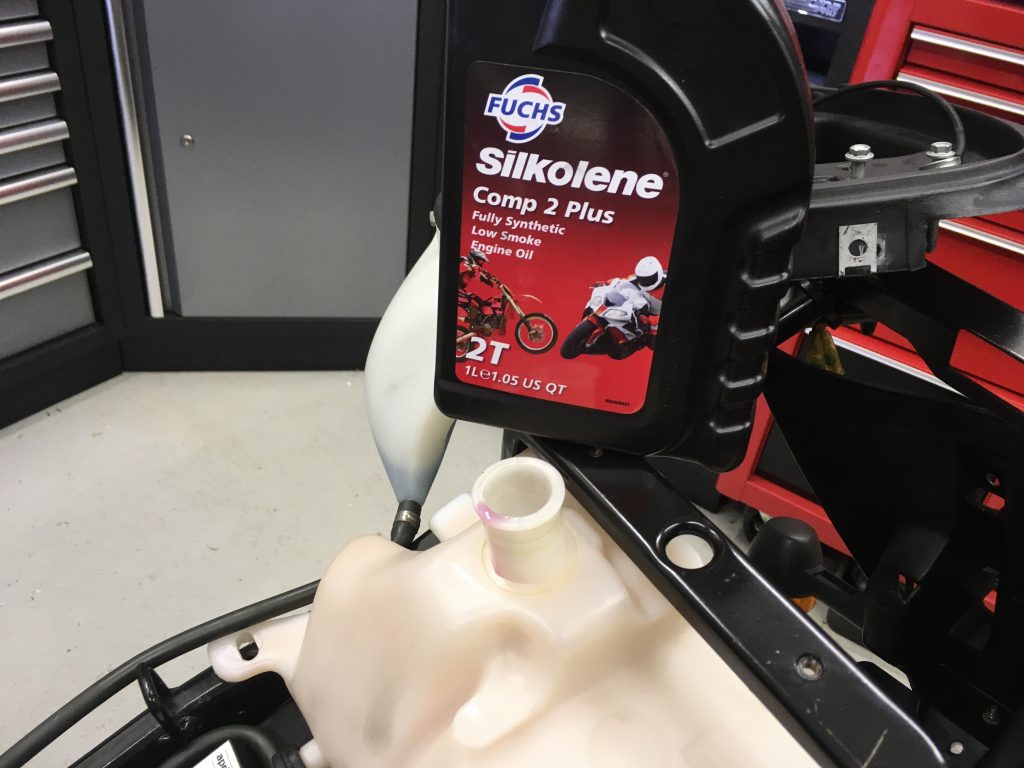
I take the opportunity to start fresh. Fully strip, remove, clean and refill with my chosen 2T oil, Silkolene Comp 2 Plus.
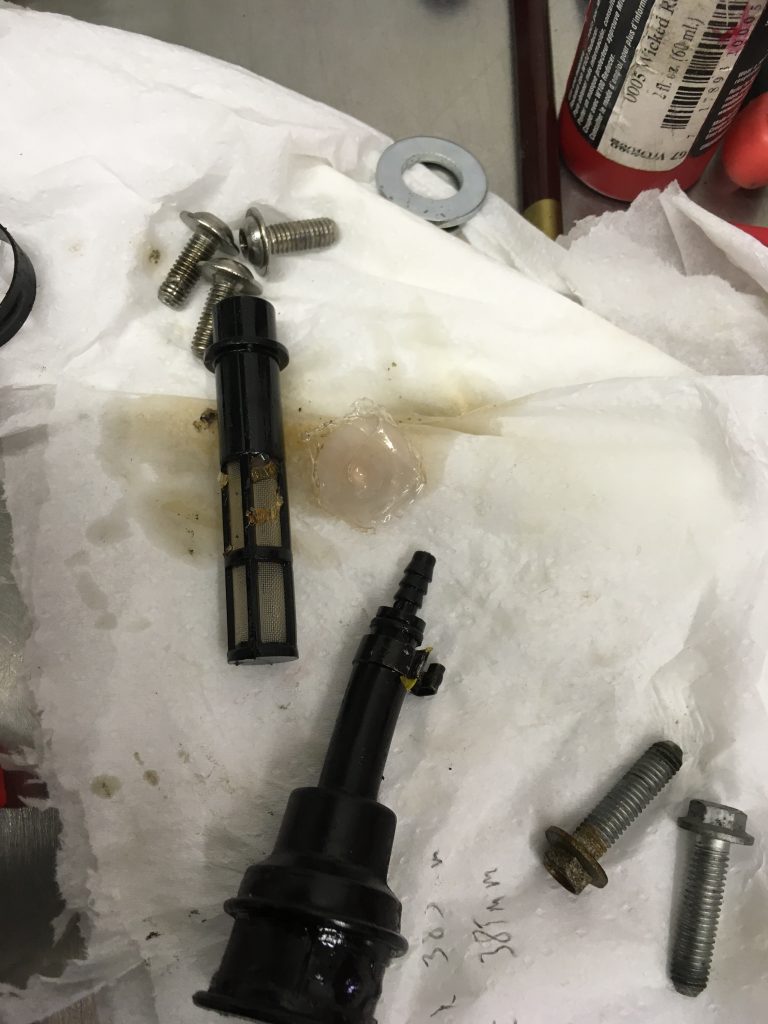
The oil filter is in a bit of a mess, and in cleaning the tank, I find the remnants of the seal tab of a previous 2T oil container.
This could have easily of blocked up the oil supply so once again, it has paid dividends to go the thorough approach and strip it all down. Also in evidence was silicone sealant that had been gummed around the level sensor, remnants of which had also made it into the tank…
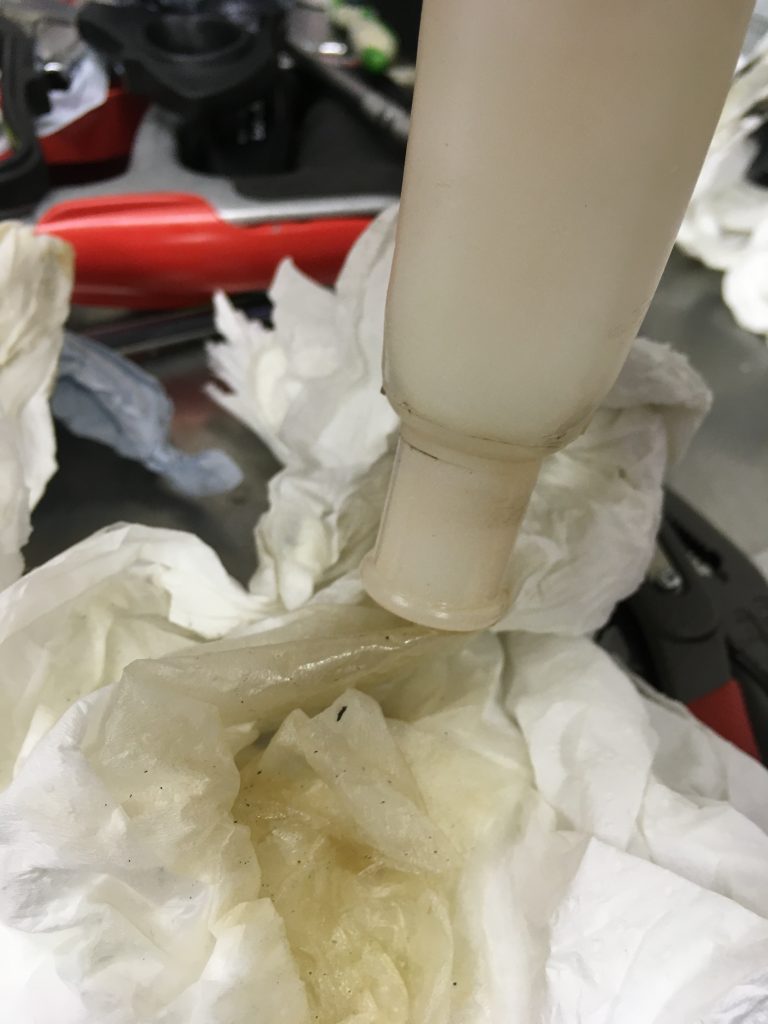
I put some diesel in the tank and slosh it around to capture the final bits of debris…
New filter fitted…the old one cleaned up ok so I’ve kept it as a spare.
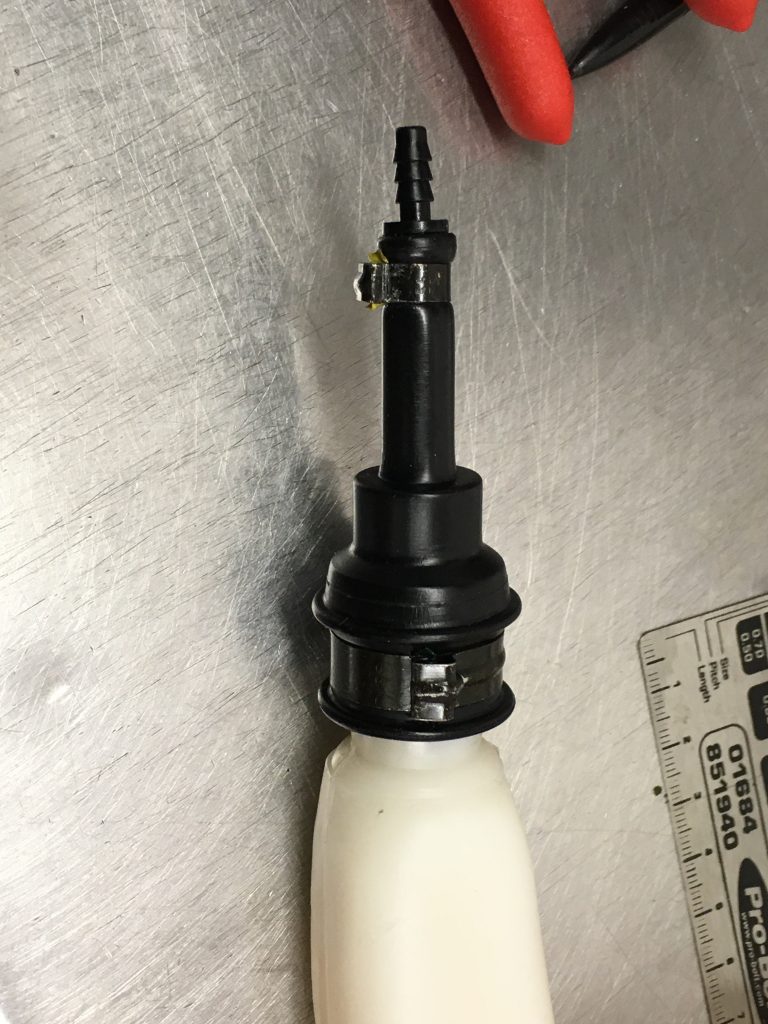
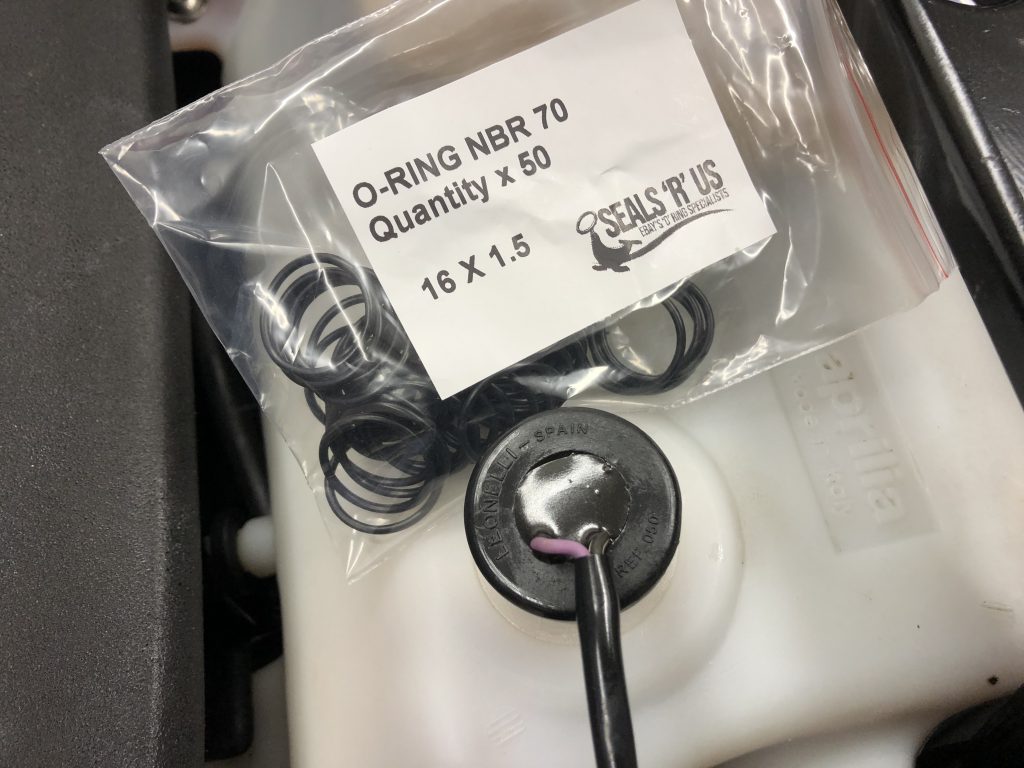
To cure the leaking oil level sensor, I place 2Nr 16mm x 1.5mm O ring seals on the level sensor to seal it correctly. This works perfectly.
I test this by topping the tank up to the brim and tilting the bike forward on the Abba stand into the stoppie position. Oil leaks out of the overflow/breather hole, but not the level sensor!
That’s one more thing ticked off the list. No more oil leaking down over the rear of the bike.
The final check, is to open up the purge screw to bleed the oil pump and ensure there is no air in the system…
I’m getting to the end of the preparation now and I’m itching to go out for a ride. All of the Blogs for this bike up until now have involved thoroughly checking the bike over to preempt as many problems as possible by ensuring that this is running as it should be following it’s lengthy lay up and it’s increasingly apparent sub standard recommissioning.
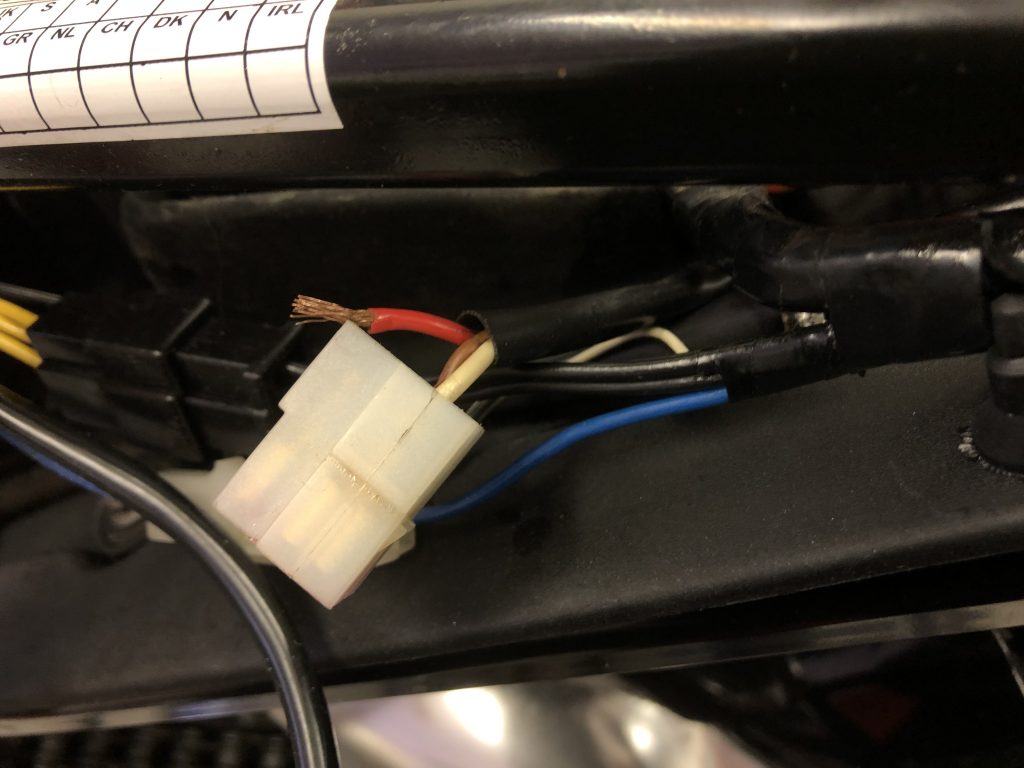
Back to the invoice of the last works that were carried out, when the carbs were done, there was mention of a new plug for the ignition. I looked around at the coils and plugs and could find no evidence of any plugs having been replaced. However while working on the oil reservoir, I came across the ‘Wurth 3 pin connector’ that was shown on the invoice. I noticed it purely because it looked out of place to all the other connectors and looked uncharacteristically large. On closer inspection, the bad workmanship that I’d come to expect from the dealer revealed a wire that was ready to fall out. With no effort it does.
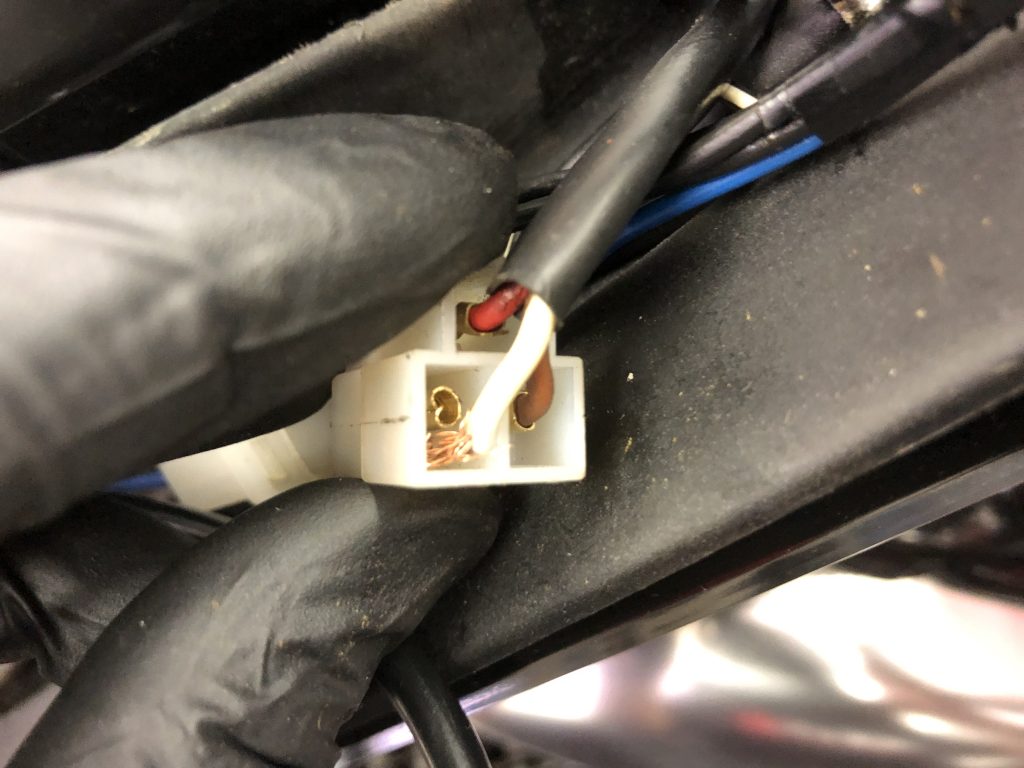
I re-crimp this wire with a new terminal (fortunately I find one of the same size that fits) but then notice the white wire is also similarly badly crimped.
So with this re-crimped and the brown wire checked, this block connector is good to go…or is it?
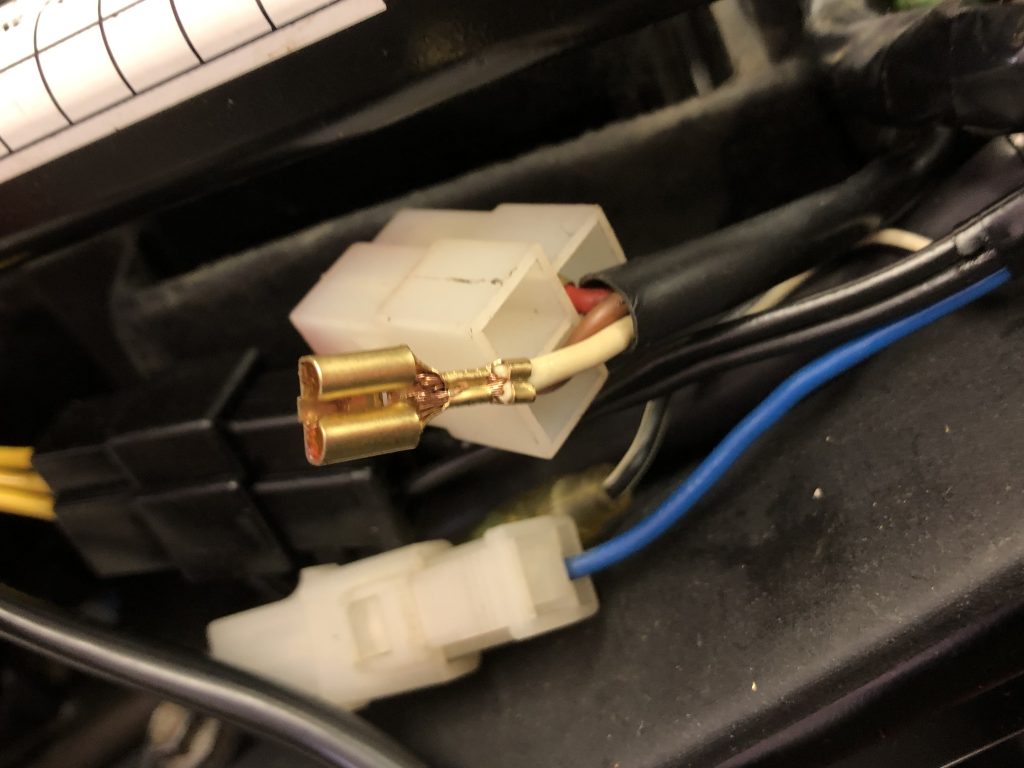
It turns out that this plug is the ignition signal feedback circuit. One of the checks I was going to do is plug in a Zeeltronic ignition controller (bought specifically for this job) to set up the power valves. Ideally the exhausts need to come off for this check so the valves can be seen in their respective positions. I have bought all the exhaust gaskets to do this work however for now I’m going to get a couple of runs in first! The power valves appear to be operating fine and even the markings line up where they should. However a quick test run with the zeeltronic unit is thwarted because this Wurth connector, happens to be the same plug that the zeeltronic connects to…
This means that the Wurth connector will need to be replaced for an OE block connector which I have now bought.
Happily, this will put the bike completely back to stock and is the last of the hashed items for me to remedy!!
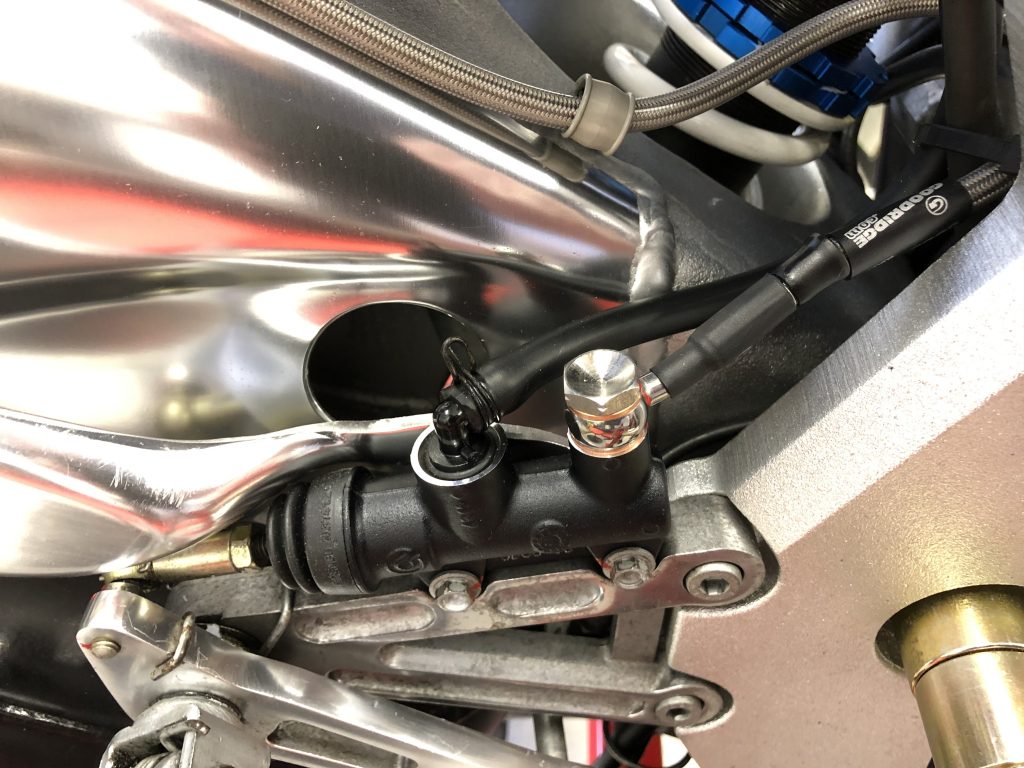
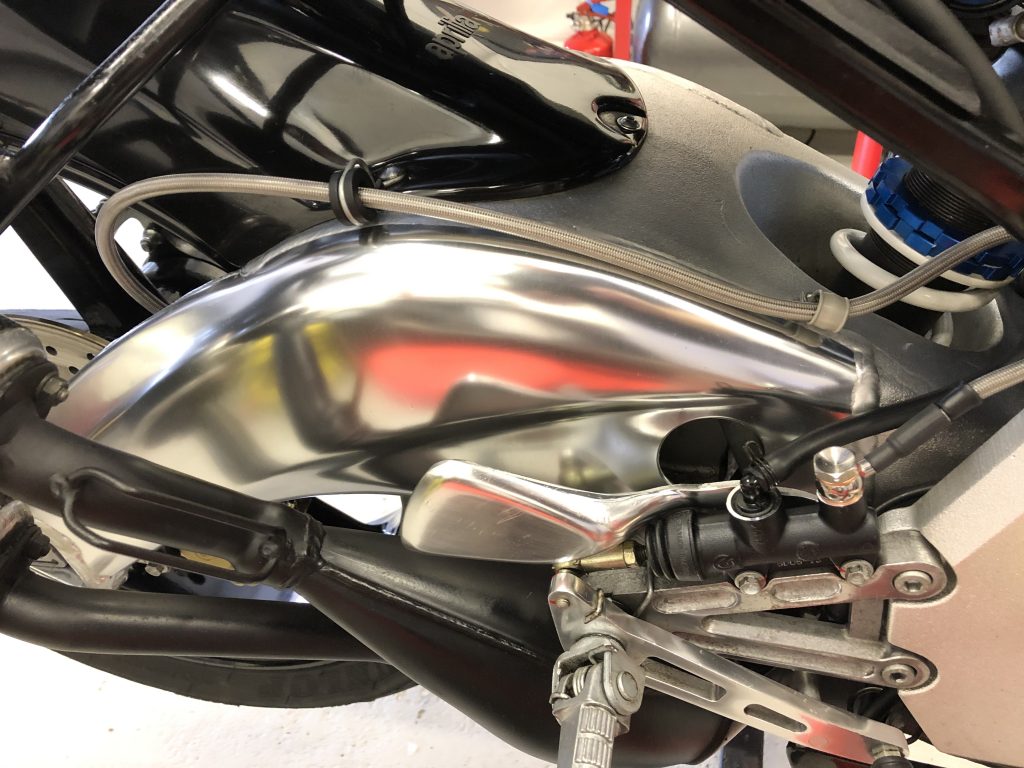
It’s time to bleed the front brakes, the fluid smells vinegary and there is some dirt around the cap to clean up. I flush the system through and put fresh fluid in.
While bleeding the front brakes I have another WTF moment, as I spot another problem!
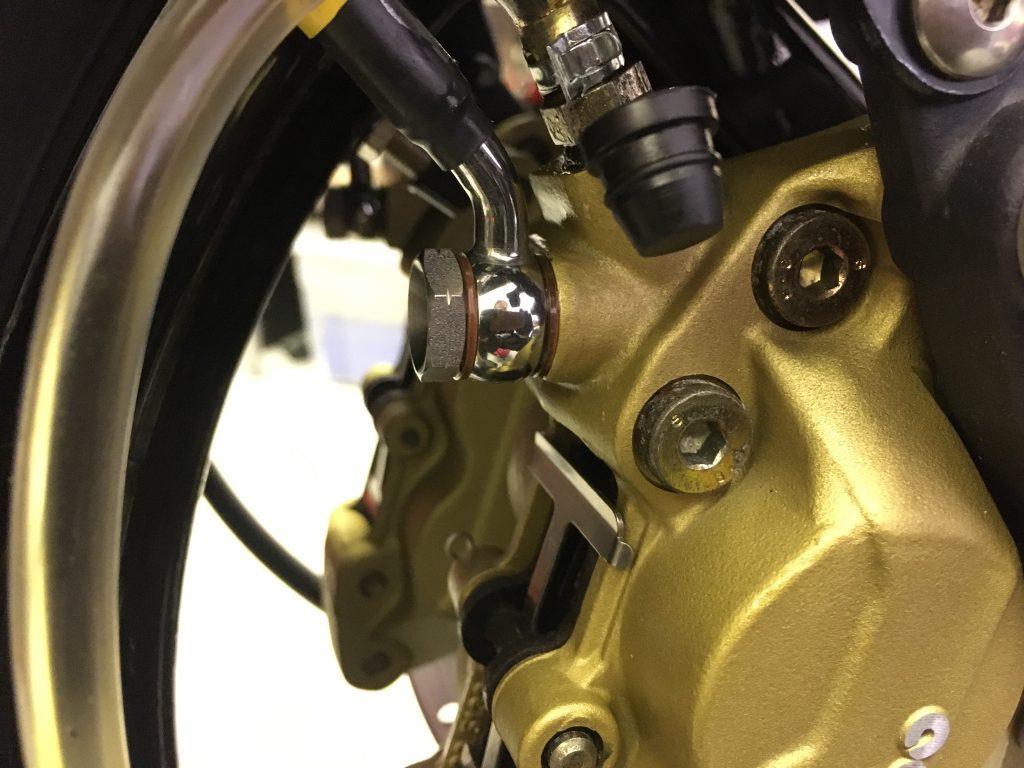
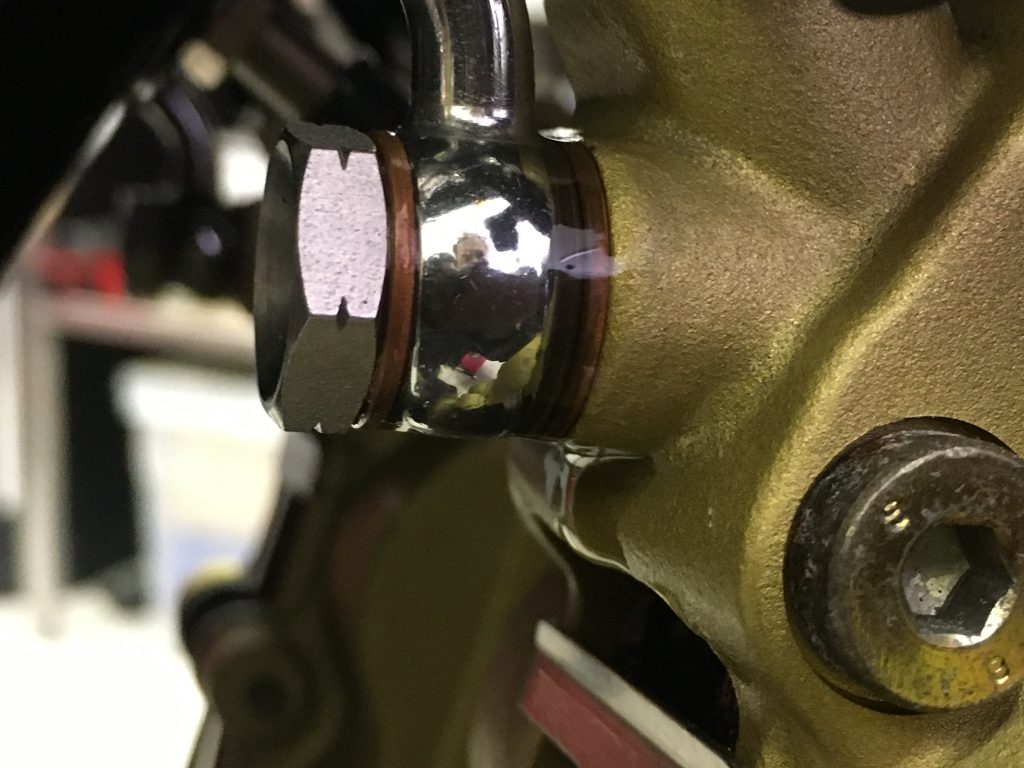
This time, it isn’t something menial that has the potential to ruin the engine like the previous carb issues or potential oil feed blockage, no, this time, it’s the brake hose banjo bolts! I’m bleeding the brakes and I see leakage from the banjo.
I barely touch the hose end and the fitting spins. The same on the other side. Both hoses are barely finger tight!!!
Once again a reminder of why I do my own maintenance, it’s frightening to think in the last 200 miles this bike has had a service, a sales preparation and an MOT by a reputable bike specialist that even sponsors a race series! Between the nick in the rear brake hose covered by tape and the loose front hoses, coupled with the failed rear master cylinder, any one of these could have been very dangerous but all at the same time wouldn’t bear thinking about! I ordered some new copper washers for the banjo’s and fitted them.
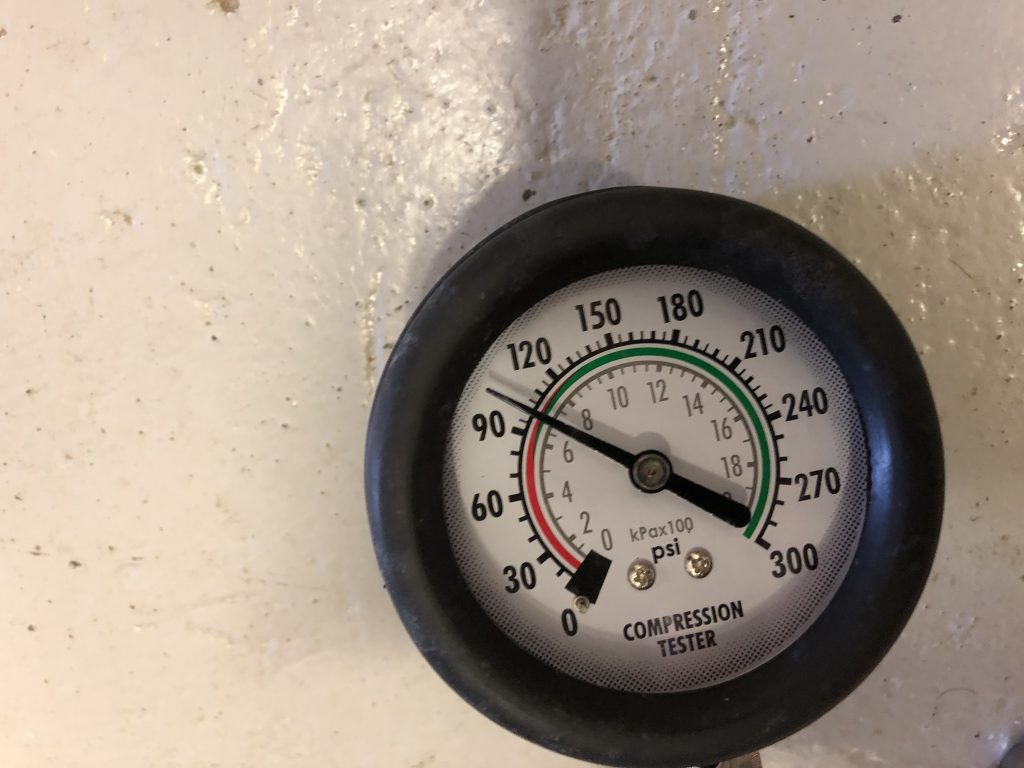
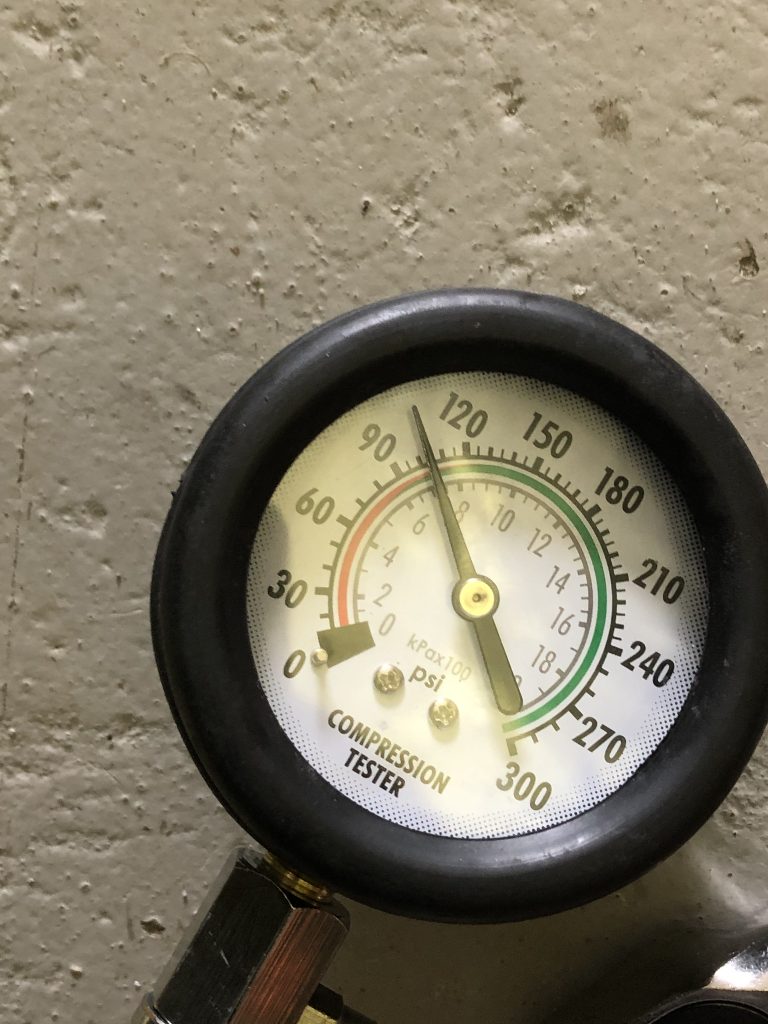
While everything is apart I decide to do a compression test. These can vary widely depending on gauge used etc. My gauge set is designed for car engines and therefore the hose itself is about 10mm diameter. This means that a motorcycle specific meter (Kawasaki gauges have a 3mm diameter hose) would likely yield a higher figure. The more important metric is to check that both cylinders are reading a similar amount rather than the outright figure. With this in mind, the reading looks a little on the low side for the lower cylinder.
However on checking the upper cylinder, the result is much the same, in fact, it’s identical 🙂
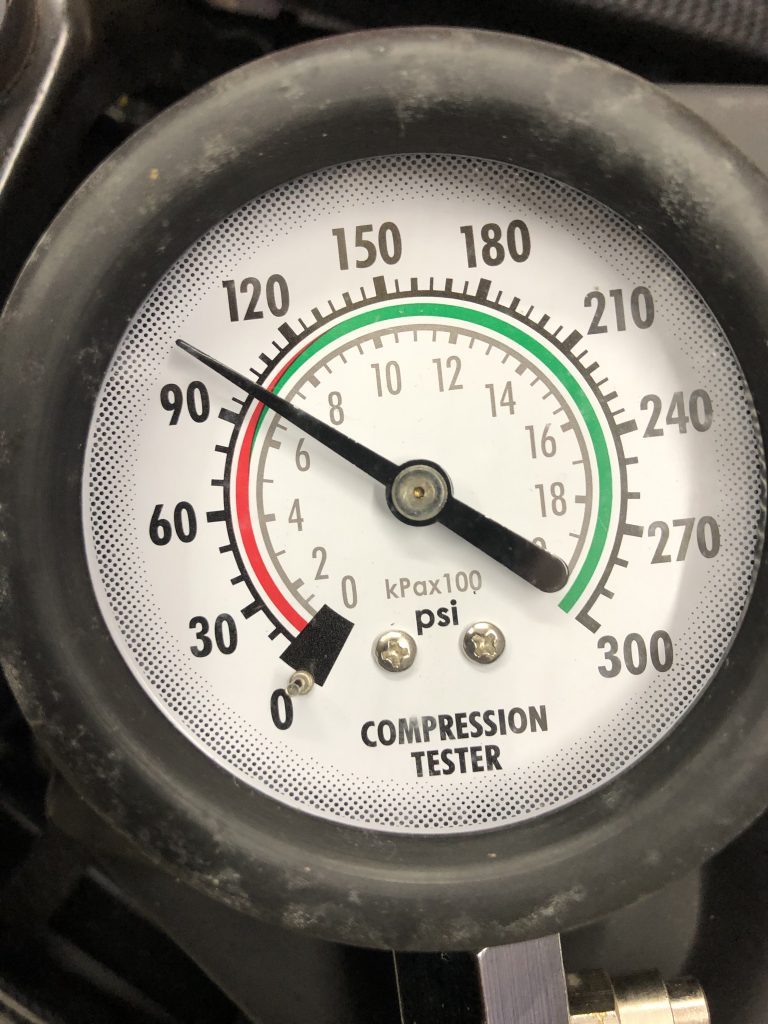
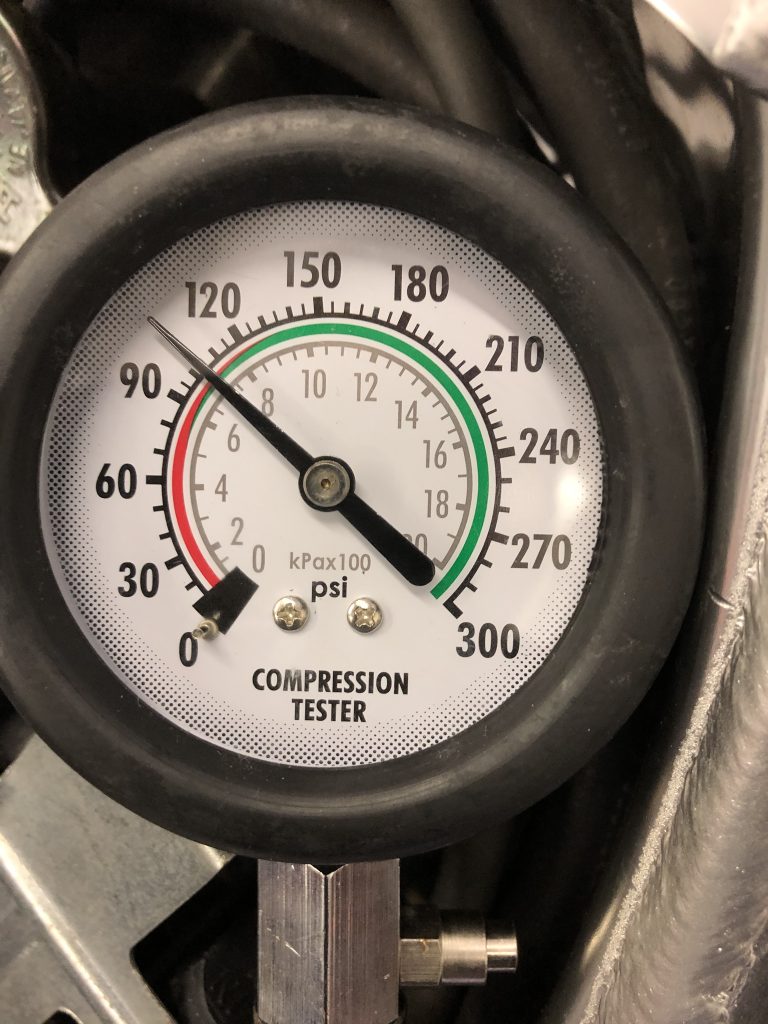
The above test was taking with a cold engine. On a hot engine and some more vivid application of the kick starter, both yield 105psi.
The spark plugs are also looking a nice healthy shade after a run.
Although I’ve purchased some Iridium plugs, I haven’t fitted them yet, preferring to make sure it is all running perfectly first as is, then hopefully I can measure (albeit subjectively) any perceived improvements when I swap to iridium.