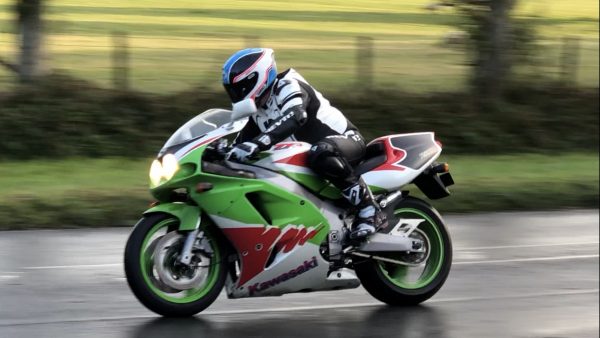
Kawasaki ZXR 750R M1 Homologation

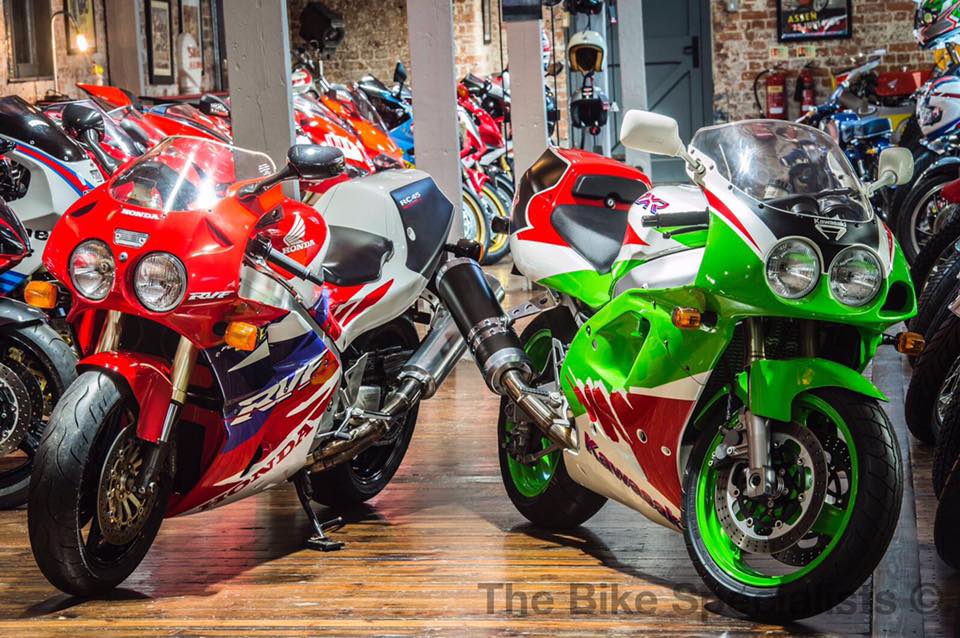
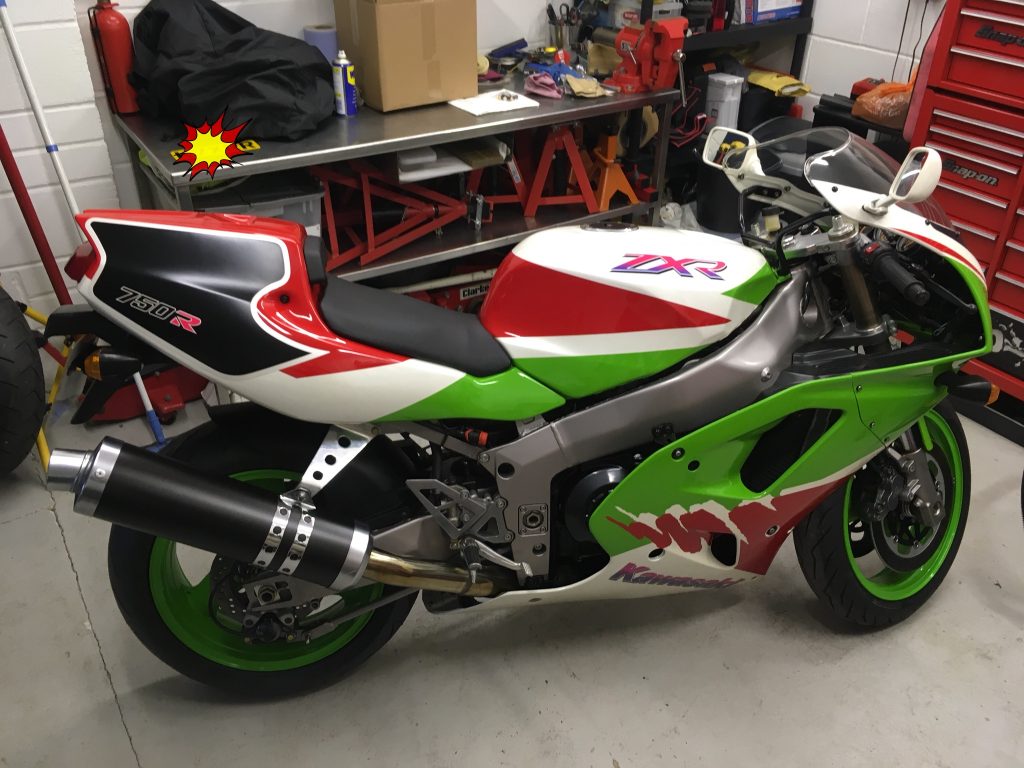
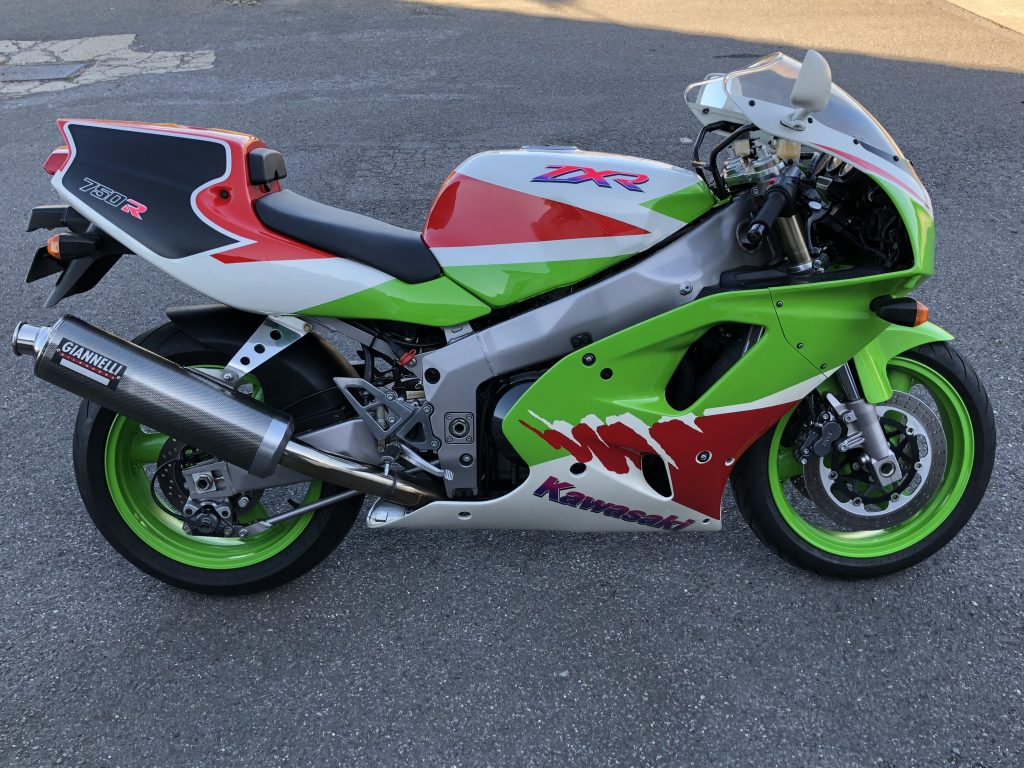
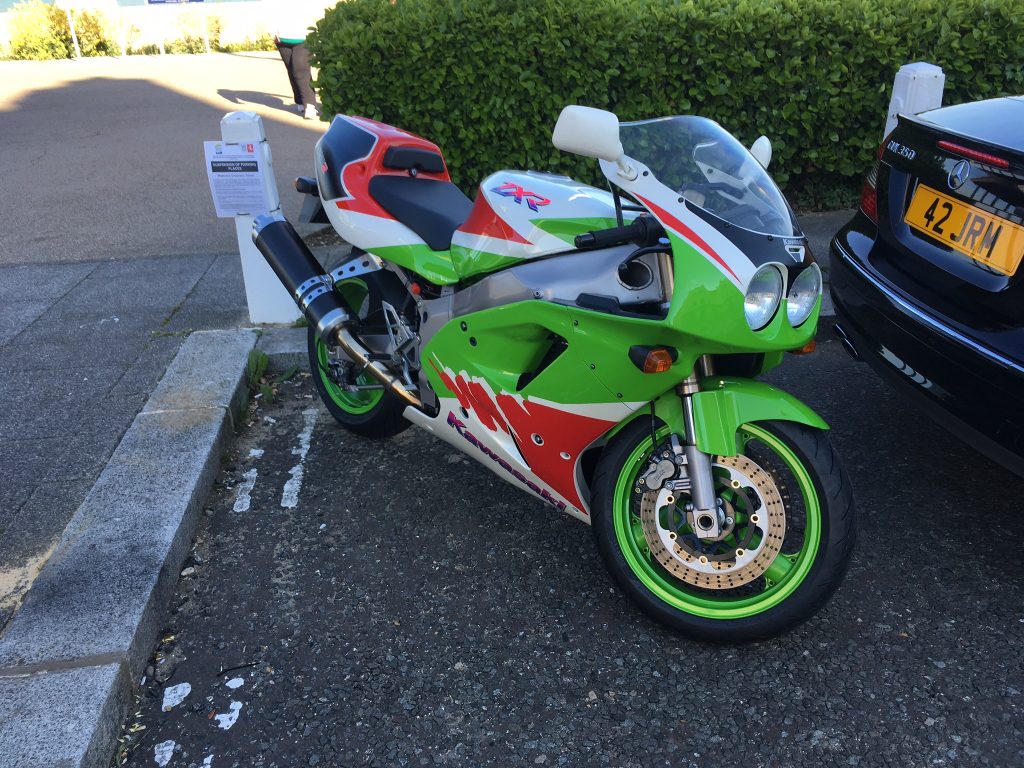
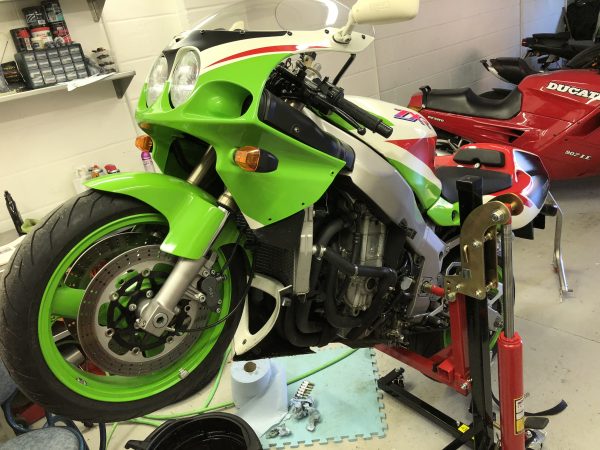
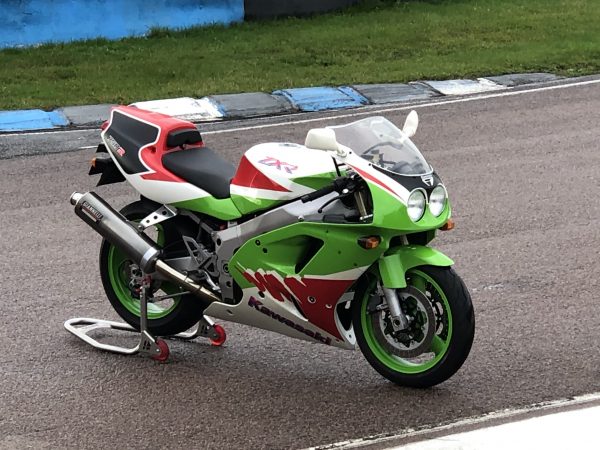
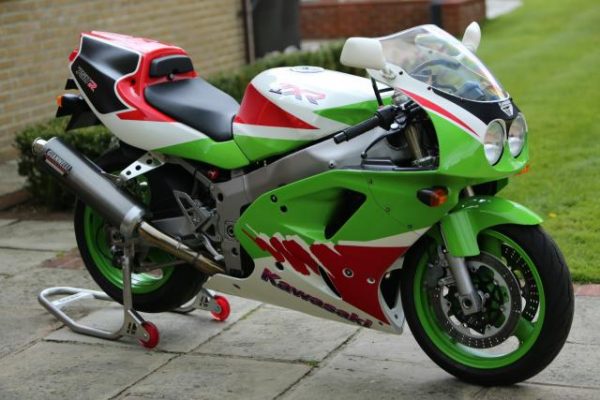
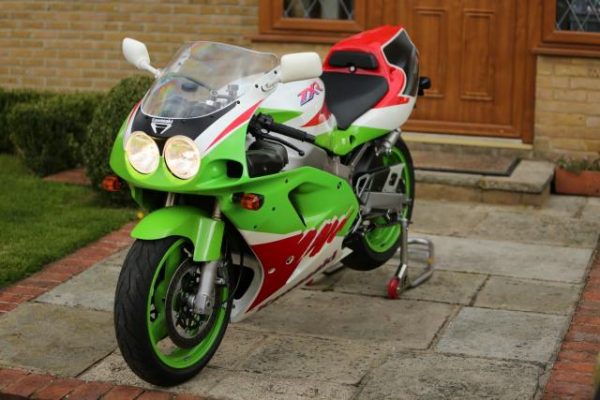
My 90’s dream bike. A ZXR750R M1 which was effectively the homologation special of the bike that took Scott Russell to Kawasaki’s first and only superbike championship world title (last century). Scott Russell and his ZXR were the underdog that triumphed over Carl Fogarty beating him to the riders championship and seeing off the other homologation specials such as the more expensive Honda RC45’s and Ducati’s in the process.

It has spent it’s life in a collection in Italy and never been registered. 39km only. It’s waiting to be registered and then fully recomissioned. I’ll have new tyres fitted to it (Pirelli Diablo Rosso III) and Goodrich braided brake and clutch hoses (probably with black teflon coat so they look stock). I’ll keep all the original parts safe. The rear shock was always criticised for being too hard, I’ll try it as is, if it is back breaking then Nitron do a 3 way shock and that would likely be it. Then I’ll just enjoy it for 200-300 miles a year on sunny Sundays.

I’ve always hankered after one since seeing my first ZXR in 1992, the first time I nearly bought one was in 2002. Since then I’ve come close a few times with an R but always talked myself out of them because of condition and what have you, every year they are getting scarcer and the condition is generally getting worse. With this, it’s a case of now or never because the way modern classics are going it won’t be long before it becomes totally out of reach. I figured I’ll be very unlikely to ever see an example like this again so time to bite the bullet. It’s not cheap but it looks like perfection to me, in my favourite colour too and it was one of the last of the ZXR750R’s!

Maiden voyage…first dead fly!


Mid life purchase, first ride and initial thoughts

It is 2017, my 40th year and the midlife crisis is well and truly upon me. A great excuse then to fulfil some of those life wishes.

Since I first started riding on the road at 16, I have lusted after a ZXR750. It was one of those ‘one day’ bikes. I came close many times, but something always brought me back from the edge. Not this time though, because I finally found my dream bike, in my dream colours and it’s new.

Yes, never even been previously registered. I am the first owner, of what is effectively a brand new bike.

Kawasaki ZXR750R

I haven’t just bought a bike, but the ownership experience from day one. Supplied by the Bike Specialists who sourced this from Italy.

With 24 miles on the clock, I have to run in this time warp 1993 twenty four year old homologation beast from scratch. The only modifications are fitment of sticky new Pirelli Diablo Rosso III tyres and subtle black Goodrich braided brake and clutch hoses to retain the stock look.

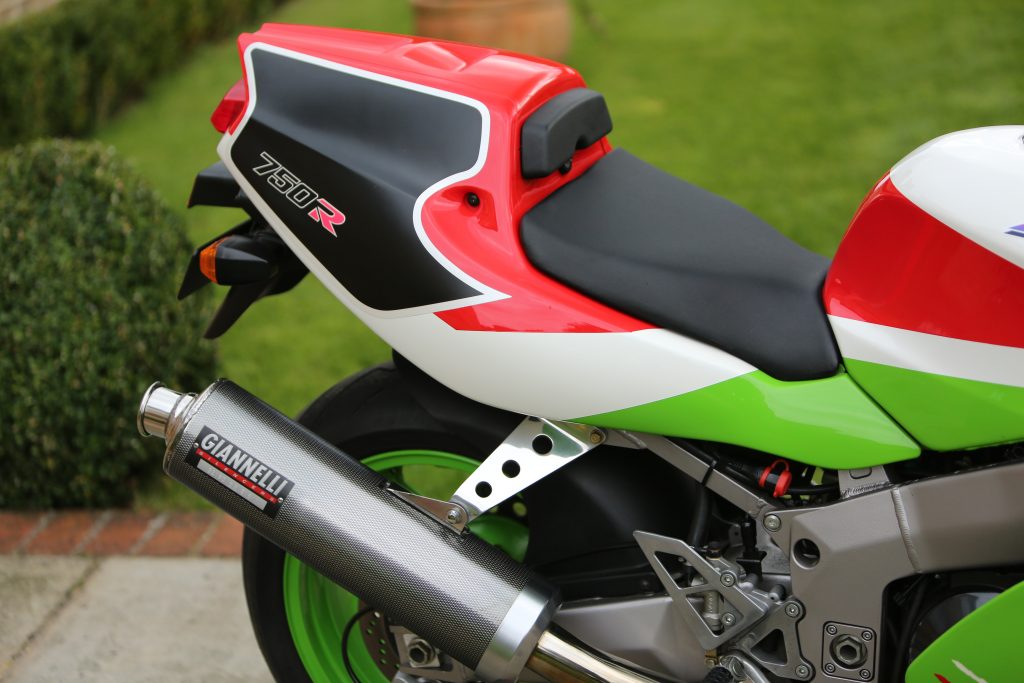
So after having it in the garage for a week admiring it and half debating the wisdom of actually using such a rare beast and the impact it may have on its value, I resort to plan A, which was always to enjoy it, and that means putting miles under those tyres. The insurance policy is deliberately limited to 2,000 miles a year to keep it as a special occasion bike! The stock silencer makes way for a period correct new old stock silencer, so the original unobtanium one can be retained and preserved in it’s unused state.

First though, there’s a 1000 mile break in procedure. No more than 4k rpm for 500 miles then 6k for the next 500 miles. With its notorious flat slide carbs and close ratio gearbox, and remembering the magazine reviews in the ’90’s complaining of the R’s tractability at low revs, I’m frankly too excited to care. I’ve been looking forward to this my whole life. They say never meet your heroes because you’ll be disappointed…time to find out then…

With 42kms on the odo (by the time she has been mot’d and delivered to me), she bursts into life after having required minimal recommissioning in the form of fuel and a battery plus an oil change with suitable Millers competition running in oil to replace the 24 year old mineral oil. We’re back to the days of chokes and carbs, memories come flooding back. The last carbed bike I had was 20+ years ago, the last bike I ran in was also my first bike ever, a similarly styled twin headlight Aprilia AF1 50 race rep which too read in Kph. I’m 16 again as I regulate the choke and wait for a stable idle.

Off we go, not over 4k…I’m down low, the riding position is very different from my middle age friendly Tuono, I replay the critics moaning of pressure on the wrists and rock hard suspension as I zip through the box. Wow, how close are these gears?? Seems to be dropping 250rpm between changes! Some change ups drop the revs more than this but boy are the gears close. Curiously the R’s also have a long first gear. With my 4k limit I max out at just under 60mph however first gear at 4k rpm incredibly takes me to half of my top speed! This means 30mph out of first then an average of 7mph per gear thereafter!!

It sounds intoxicating even at these rpm’s, and so smooth. You realise what the magazines meant about pulling away in a hurry being tricky, you need to be very delicate with the throttle to avoid dumping too much fuel too soon into those carbs and bogging down. Realistically once over 2.5k rpm this quirk is a non issue so plenty easy to ride around. However I’m in no hurry as I drink in the experience. So this is what it’s like to ride a homologation special, the base bike built to enable Scott Russell to take Kawasaki’s first world title in the same year, 1993. The bike that beat off Carl Fogarty’s Ducati and the uber expensive RC45, the good old modest underdog that put both of these prima donna’s in their place. I like that I’m reminded of this heritage every time I pull out of a junction. Executing a precise clean getaway rewards rider finesse and sets the tone for the rest of the bike.

I find the riding position perfect, putting my weight over the front end reminds me of the close connection to the bike that these race reps provide, with laser guided precision you can aim the bike at corners and rely on a faithful trajectory. I remember the ZXR fondly hailed as having the best front end in the business and I see why. You can lean on it heavily as it turns very deliberately. The brakes are wooden, the suspension firm, fortunately being a heavier rider I don’t find the rear end too heavily sprung. After my V twin Tuono, this super smooth four is a revelation, it sounds incredible and so smooth. The gears feel intuitive as they change ratios quick as lightning, who needs a quickshifter. There is no jerkiness from the throttle, smooth power as I modulate the throttle and gears to keep within my 4k limit. Feels like riding a small bike as you go back to reading the road ahead, conserving momentum and pre planning your next move. This is fun. Rather than be a chore, I’m enjoying this break in, new tyres, new brakes and a graceful pace to learn the finer characteristics of this bike that do not require speed to appreciate, instead, savouring the finer nuances of how rewarding getting it right feels, when you have such a characterful steed.

35kms later I’m parked by the sea. Radiant after such a long build up to this moment. Yes, I’m so pleased, this is exactly the bike for me, everything about it feels so familiar to my younger self. The layout typically 90’s like my bikes of the time. Thankfully the Tuono is a raw agricultural machine so I haven’t been ruined by modern machinery nor do I particularly want to be.

As I set off from the beach, disaster!! The tickover was around 800rpm once settled when I got it which sounded strained. After perhaps not allowing the revs to stabilise before setting off I pull up to the first junction and she dies. Too much fuel I suspect and it would appear I’ve managed to flood it. I push her into a car park and try restarting. She cranks well but its not starting. I try push starting with no joy. Eventually I call Carole Nash assistance, who will send someone within 90 mins. I clock up nearly 1km in the car park trying to clear out some fuel, I turn the tap off etc. Sure enough backup arrives. My tiring battery is pleased to have some fresh juice hooked up to it. After a short period of cranking she crackles into life. As the revs stabilise I discover the tickover screw, I adjust the idle to around 1200rpm, instead of sounding like she’s going to stall at any moment she now sounds happy, firing away joyfully. Back on the road there are no stalling issues and its back home with no further dramas.

For the next week I take advantage of the good weather and ride to work everyday. What a privilege to commute on one of these, fortunately my commute takes in some lovely windy country roads. After my first week of riding to work and back every day I have no aches, 350kms on the clock the tyres are starting to scuff up nicely and I’ve gone through my first tank of SUL and onto my second. Bang on 40mpg so far.

I can now appreciate some of the criticism of the rising rate of the linkage which goes from firm to smack your testicles into the fuel tank thud on unexpected bumps as the rear shock goes through the arc of it’s travel. A later model linkage can provide a more linear rising rate but it’s not something that has me overly bothered at the moment as I seemed to have learnt very quickly where the bumpy sections in the road are, besides; this isn’t a road bike, it’s a racing homologation special, it’s natural habitat is the track. Every molecule of its DNA is reminding you of this and every characterful quirk is an intrinsic part of the greater whole, to modify some better road manners might be to detract from this wonderful experience.

ZXR Brake caliper refurbishment Part 1

As expected of a bike that has been static for 24 years, there will likely be an element of recommissioning required.

On purchase, the brake and clutch lines were replaced with black Goodrich hoses to retain the stock look, new Pirelli Rosso III tyres and refreshed fluid. The engine was treated with Millers competition running in oil and fresh fuel had her fire up right away.

I had my reservations regarding brakes and front fork oil seals. The latter has been fine so far, the brakes on the other hand, while seemingly working fine, have had underwhelming performance. Of course it’s hard to know what normal should be but I can’t believe it would be this poor judging by the rest of the bikes capabilities.

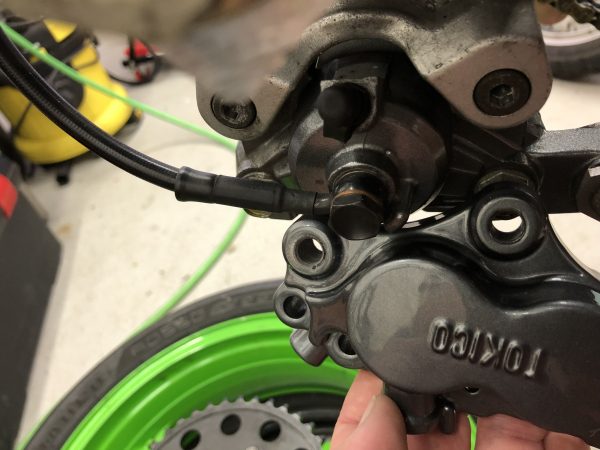
After the first 500 mile running in stint it has become obvious that all is not well with the front brake setup. There is some evidence that a pad is binding on the front disc. With the front wheel off the ground, spinning it by hand yields about 1.5 revolutions. Removing the left hand caliper extends that happily to 3.5 revolutions with a quick flick of the hand.

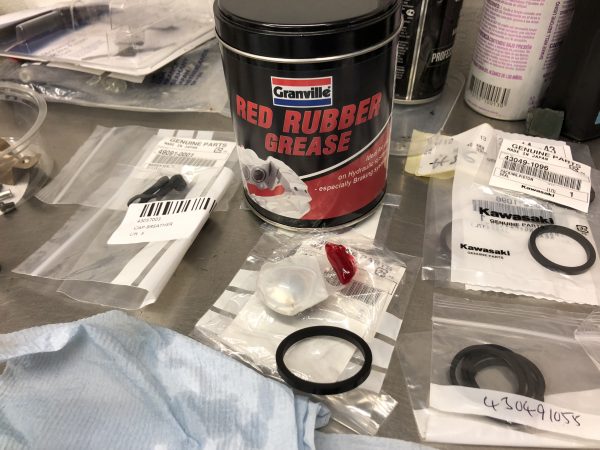
A caliper rebuild was therefore in order. I ordered up all genuine Kawasaki Seals and dust seals, O ring seals and some red rubber grease.

First up, the damage to the disc, it’s aesthetic really as it isn’t deep yet but would have become an issue. The first 500 mile bedding in at not more than 4k rpm is perfect for taking stock of what the bike needs in terms of recommissioning.

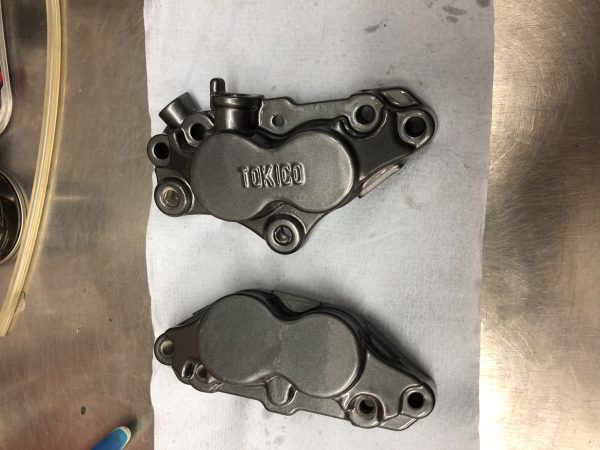
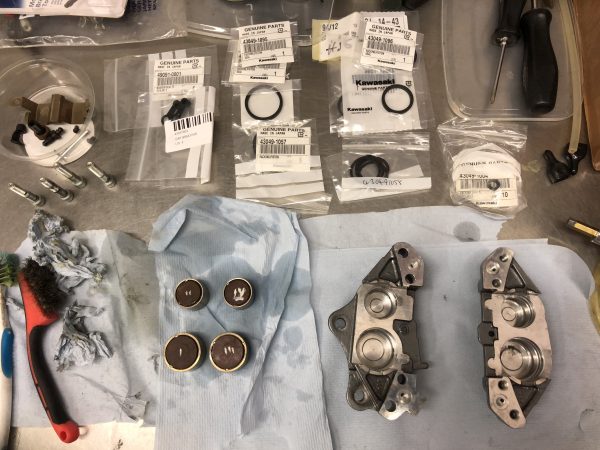
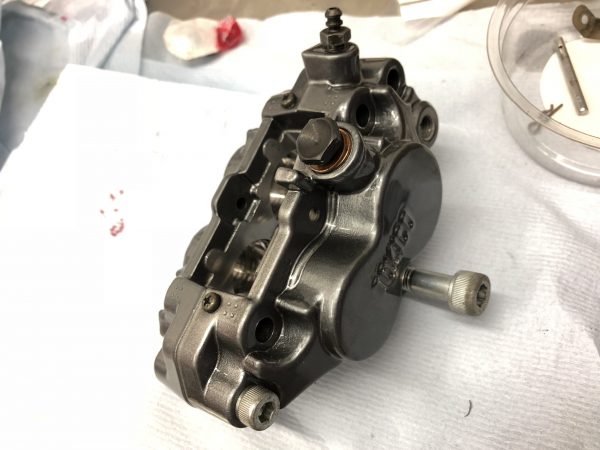
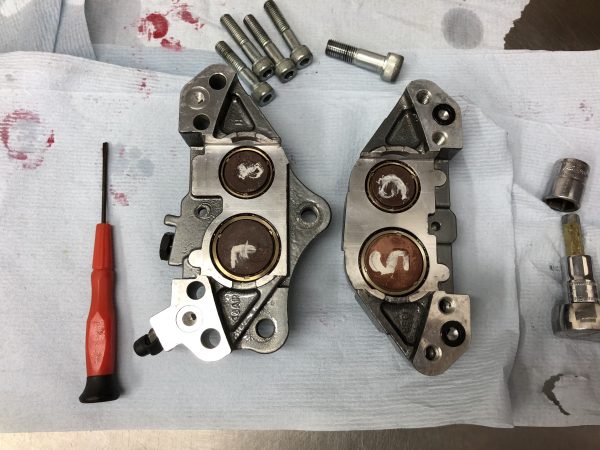
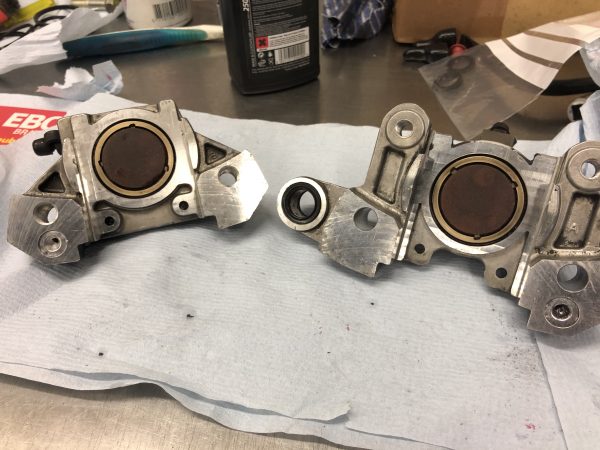
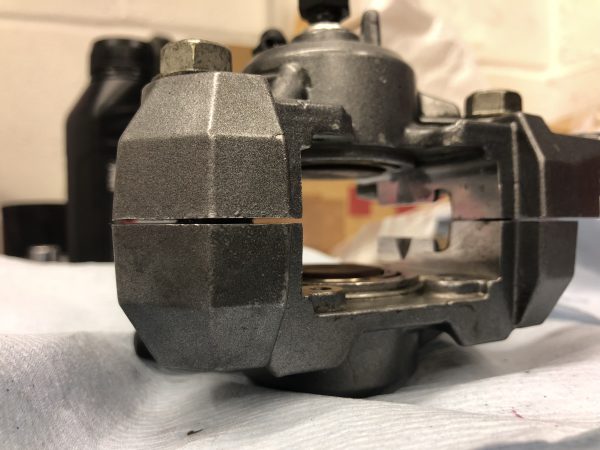
Splitting the caliper halves shows the pistons to be in excellent condition externally. There is no rust as expected seeing the bike had covered a mere 24 delivery miles (39kms) from new and had sat in a collection for the last 24 years until pressed back into light service by myself.

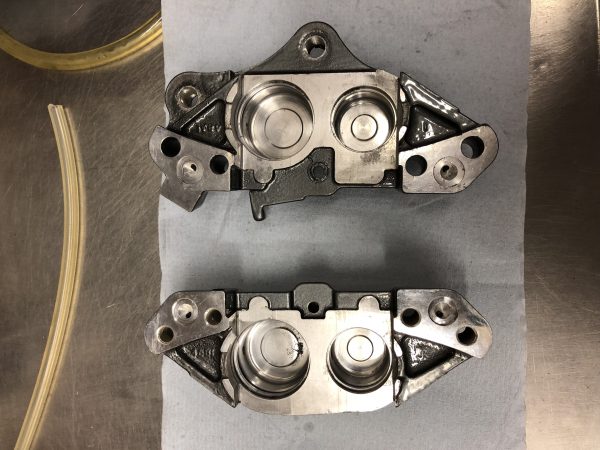
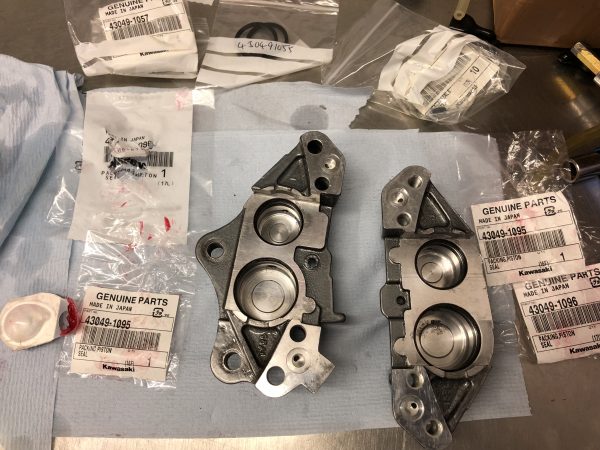
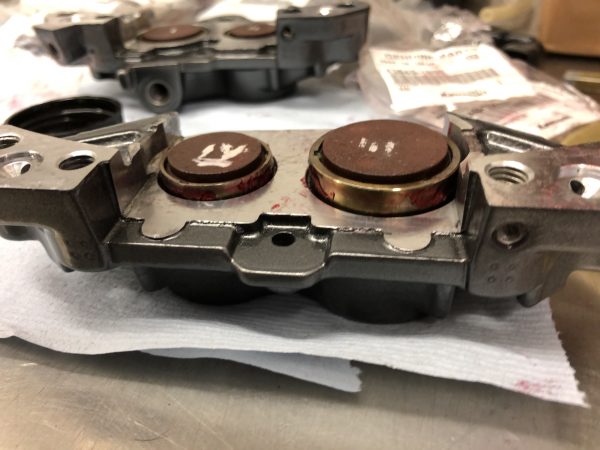
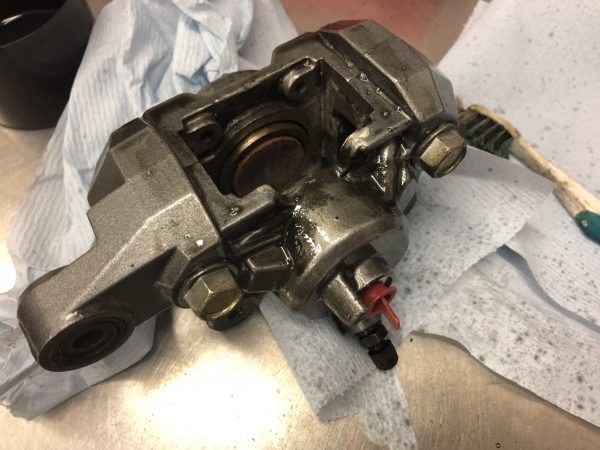
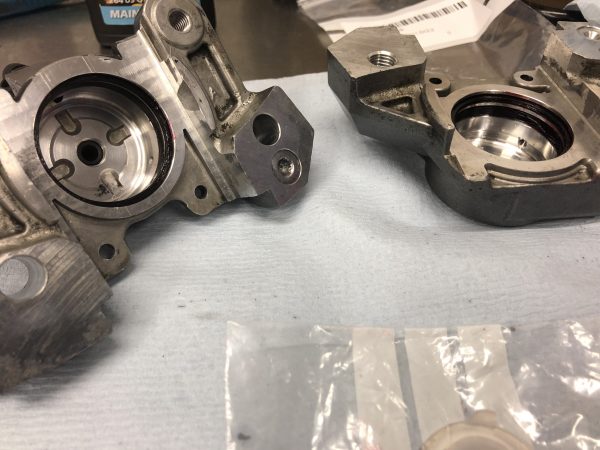
Closer inspection shows the dust seals are damaged, probably where they have been in the same position for many years then suddenly used. The larger piston dust seal had become deformed, likely causing the binding. The bore had some old residual brake fluid that had dried or congealed.

The piston itself showed a less healthy look to it’s internal face, which surprised me initially given the condition of the external face. A good clean with brake fluid and a toothbrush made everything better.

A closer look at the dust seal.

On removing the seals there is some congealed crud, old brake fluid mixed with light corrosion. This I guess pushes on the seal. The rear of the bore also has some dried(looks almost like baked on) brake fluid which is easily removed with some metal polish.
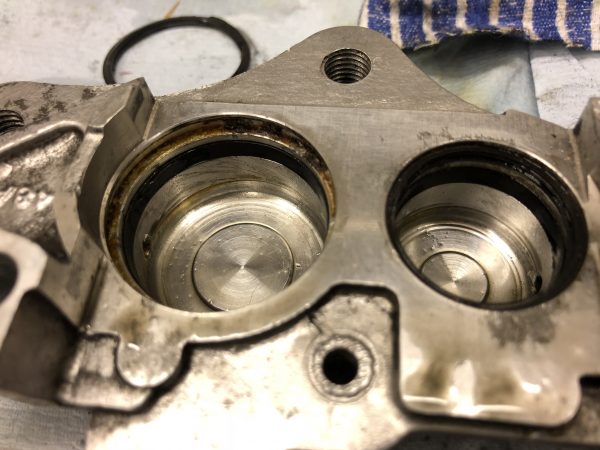
Congealed brake fluid featured in the galleries. Despite having new fluid with the fitment of the braided hoses, this is clearly historic gunk that a flush didn’t shift.

The pistons are generally in good order after a simple clean with brake fluid. The outer caliper half left hand piston has a tiny nick in it, which I later found out appears to be some form of corrosion eating at the piston. This is in a part of the piston which is not affected fortunately. This is commensurate with mild corrosion build up on the bore in the same location which has migrated onto the piston. It is however smooth.

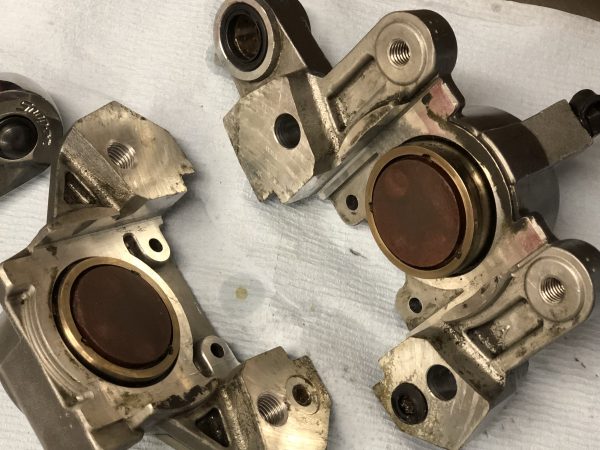
The inner half of the left hand caliper…once again the pistons don’t look great on their inner portions but fortunately clean up well enough.
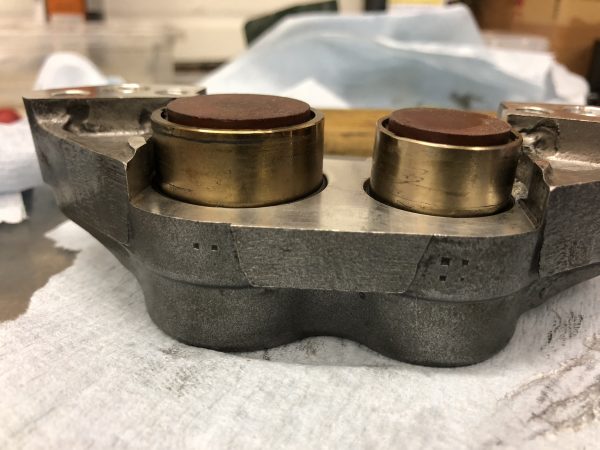
From this;
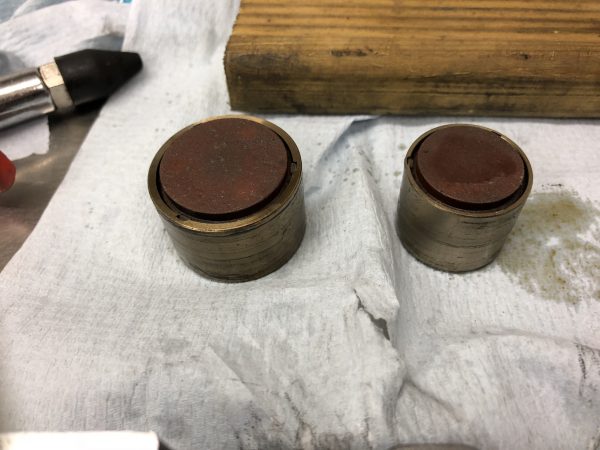
To this; With just the use of brake fluid.

and here is the corresponding outer half after clean up. Unfortunately the thin coating on the caliper was compromised through the use of brake cleaner and break fluid which gets everywhere. The finish went soft and despite trying to remove it quickly it has eaten in and started to lift the finish in areas.
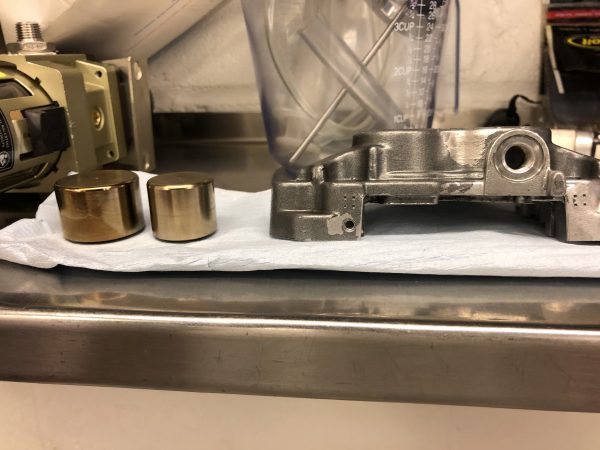
Compounded later with the use of an air compressor.
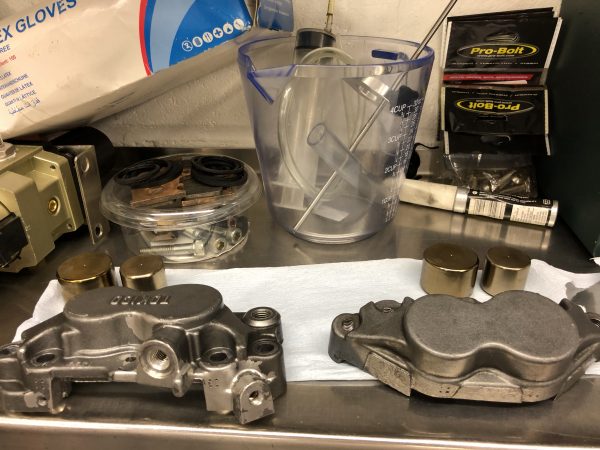
The inner bores cleaned up well with some metal polish;

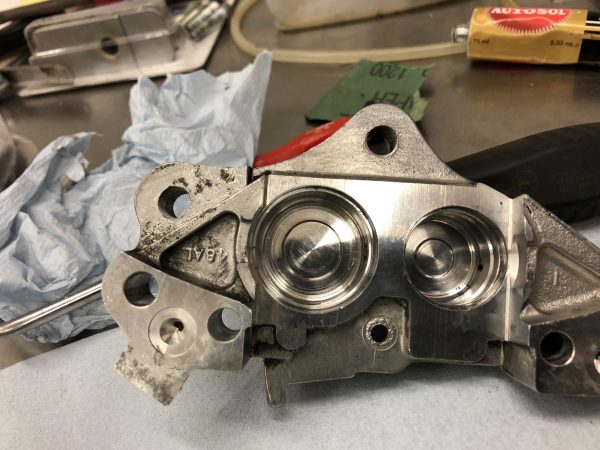
The inner side of the caliper had a spot with corrosion which had actually pitted the bore. Again not in an area of concern with regards to functionality but I’m pleased to have stripped these down to address bigger problems in the future.
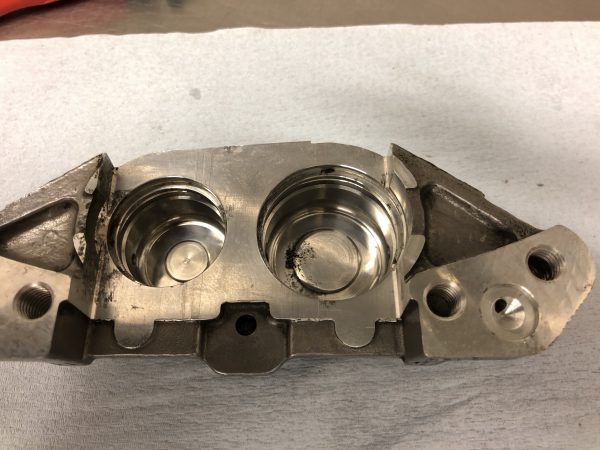
A close up shows the pitting. Was it through moisture in the fluid that had built up where it hadn’t been changed in 24 years? I wonder what a regularly used ZXR caliper would look like, one which had had frequent fluid changes? This is to the inner half of the left hand caliper.
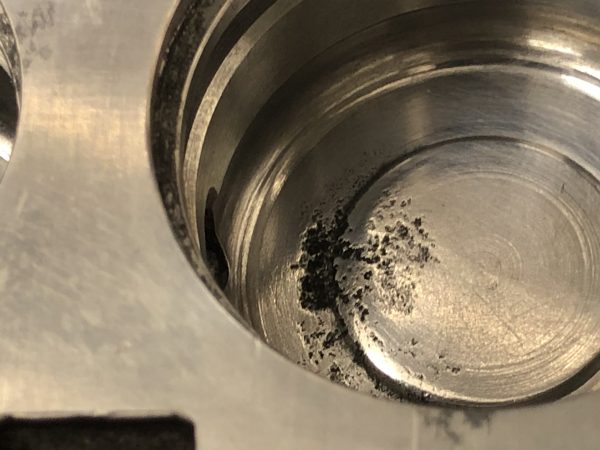
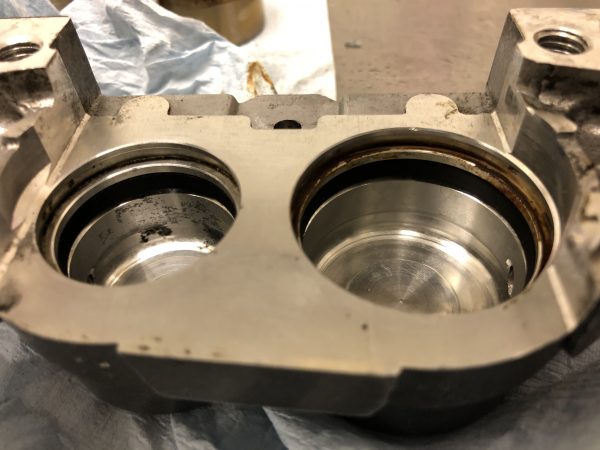
Onto the right hand caliper…a similar story…although this one in particular had a fair bit of corrosion going on in the larger piston bore between the seals…
Leaving its mark on the piston itself…similar to the piston above, except this one is in between the seals. All of the main fluid seals were perfect incidentally, however this one has corroded in between the dust seal and the main seal. Once again, fortunately this won’t affect performance since it is beyond the main seal.
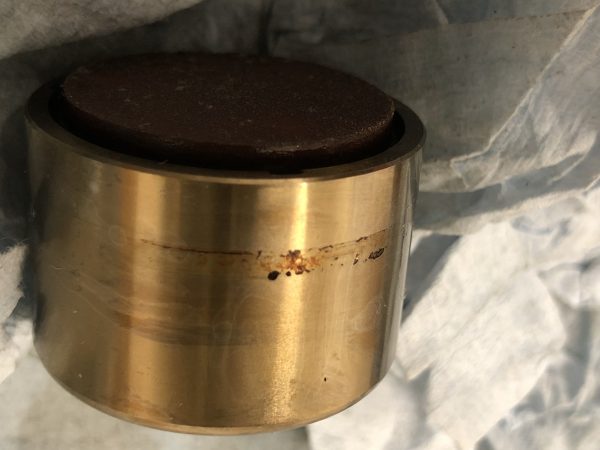
Some metal polish cleaned it up but the pitting remains.

A close up of the corrosion in the bore…
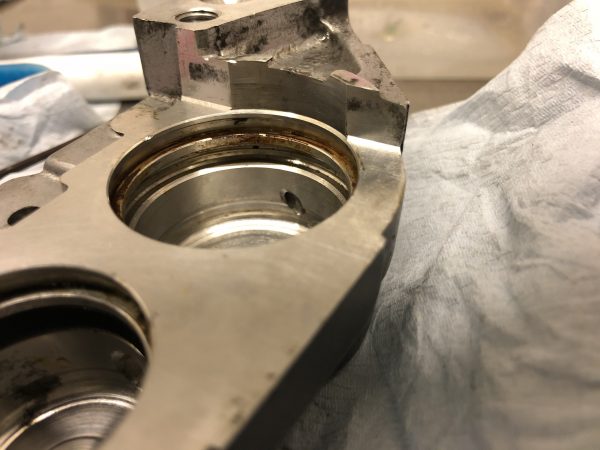
All cleaned up with metal polish…again a little bit of pitting in one of the bores at the base of it, this time on the outer half of the right hand caliper.
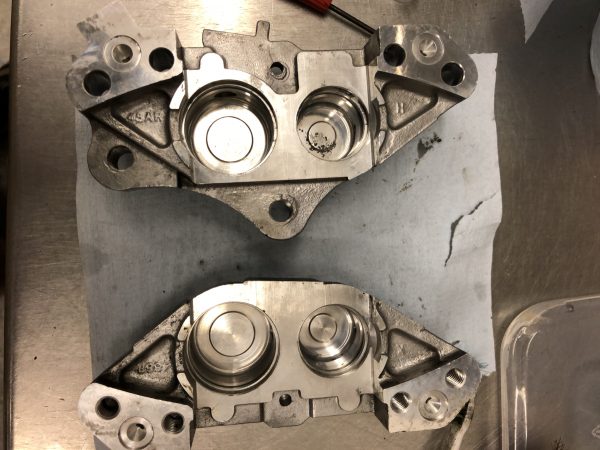
This time no damage to the caliper finish. Using a red plastic plug where the brake hose would go (came with my new oberon clutch slave for another bike) it seems plugging the hole from fluid coming out has helped retain the finish. This one was cleaned down with diesel and detergent/water rather than brake cleaner for the most part.
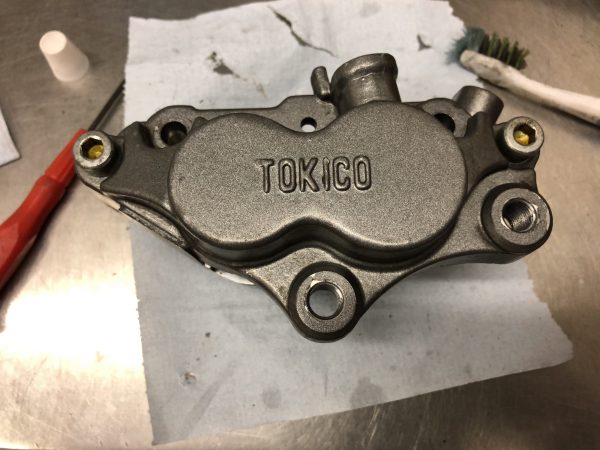
Now I am in a position to rebuild except the damage to the finish of the left hand caliper means this will need to be sent away to be powder coated. This means they will receive an acid dip and be blasted before having the vital bits masked up prior to application of a 3 coat system. I will update this once this work is done and document the rebuild.

UPDATE

I have luckily managed to track down the discontinued piston to replace the pitted piston… 🙂

In other news, the rear caliper has one piston seized in it also on the inboard side, so this will also be under going the refurbishment treatment. All new seals have been ordered, hopefully the pistons will be ok!
ZXR Brake caliper refurbishment Part 2 Reassembly

3 weeks later and the calipers are  back from the powder coaters…

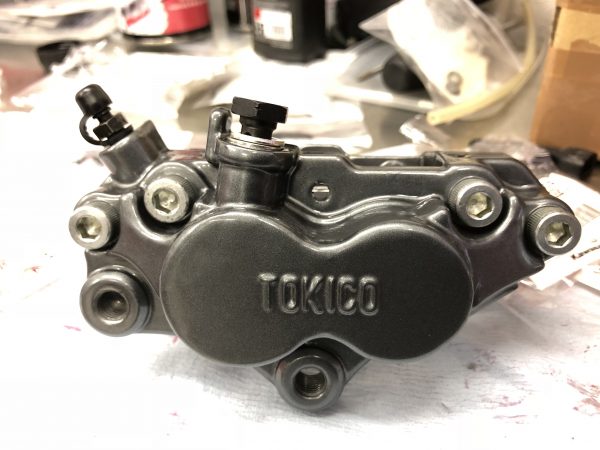
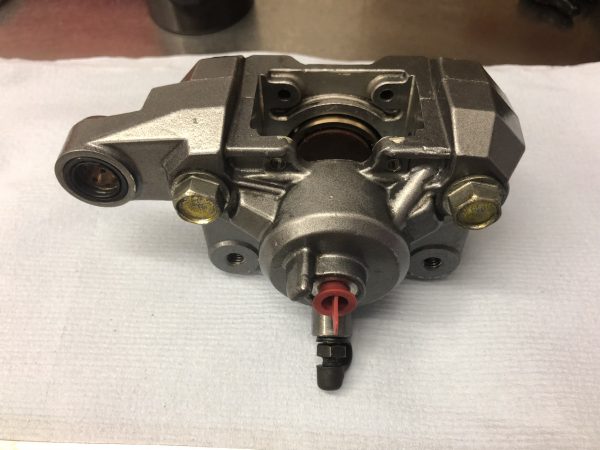
I had to clear off some overspray from the mating surfaces but all came up ok. The colour match is close to the original although being powdercoated the finish is glossier rather than satin but hopefully more resilient.

Picture below shows the colour match against the stock rear caliper.

Some red rubber grease to grease the piston seals as advised per the workshop manual.

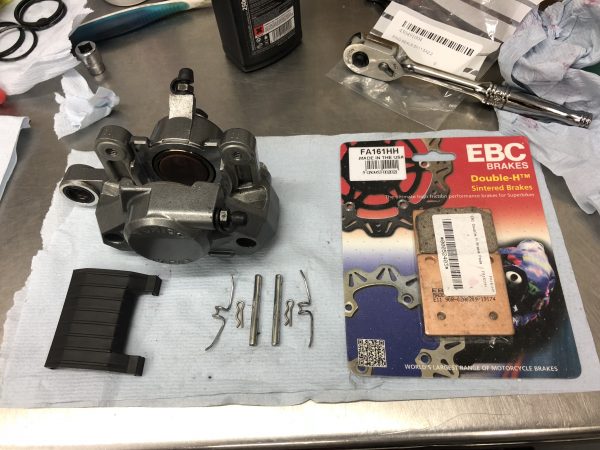
All laid out ready for reassembly;

Seals installed into the caliper bores.

Pistons Installed. Red rubber grease excess cleaned off after photo.

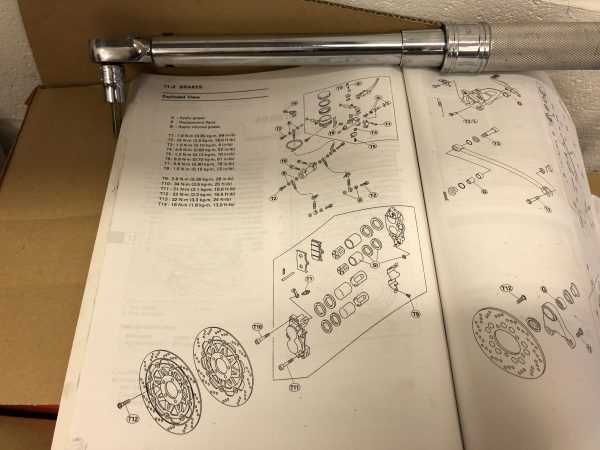
Caliper joining seals inserted and caliper halves bolted together to specified torque…

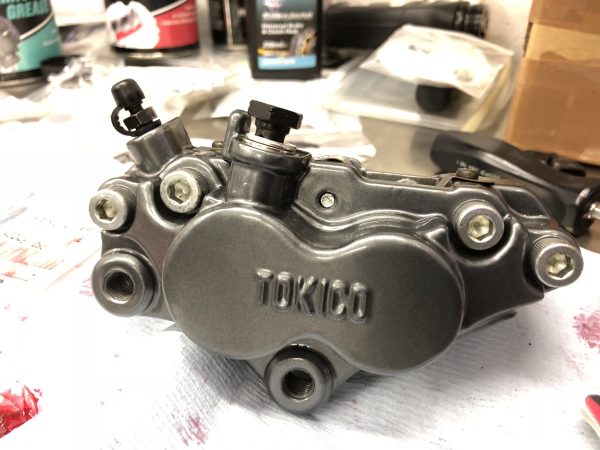
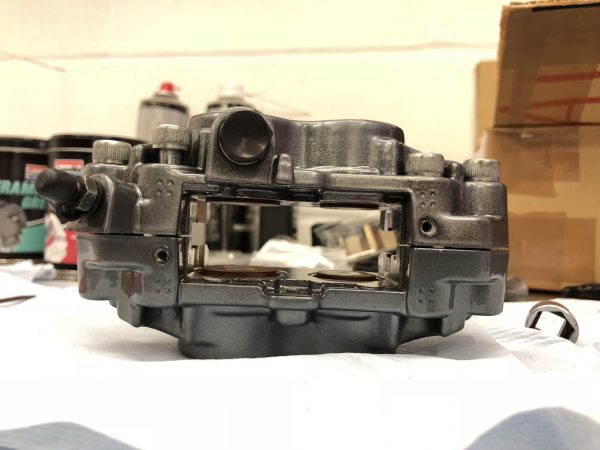
All assembled

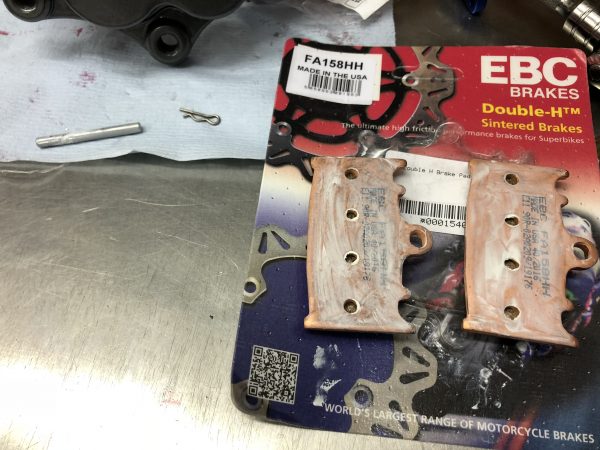
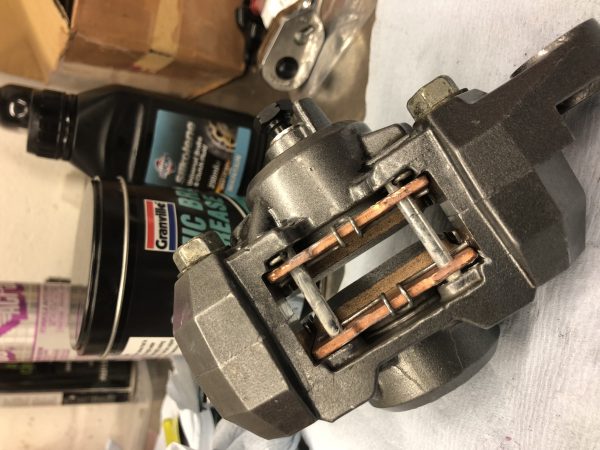
EBC HH Sintered brake pads going in to provide a more modern braking experience! Ceramic anti seize grease is applied to the backs of the pads and the slider pin

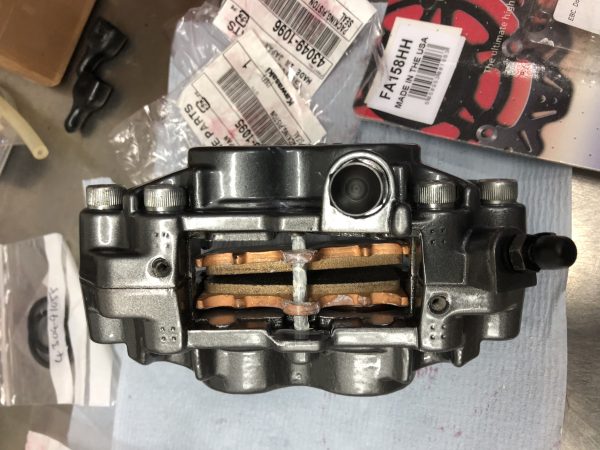
Pads fitted…

Anti rattle plate installed

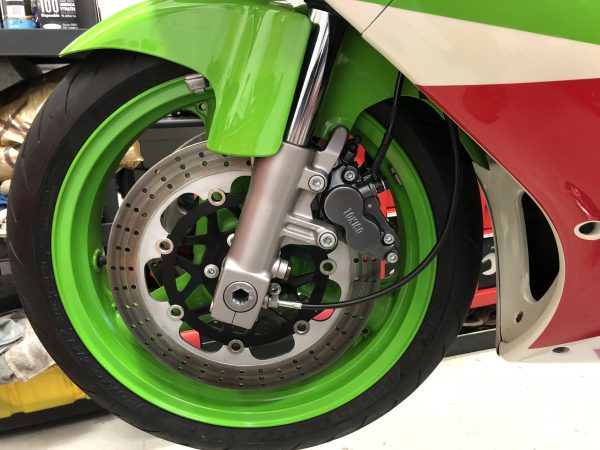
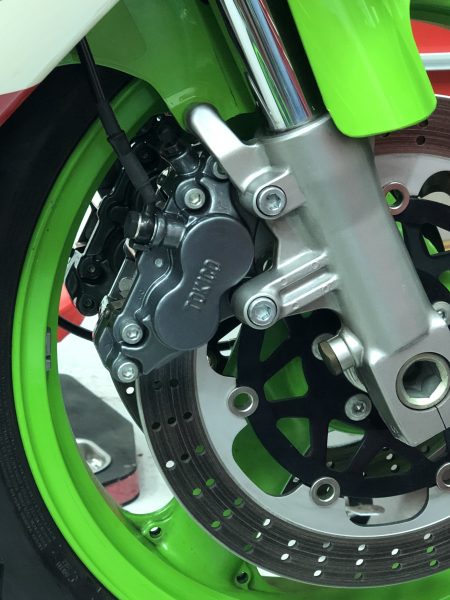
…and finally nearside caliper fitted to the bike 🙂 mounting bolts torqued to 34nm . Brake hoses fittings torqued to 25nm and fitted with new washers. Bleed nipples should be torqued to 7.8nm.

Offside caliper undergoing the same rebuild procedure; all bolts test fitted to ensure threads are clear, clean and free

Seals and pistons installed…caliper joining gallery seals also visible to right body below…

Caliper halves reunited with joining seals carefully positioned and assembly bolted down and torqued down to 21nm.

Offside calipers bolted up…

The System was then bleed which takes a fair amount of patience, gravity bleeding and pumping the lever. Eventually the lever pressure built up. Front wheel would free spin to 20 revolutions without pad drag with a simple hand spin. Once both calipers installed and pumped up, this would drop to between 6-7 revolutions. Quite a difference from the 1.5 revolutions at the outset!!
Next up will be rear caliper overhaul…

ZXR Brake caliper refurbishment Part 3 rear brake

Rear caliper time;

I thought the rear brake was perfect as it seemed to work well. On removing the rear wheel to replace the cush drive, I tested the rear caliper just to make sure all was good and discovered that there was no movement on the inboard piston, whereas the outside piston was moving freely. Having seen the mess in the front calipers I took the opportunity to order the relevant seals and bite the bullet to refurbish this at the same time. I thought the inboard piston might be seized and was hoping that I wouldn’t require a new piston!

First things first, caliper removed and cleaned up with diesel. Like the front calipers, the exposed part of the pistons were in good order, more crud on them than the front but the diesel shifted it easily.

All cleaned up ready for strip down…

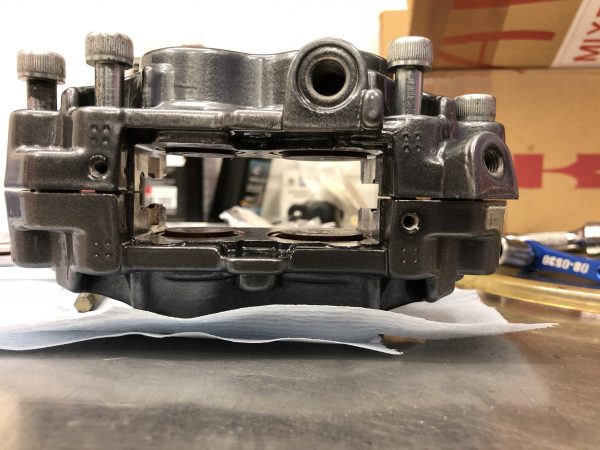
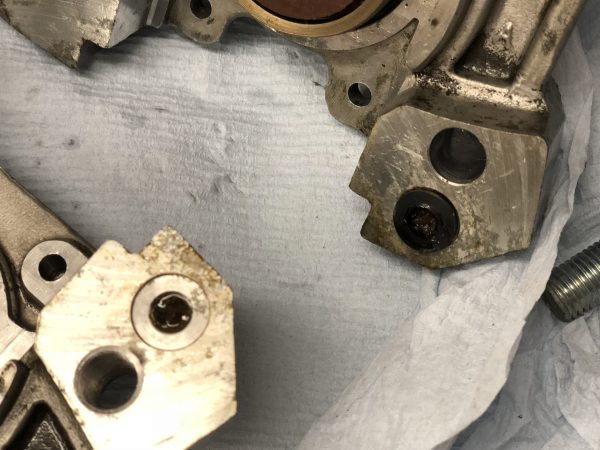
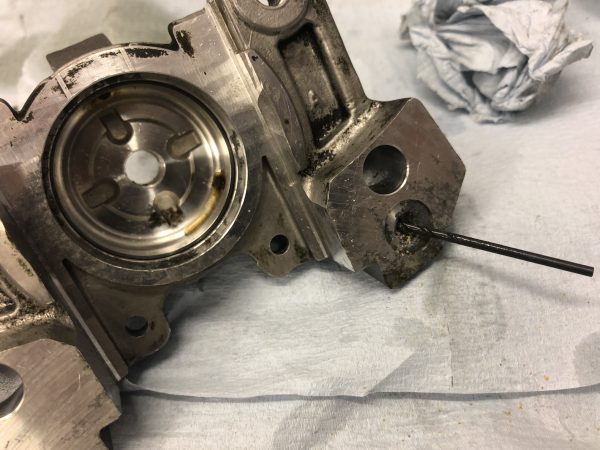
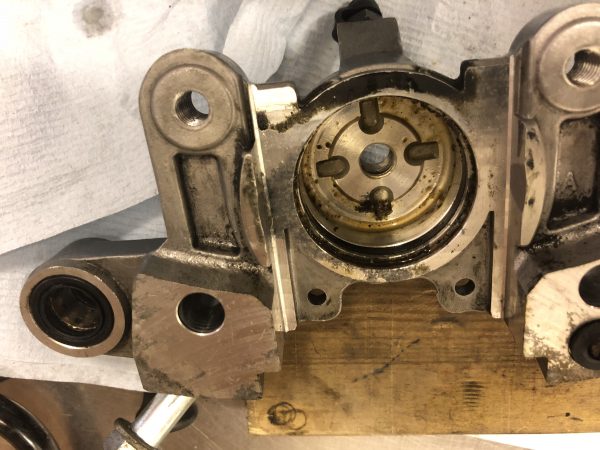
Splitting the caliper, what was immediately apparent was the state of the fluid galleries where the caliper halves join.

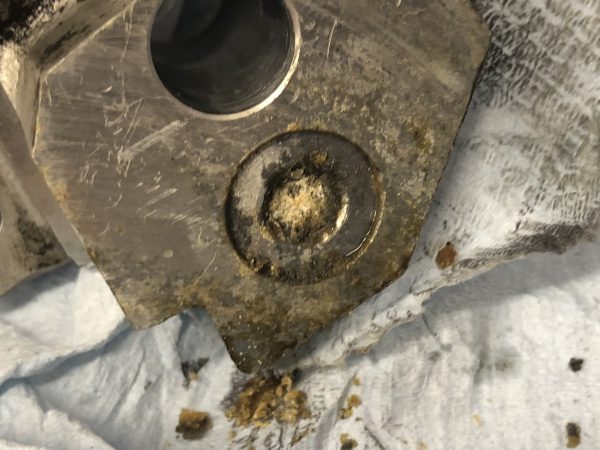
It didn’t take long to figure out why the inboard piston wouldn’t budge…the gallery was plugged solid. Even chipping away with a screwdriver was struggling to shift it and compressed air didn’t touch it.

The only thing that did was a 2mm drill bit which I turned by hand…

This had been the reason for the piston not moving. As it turned out, both pistons were perfect and all the seals were even in good order. The fluid was a bit of a mess with a fair amount of bits in it.

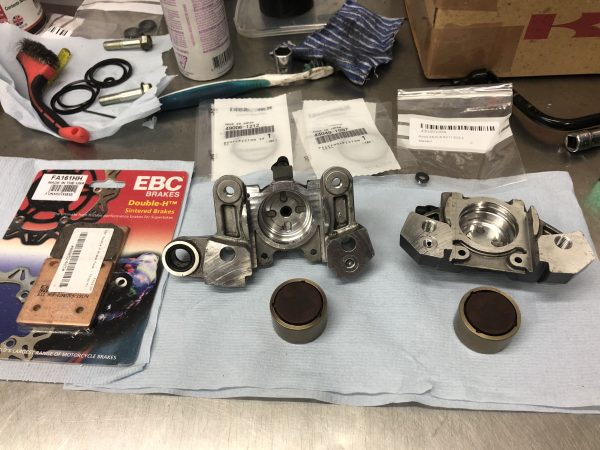
The old seals were removed, the bores and pistons cleaned out and the replacement parts all laid out…

The new seals were smeared with red rubber grease to ease fitment as per the workshop manual.

Pistons were fitted with some brake fluid to slip them in…

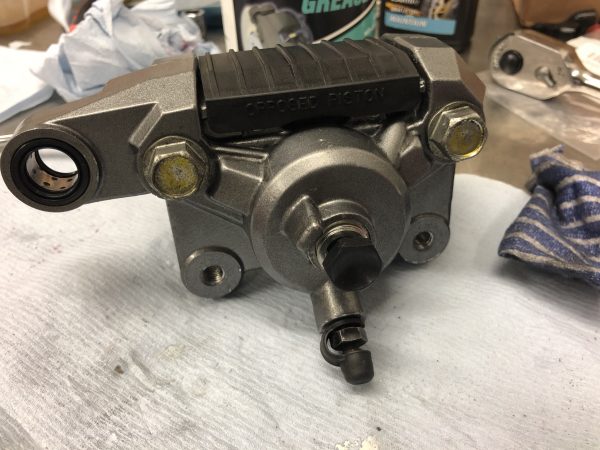
O seal inserted, again with red rubber grease, positioned and caliper joining bolts were subsequently tightened down to correct torque, 32nm.

The old pad sliding pins and springs were cleaned up…

Pads installed with ceramic grease applied to the rear of the pad backing plates and sliding pins…

New seals were fitted to the control arm bearing housing

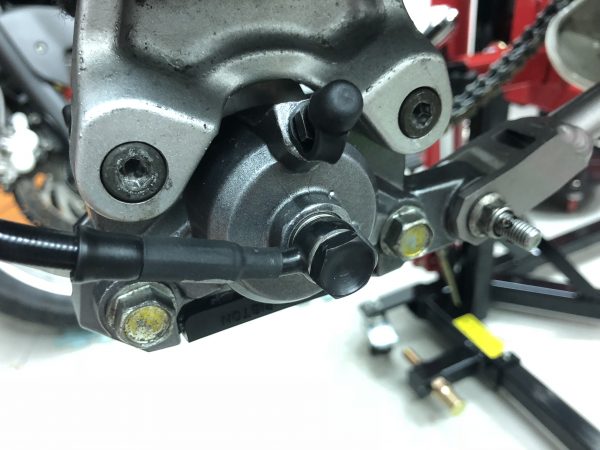
and finally, all bolted up and bled ready to go. This bled up surprisingly easily…

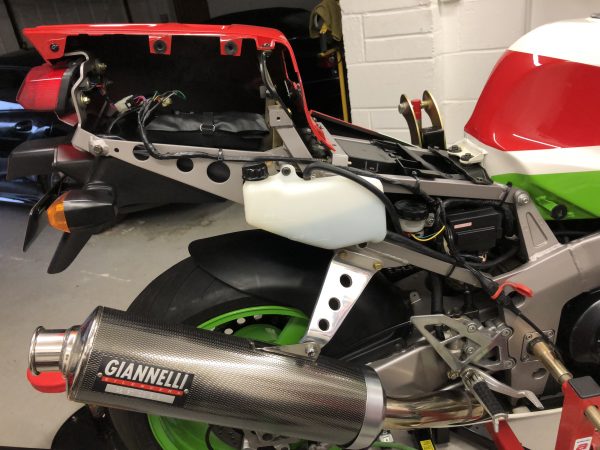
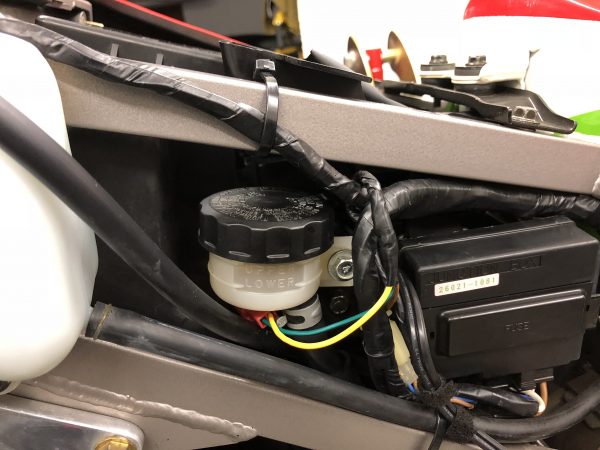
Rear brake reservoir is located behind the rear bodywork;

Topped off and ready to go…

So that is the brakes all done. Front and rear with goodrich braided hoses and EBC HH Sintered pads all round and fresh Silkolene Maintain fluid.

I’m hoping this should be a totally different beast now on the braking front! The rear caliper should now have twice the power and the fronts should also be functioning as intended.

ZXR cush drive replacement

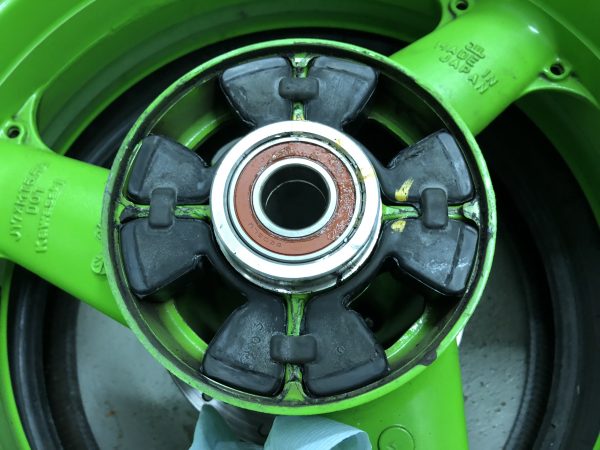
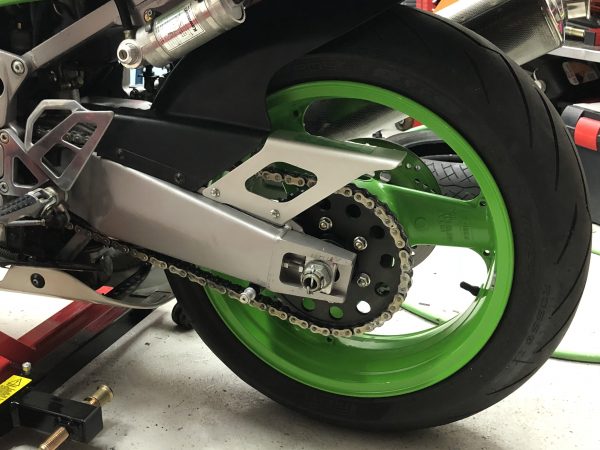
Right towards the end of the 500 mile break in period, it became apparent that the cush drive had some unwanted play in it, 4-5mm in fact. Curious as this is no mileage but then the rubber is 24 years old.

Original cush drive rubber…

Removed and cleaned up for new cush…

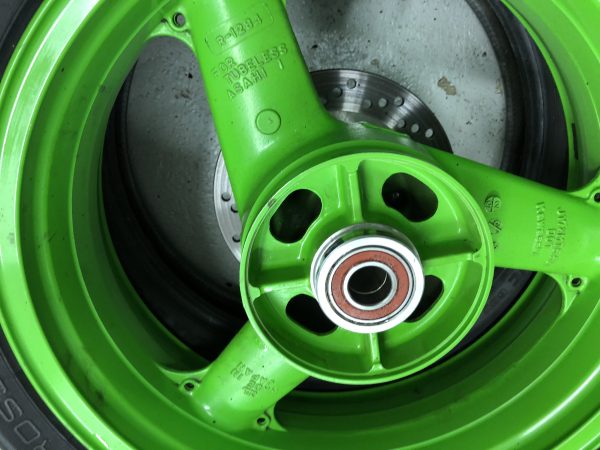
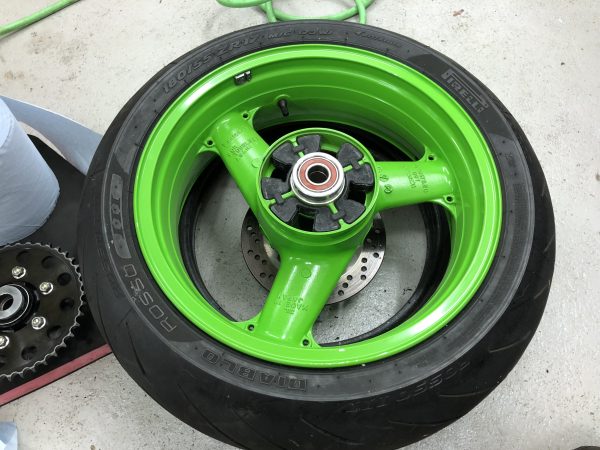
New cush drive rubber fitted…

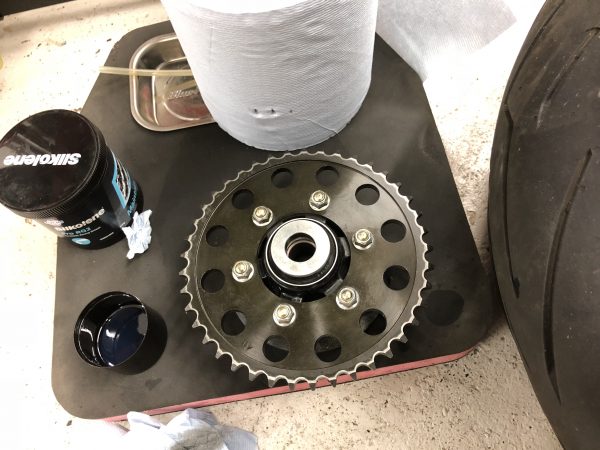
Sprocket cleaned up…

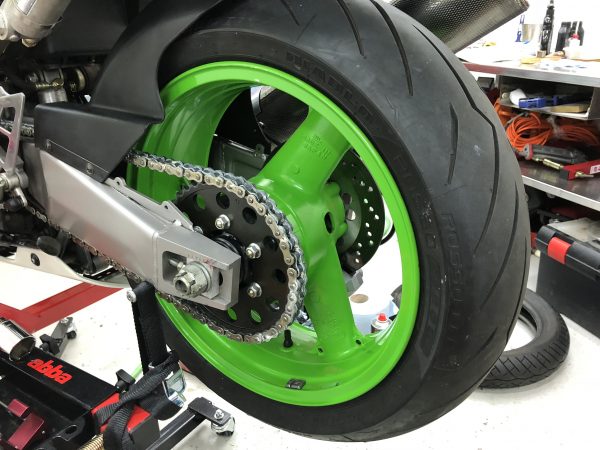
Axle and bearings lubed with Silkolene RG2 grease,  wheel cleaned with diesel then Autoglym super resin polish followed by Autoglym extra gloss protection.

The chain was cleaned with diesel and Silkolene chain cleaner followed by Silkolene Titanium dry lube chain lubricant. All is back together now and bike fired up.

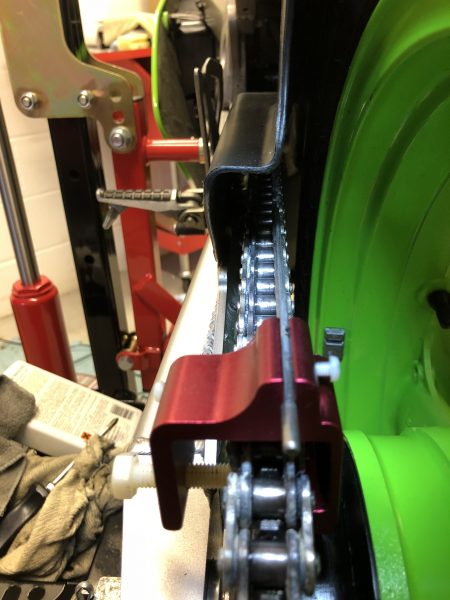
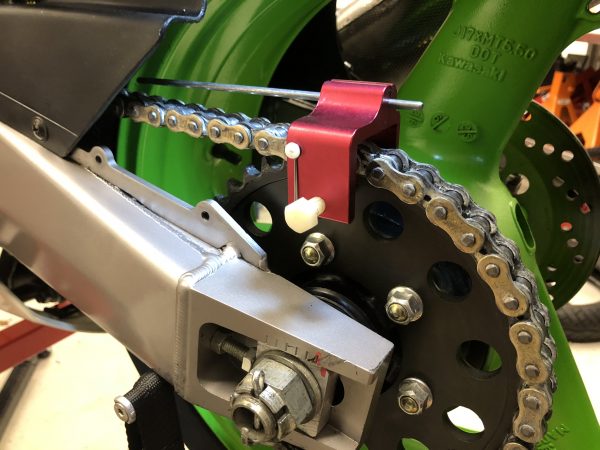
Chain alignment carried out, matching the markings on the swingarm and then double checking with this alignment tool…

Wheel torqued to 145nm as per manual and chain guard fitted…


ZXR Oil Change 500 miles

500 mile oil change carried out today. (Bang on 500 miles ). Took the bike for a run to check the brakes following the refurb and they are now working stupendously. The oil was warmed through and on return I drained it straightaway.

This was the thin Millers competition running in oil.

New oil is Silkolene Pro4 10w40. New Kawasaki oe oil filter and sump washer.

Side fairing removed to access oil filter

Oil filter behind the headers. New filter fitted and sump bolt torqued to 20Nm as per book.

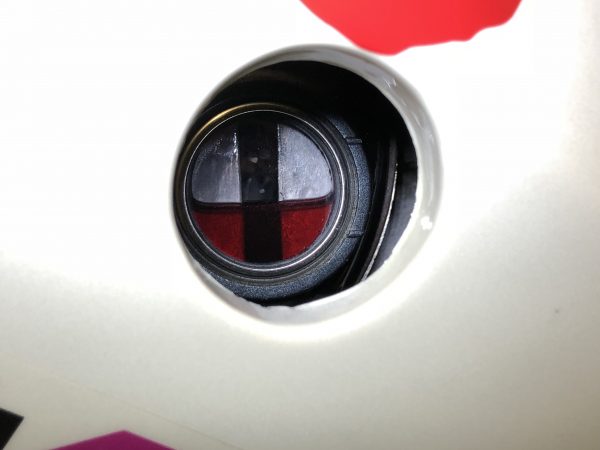
Nice red oil colour through the sight glass!

All ready for the next phase of running in which allows 6k rpm for the next 500 miles, at least this will top out at 90mph now rather than the first 500 miles stuck at no more than 60mph.

ZXR UK spec headlight conversion

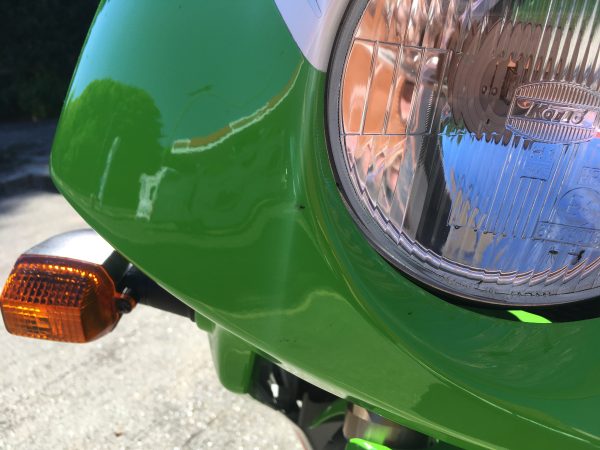
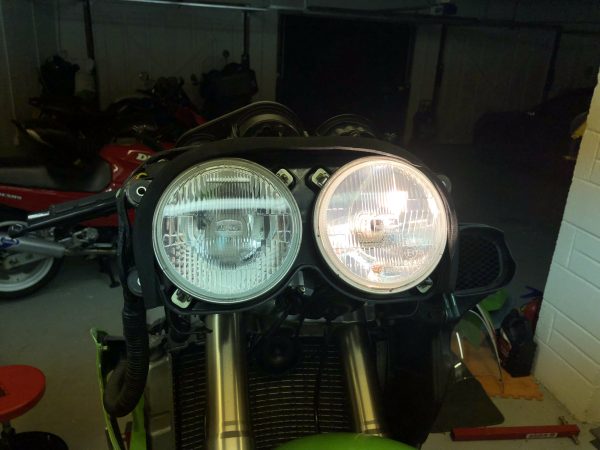
Being an Italian spec bike, the ZXR came with only one main beam, although both would come on with full beam. The r/h lamp unit was actually a full beam only unit which made it look like a bulb was out.

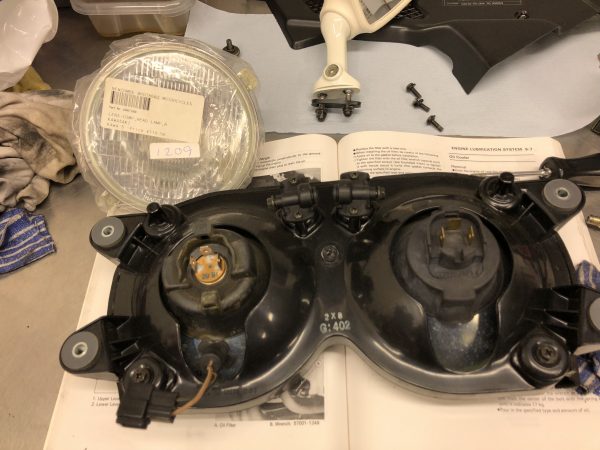
I managed to track down a UK spec NOS headlamp for the R/H side. The wiring is all there to take it so it should be straight forward.

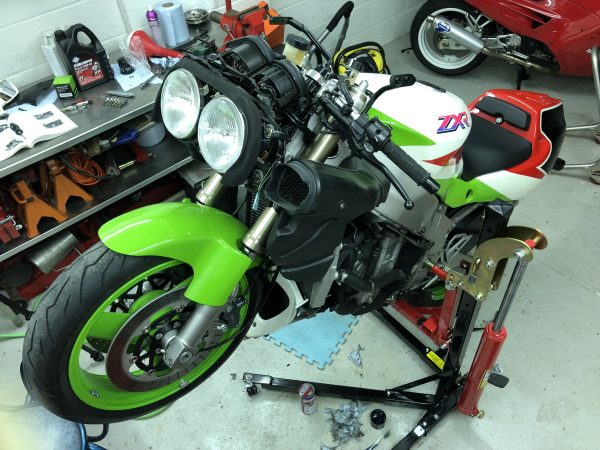
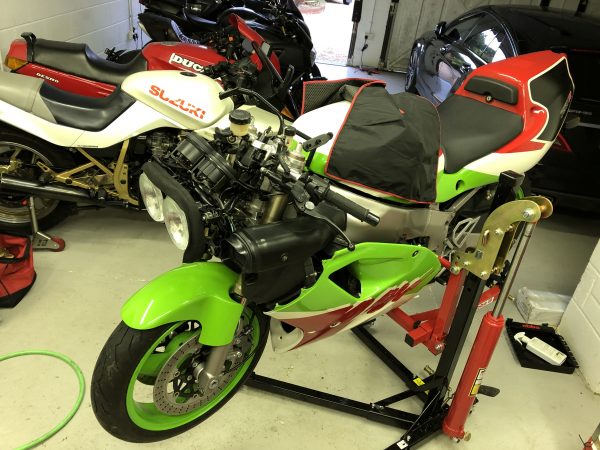
This meant the nose cone had to come off…

Other Italian market peculiarities are the flash/pass light illuminate low beam only, not high beam, which means if you ride with lights on, you can’t flash anyone as they wont see them flash since they’re already on!!

On the plus side, the ITA market model also gets an extra horn!!

Speedo replacement…

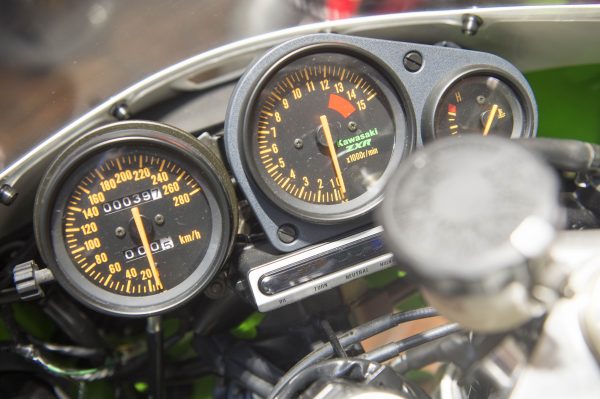
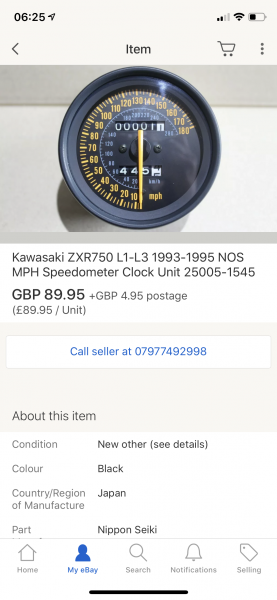
For 2 years, I have been on the hunt for a NOS UK spec speedometer that reads in MPH. The KMH speedo is lovely and clear, but living in the UK, I can’t tell quite how fast I’m going at a glance as I have to work kmh back to mph. I did buy a sticker to go over the speedo but it would always looks a bit naff and wouldn’t be at all clear at night.

I’m pleasantly surprised one evening, after getting home late from dinner with friends my ebay flashes up with a item alert. I’d all but given up on this hunt, when lo and behold, staring at me is a NOS speedo in mph. I waste no time hitting the buy it now button. Literally moments after it went on sale.

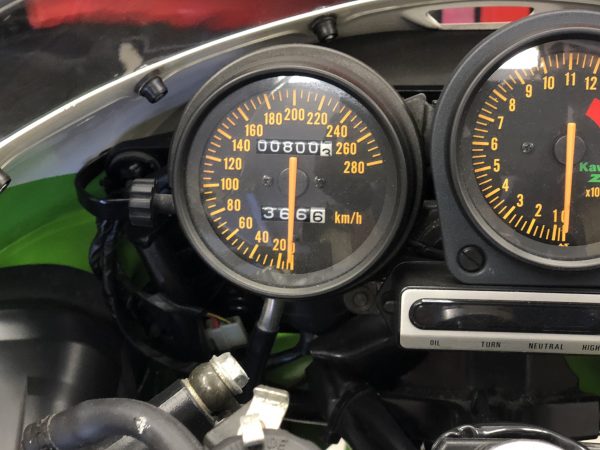
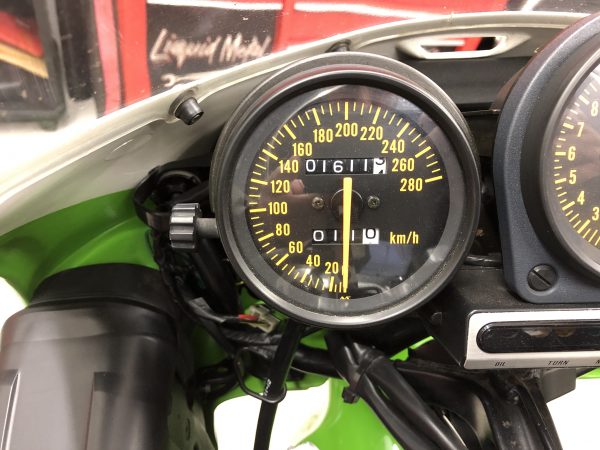
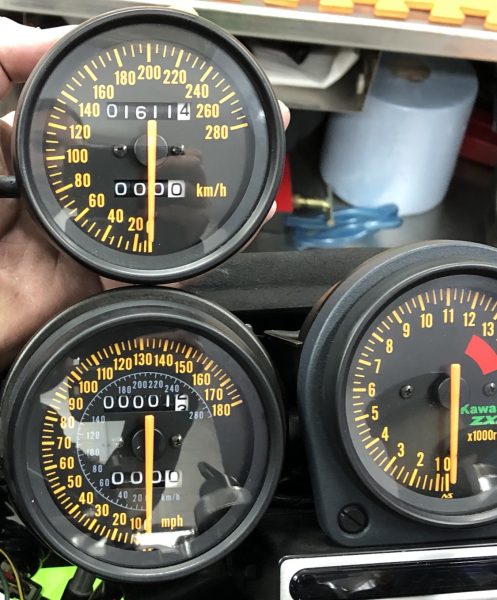
It’s reading 1.1 test miles. I don’t normally like the idea of the bike not displaying its true mileage, it doesn’t sit well with me, however this is the final piece of the jigsaw to convert the bike to full UK spec. Seeing as I wasn’t quite at the 1000 miles break in point, I hatch a plan to run the kmh clock to exactly 1611km’s which equates to 1001 miles. This way, the kmh clock accounts for the running in period (1000 miles) plus the 1 test mile showing on the mph clock already, and the new speedo will therefore show the bike as having exactly 1000 miles less than indicated.

Speedo swap fully documented for the bikes provenance below. The KMH clock at the end of the break in period.

Front nosecone comes off…

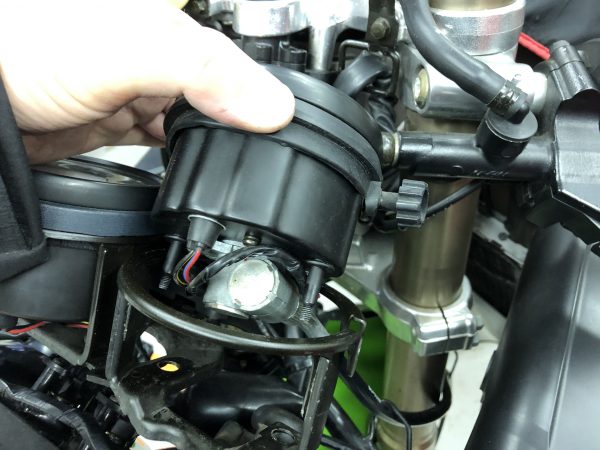
Off with the speedo head!!

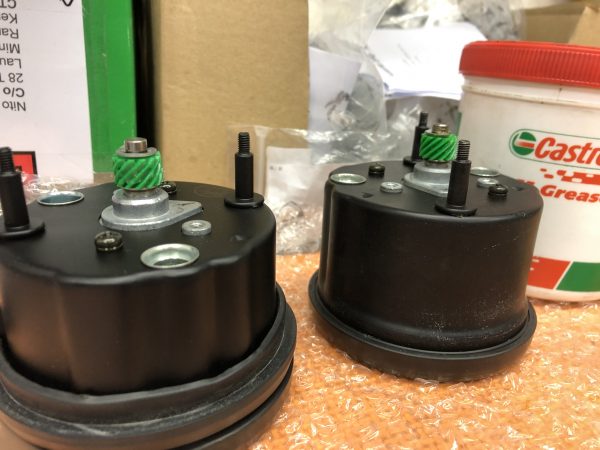
New speedo cog greased up…

Speedo installed…

The new display shows mph and kmh on a dual scale. It’s a bit of a rebirth for the bike, this coincides with the completion of the break in period. The fun can now begin in earnest 🙂

Practical Sportsbike magazine shoot…

Following a couple of email exchanges with Practical Sportsbike editor Chris Newbigging, who was searching for a ZXR for an upcoming feature, it transpires he was after a regular ZXR and not a homologation. His interest is piqued however with the idea that this is a NOS bike and a plan hatches to cover what it’s like to be running a NOS bike after so many years dormant. This bike had effectively covered 24 miles in 24 years, now 26 years old, what horrors (or not) may await!

He informs me a month or so later, that he would like to send motorcycle journalist Jim Moore down to cover the bike who he assures me is a”safe pair of hands”.

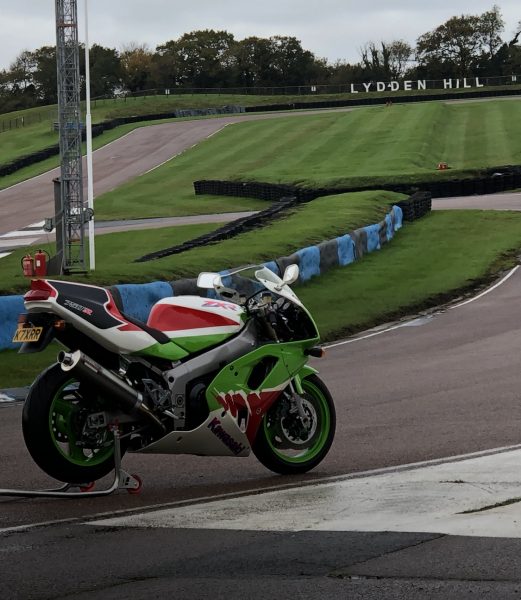
After a phonecall with fellow Katana owner Jim, a date is therefore set for a visit, accompanying Jim is photographer Stuart. We’ve also managed to arrange with Lydden Hill to borrow their circuit as a backdrop for some photos to which they very generously agreed.

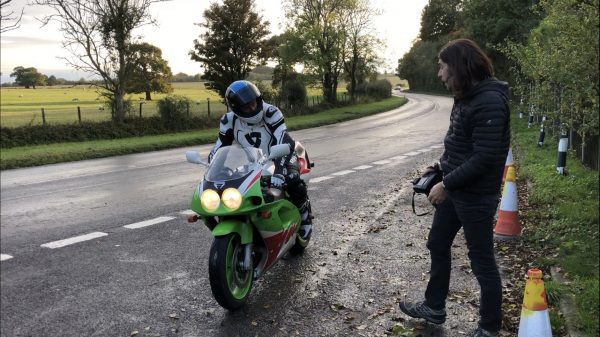
After a morning in the garage, where my beautifully clean R  enjoys being papped by a professional, Jim and myself go through much of the ownership experience and how it came to be. It’s raining outside so we decide to scope out Lydden and see if it will be suitable. It is. Fortunately on our return the rain has stopped and Jim rides my bike to the circuit. Stuart snaps away and banks some decent shots for the feature. The ZXR is in its home environment here, an apt setting for this race homologation special.

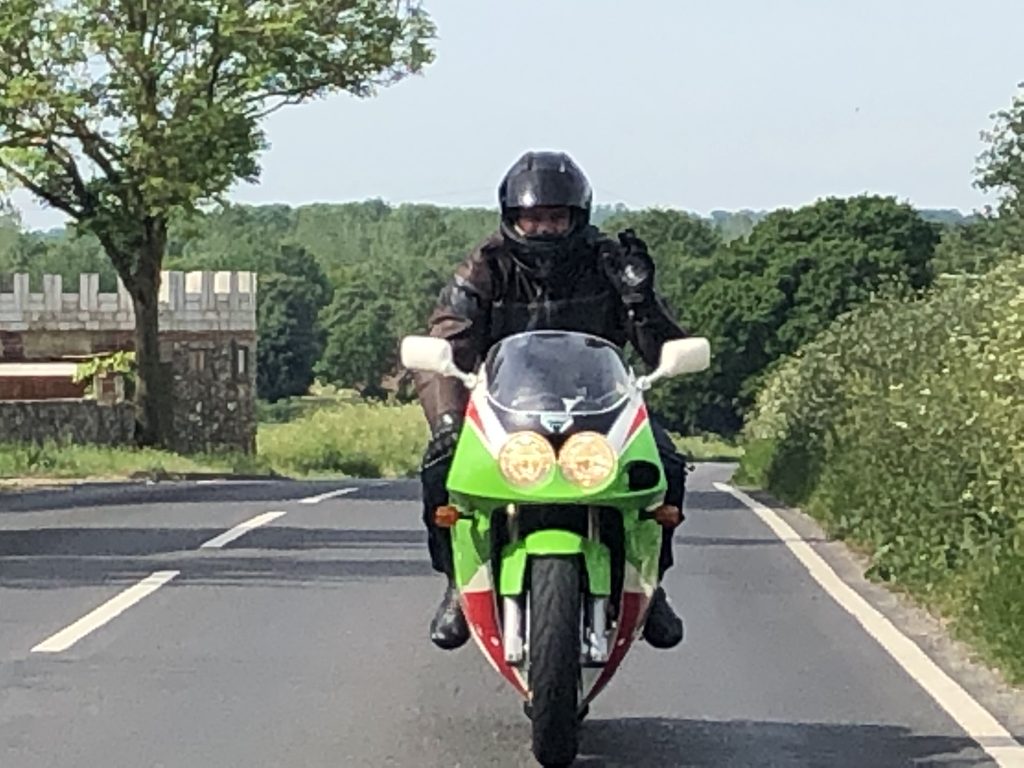
Moving on from Lydden, we take an extended ride to seek out some corners for some road shots. Jim covers 50 miles on the ZXR and we’ll have to await the publish of the magazine to read his thoughts…in the meantime…a couple more unprofessional cameraphone photos of the day…

It’s the first time Jim has ridden a homologation ZXR so it will be intriguing to learn how he feels and what memories he has of it once he’s had a chance to gather his thoughts after a day that involved many hours of a round trip as well as what was nearly 7 hours worth of talking and riding that seemed to pass far too quickly!!

It’s always a pleasure to chat away with fellow bike owners and the day was made all the better by some genuinely great company!