Speedo replacement…

For 2 years, I have been on the hunt for a NOS UK spec speedometer that reads in MPH. The KMH speedo is lovely and clear, but living in the UK, I can’t tell quite how fast I’m going at a glance as I have to work kmh back to mph. I did buy a sticker to go over the speedo but it would always looks a bit naff and wouldn’t be at all clear at night.

I’m pleasantly surprised one evening, after getting home late from dinner with friends my ebay flashes up with a item alert. I’d all but given up on this hunt, when lo and behold, staring at me is a NOS speedo in mph. I waste no time hitting the buy it now button. Literally moments after it went on sale.

It’s reading 1.1 test miles. I don’t normally like the idea of the bike not displaying its true mileage, it doesn’t sit well with me, however this is the final piece of the jigsaw to convert the bike to full UK spec. Seeing as I wasn’t quite at the 1000 miles break in point, I hatch a plan to run the kmh clock to exactly 1611km’s which equates to 1001 miles. This way, the kmh clock accounts for the running in period (1000 miles) plus the 1 test mile showing on the mph clock already, and the new speedo will therefore show the bike as having exactly 1000 miles less than indicated.

Speedo swap fully documented for the bikes provenance below. The KMH clock at the end of the break in period.

Front nosecone comes off…

Off with the speedo head!!

New speedo cog greased up…

Speedo installed…

The new display shows mph and kmh on a dual scale. It’s a bit of a rebirth for the bike, this coincides with the completion of the break in period. The fun can now begin in earnest 🙂

Capo’s new boots

Following the last outing in Wales where I noticed before leaving that my tyres really were due replacing but it was too short notice to change them, the time has come to finally swap them out. Front tyre was made week 26 in 2009, some 10 years old and was showing cracking around the sidewall and in between the tread blocks despite the tread still being good.

The rear tyre wasn’t cracked, but the tread was wearing, motorway jaunts to better riding roads had flattened the centre a little;

Ergo, she’d earned a new pair of boots…so up she goes on the ever so useful and versatile stand…

Wheels off…

Previous owner had installed green sludge as a premptive tyre seal. Apparently these help seal punctures as the happen.

Glad I took them to the Motorcycle dealer to remove, they kindly cleaned all the gunk off before reinstalling the new tyres without scratching the rims…

That’s more like it…

While off, I took the opportunity to clean the brake calipers and pistons and check them all over.

All cleaned up and ready to go…

Pads probably still have a few thousand miles left on them. I have a spare set ready to go on when the time comes. These are at 2.5mm-3mm. New is around 4mm.

All re-assembled and ready to hit the trail…

A run to Yorkshire this time…

The bike clocked up the 20k milestone somewhere in Yorkshire…

First Service…first thoughts!!

So the first service was carried out at the exact mileage required, rolling up to Laguna Performance just as the service light illuminated. £195 isn’t cheap for an oil change and some torque value checks/chain adjustment but it’s in warranty so to the dealer it goes. I have been sticking mostly to the 6k rpm break in limit with the odd excursion up to 7k. It’s not really a hardship since 6k equates to around 100mph anyway with mountains of torque below this. The tyres have bedded in nicely as have the brakes.

Post service I am now allowed to access 7k for what will seem like an eternity. The first 1,000km is no more than 6k rpm, then no more than 7k rpm for a further 1,500km! Total break in should be complete by 2,500km or 1,553 miles.

The first service is always a good time to reflect on the motorcycle. Contrary to many, I actually enjoy the running in process, it’s a time for discovery, a time to get acquainted with and learn the finer nuances of the bike, something that can be easily overlooked when travelling at warp speed!

My first impressions were, wow this thing has some torque, the first phrase that came to mind after experiencing it was  something about this bike ‘will tear your arms out of their sockets’, so it’s affectionately my Wookie bike! Even limited to 6k, the low down grunt is there to be appreciated.

What seemed supremely comfortable in the shop was now a source of discomfort. The lovely leather saddle was a bit of a nut crusher as the hammock style seat rakes up to the tank, 20 miles and you start feeling it. Thankfully, either the saddle broke in or I did, either way, after the first 300 miles 50+ mile trips of a couple of hours or more are now quite bearable and dare I say comfortable.

What hasn’t improved is the suspension. I spent some time getting it set up right for me which has improved things, and improved the handling, which is very impressive for any bike, let alone a power cruiser! It goes about its business like a naked street fighter and has sufficient pace to trouble sports bikes. For the final iteration of the second Gen Ducati, I’m genuinely surprised that they have sold so many units without feeling the need to improve on the suspension. Frankly the setup is terrible.

Not the handling as such, rather the ride quality which interferes with the handling when the road gets choppy but it’s more about what it does to the rider. Your kidneys get pumelled by the ride, you are bucked out of your seat on bumps, the whole thing is most disappointing because the bike has so much pent up potential crying out to be released but it is constrained by such an appalling setup.

The front is rock hard, even on minimum preload, I can’t use up sufficient travel at the front end telling me the springs are too hard, at the rear, the  preload is wound up telling me the rear spring is too soft, this requires more compression damping to compensate which in turn leaves the ride too hard. I’m not sure what weight rider this bike could have been setup to, the answer is even more boggling because the rear is setup to a featherweight and the front to a sumo wrestler. It’s setup poorly for any rider. On billiard smooth tarmac the ride wouldn’t be an issue perhaps, but this is a road bike, not a track hack. This is the one department where improvement will be mandatory. I see Ducati have released the latest 1260S Diavel with full Ohlins suspension. If you’re in the market for the new 1260, I would definitely suggest one pays the premium and opts for the S model!!

While we’re on the negatives, there is one more gripe, this is more of an annoyance but it is so out of keeping for such a beastly looking bike; the engine has the most limp wristed fire up noise on the planet. Rather than roaring into life, this, more engine than bike contraption, coughs and splutters to a start with an emasculated effeminate fake cough type of feigned effort. Apparently the after market offer some heavy duty battery to starter cabling which can help this…I’m looking into it and will report back. My other V-twins ROARRR into life, I’d quite like this to do the same!

The latter is a small complaint in comparison to the suspension, in spite of these gripes however, the Diavel is a monstrous bike, the brakes, the handling, the torque, the riding position, quite simply this is now my go to bike.

So much so, that one almost yearns for a touch more practicality in terms of being able to carry something!! Well it’s my birthday and I received the Diavel tail bag.

This is a great bit of kit, offering two velcro side pouches or the full on tail bag.

Just enough practicality for me. It looks good enough that the little velcro saddle bags can remain as a permanent feature with the added bonus that fitting meant unfortunately removing the cool zombie apocalypse rear seat cover but with the benefit of now leaving the saddle able to carry a pillion at any time!

The ‘must do’ modifications for a reliable Capo!!

While researching information on the Caponord ETV, I came across the Caponord  ETV1000 section of the incredibly helpful AF1 owners club.

Experienced members were very quick to offer advice on the vulnerabilities of the Caponord and preventative maintenance the should be carried out to ensure a reliable motorbike and prevent a breakdown or worse, this;

Essentially there were three main acknowledged Achilles heels. As with many Italian bikes, the original shunt type rectifier/regulator is not fit for purpose for a reliable long distance tourer. This coupled with the non waterproof brown connectors (of which there are two) connecting the stator to the regulator. These have a tendency to corrode causing the connection to go high resistance with some disastrous results. Burnt down bikes have been seen. Of course this isn’t helped by the next problem, the original quick release fuel connectors are made from plastic, these embrittle with age. Combine dodgy electrical connectors, situated below fuel connectors which are brittle and there’s a lovely cocktail waiting to ruin your day.

Fortunately, these foibles are easily remedied.  The rectifier can be replaced with a Shindengen MOSFET version FH008EE as used on some CBR600/1000 I believe around the MY07-MY10 models.

This is a direct fit to the chassis in place of the OEM and merely requires fitting with a suitable connector since the Honda block connector doesn’t fit the Aprilia loom. Since one of the connectors is one of the dreaded and notorious (aptly coloured) ‘Brown connector’ this gets replaced with an infinitely more robust waterproof Delphi Metripack 630 connector with soldered terminals.

The same goes for the two pin plug from the rectifier to the main fuse

along with the lower brown connector from the stator.

The plastic fuel quick release connectors are replaced with metal along with Viton seals. For the high pressure delivery line, Aprilia offer a superseded fuel line aprilia part number AP851959 featuring the metal disconnect.

For the low pressure line, a metal CPC connector replaces the CPC plastic ones.

CPC quick release connectors and Viton seals are available from many hydraulic fluid shops. Mine came from Tom Parker in the UK, part numbers below;

CPC Part numbers for return line as follows (I bought mine here) https://www.tom-parker.co.uk/ ;

CLCD170-04V quick release (fuel tank side) connector with Viton seal £23.22ea 1Nr
Then either
CLCD220-06 quick release (TB return side) this is a valved version so it’s dry break £13.75 ea 1Nr (I went valved)
or
as above but unvalved which replicates original design and will leak a little on disconnect
CLC220-06 £6.40 ea (unvalved) 1nr

The above either/or fittings do not have Viton seals. So I bought 10 spare Viton seals as I have two bikes, I swapped the seals they come with over for the Viton ones for peace of mind. The seals are the same as on the other fittings (oe aprilia tank valve) so worth having spares and keeping a couple in your bike toolkit.
Part number C731104 Viton Seals @ 0.84p ea (I bought 10Nr)

Oetiker Clamps, I used two different sizes. I believe I thought the first was a little tight so used the larger one, or it may have been the other way around, either way, 14-15mm clamps is what I used. Part numbers;
OET14RER They are brilliant these clamps.
OET15RER (as above) Average around 0.50p per clip.

This takes care of the immediate must do modifications and these are indeed the very first modifications I carried out on mine.

The next item that many owners experience failures with, is the clutch slave cylinder. The seal tends to breakdown and fail resulting in an inability to disengage the clutch. Some simply replace the seal, however many have experienced subsequent failures and put this down to the design of the original and the effect of heat on it. The preferred fit and forget solution, is to replace the oem item with an Oberon clutch slave cylinder. I put this on the back burner as mine was operating perfectly and mine had relatively low mileage. As it turns out, I should have heeded the advice from the experienced ownership since mine randomly failed with no warning. Fortunately I was near home when it occured and nursed it back. As I pulled up to my drive I had to shut off the engine as I couldn’t disengage the clutch!! A nice stealthy black Oberon was fitted to round off the fourth of what should be deemed the essential mods.

This is my long distance tourer bike so it was important that I am able to have maximum confidence in her ability to get me home. Every component replaced gives me more confidence in her.

The original chain and front sprocket were looking pretty worn and sorry for themselves, originals for some 17,000 miles. These were replaced with a heavy duty DID ZVM-X chain and new oem front and rear sprockets.

Next an Oil change was carried out. Realising that the supplying dealer had used the wrong (shorter) earlier oil filter in the later (longer) housing body. Effectively the bike had not been correctly filtering oil for a few thousand miles. Fortunately there were no particles in the oil but another reminder of why I always prefer to carry out maintenance myself and trust no one.

The filter was replaced with the correct one and fresh Silkolene Pro 4 oil introduced.

All the brakes were bled prior to a jaunt down to Wales and back for a few days.

Next up will be fitment of some new EBC HH sintered pads and new tyres!! Both have been hanging on a little while. I’ve been keeping an eye on them, they’re low but they still have a little more life left.

All packed up and ready to rock for its annual trip to Llandovery 🙂

ZXR UK spec headlight conversion

Being an Italian spec bike, the ZXR came with only one main beam, although both would come on with full beam. The r/h lamp unit was actually a full beam only unit which made it look like a bulb was out.

I managed to track down a UK spec NOS headlamp for the R/H side. The wiring is all there to take it so it should be straight forward.

This meant the nose cone had to come off…

Other Italian market peculiarities are the flash/pass light illuminate low beam only, not high beam, which means if you ride with lights on, you can’t flash anyone as they wont see them flash since they’re already on!!

On the plus side, the ITA market model also gets an extra horn!!

ZXR Oil Change 500 miles

500 mile oil change carried out today. (Bang on 500 miles ). Took the bike for a run to check the brakes following the refurb and they are now working stupendously. The oil was warmed through and on return I drained it straightaway.

This was the thin Millers competition running in oil.

New oil is Silkolene Pro4 10w40. New Kawasaki oe oil filter and sump washer.

Side fairing removed to access oil filter

Oil filter behind the headers. New filter fitted and sump bolt torqued to 20Nm as per book.

Nice red oil colour through the sight glass!

All ready for the next phase of running in which allows 6k rpm for the next 500 miles, at least this will top out at 90mph now rather than the first 500 miles stuck at no more than 60mph.

ZXR cush drive replacement

Right towards the end of the 500 mile break in period, it became apparent that the cush drive had some unwanted play in it, 4-5mm in fact. Curious as this is no mileage but then the rubber is 24 years old.

Original cush drive rubber…

Removed and cleaned up for new cush…

New cush drive rubber fitted…

Sprocket cleaned up…

Axle and bearings lubed with Silkolene RG2 grease,  wheel cleaned with diesel then Autoglym super resin polish followed by Autoglym extra gloss protection.

The chain was cleaned with diesel and Silkolene chain cleaner followed by Silkolene Titanium dry lube chain lubricant. All is back together now and bike fired up.

Chain alignment carried out, matching the markings on the swingarm and then double checking with this alignment tool…

Wheel torqued to 145nm as per manual and chain guard fitted…


ZXR Brake caliper refurbishment Part 3 rear brake

Rear caliper time;

I thought the rear brake was perfect as it seemed to work well. On removing the rear wheel to replace the cush drive, I tested the rear caliper just to make sure all was good and discovered that there was no movement on the inboard piston, whereas the outside piston was moving freely. Having seen the mess in the front calipers I took the opportunity to order the relevant seals and bite the bullet to refurbish this at the same time. I thought the inboard piston might be seized and was hoping that I wouldn’t require a new piston!

First things first, caliper removed and cleaned up with diesel. Like the front calipers, the exposed part of the pistons were in good order, more crud on them than the front but the diesel shifted it easily.

All cleaned up ready for strip down…

Splitting the caliper, what was immediately apparent was the state of the fluid galleries where the caliper halves join.

It didn’t take long to figure out why the inboard piston wouldn’t budge…the gallery was plugged solid. Even chipping away with a screwdriver was struggling to shift it and compressed air didn’t touch it.

The only thing that did was a 2mm drill bit which I turned by hand…

This had been the reason for the piston not moving. As it turned out, both pistons were perfect and all the seals were even in good order. The fluid was a bit of a mess with a fair amount of bits in it.

The old seals were removed, the bores and pistons cleaned out and the replacement parts all laid out…

The new seals were smeared with red rubber grease to ease fitment as per the workshop manual.

Pistons were fitted with some brake fluid to slip them in…

O seal inserted, again with red rubber grease, positioned and caliper joining bolts were subsequently tightened down to correct torque, 32nm.

The old pad sliding pins and springs were cleaned up…

Pads installed with ceramic grease applied to the rear of the pad backing plates and sliding pins…

New seals were fitted to the control arm bearing housing

and finally, all bolted up and bled ready to go. This bled up surprisingly easily…

Rear brake reservoir is located behind the rear bodywork;

Topped off and ready to go…

So that is the brakes all done. Front and rear with goodrich braided hoses and EBC HH Sintered pads all round and fresh Silkolene Maintain fluid.

I’m hoping this should be a totally different beast now on the braking front! The rear caliper should now have twice the power and the fronts should also be functioning as intended.

ZXR Brake caliper refurbishment Part 2 Reassembly

3 weeks later and the calipers are  back from the powder coaters…

I had to clear off some overspray from the mating surfaces but all came up ok. The colour match is close to the original although being powdercoated the finish is glossier rather than satin but hopefully more resilient.

Picture below shows the colour match against the stock rear caliper.

Some red rubber grease to grease the piston seals as advised per the workshop manual.

All laid out ready for reassembly;

Seals installed into the caliper bores.

Pistons Installed. Red rubber grease excess cleaned off after photo.

Caliper joining seals inserted and caliper halves bolted together to specified torque…

All assembled

EBC HH Sintered brake pads going in to provide a more modern braking experience! Ceramic anti seize grease is applied to the backs of the pads and the slider pin

Pads fitted…

Anti rattle plate installed

…and finally nearside caliper fitted to the bike 🙂 mounting bolts torqued to 34nm . Brake hoses fittings torqued to 25nm and fitted with new washers. Bleed nipples should be torqued to 7.8nm.

Offside caliper undergoing the same rebuild procedure; all bolts test fitted to ensure threads are clear, clean and free

Seals and pistons installed…caliper joining gallery seals also visible to right body below…

Caliper halves reunited with joining seals carefully positioned and assembly bolted down and torqued down to 21nm.

Offside calipers bolted up…

The System was then bleed which takes a fair amount of patience, gravity bleeding and pumping the lever. Eventually the lever pressure built up. Front wheel would free spin to 20 revolutions without pad drag with a simple hand spin. Once both calipers installed and pumped up, this would drop to between 6-7 revolutions. Quite a difference from the 1.5 revolutions at the outset!!

Next up will be rear caliper overhaul…

ZXR Brake caliper refurbishment Part 1

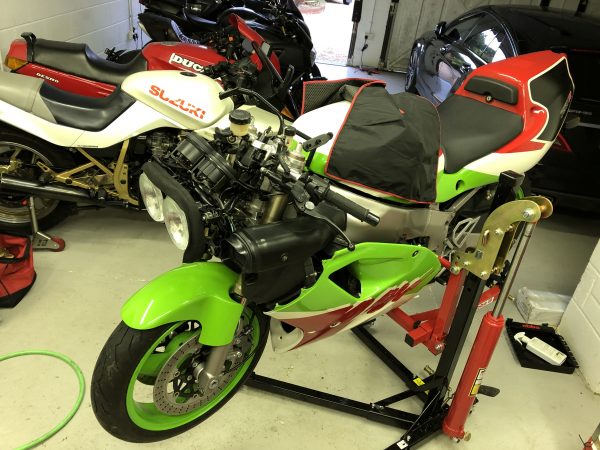
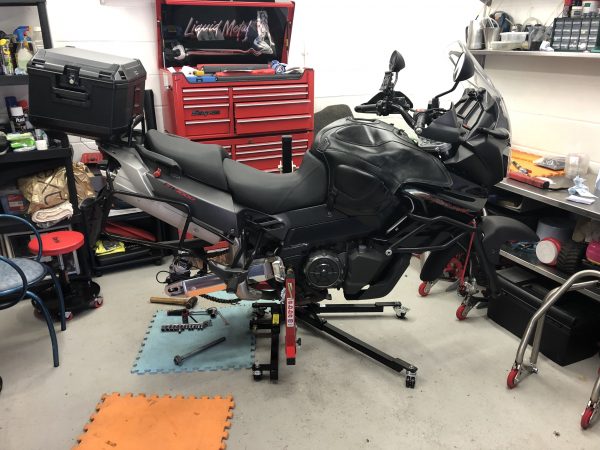
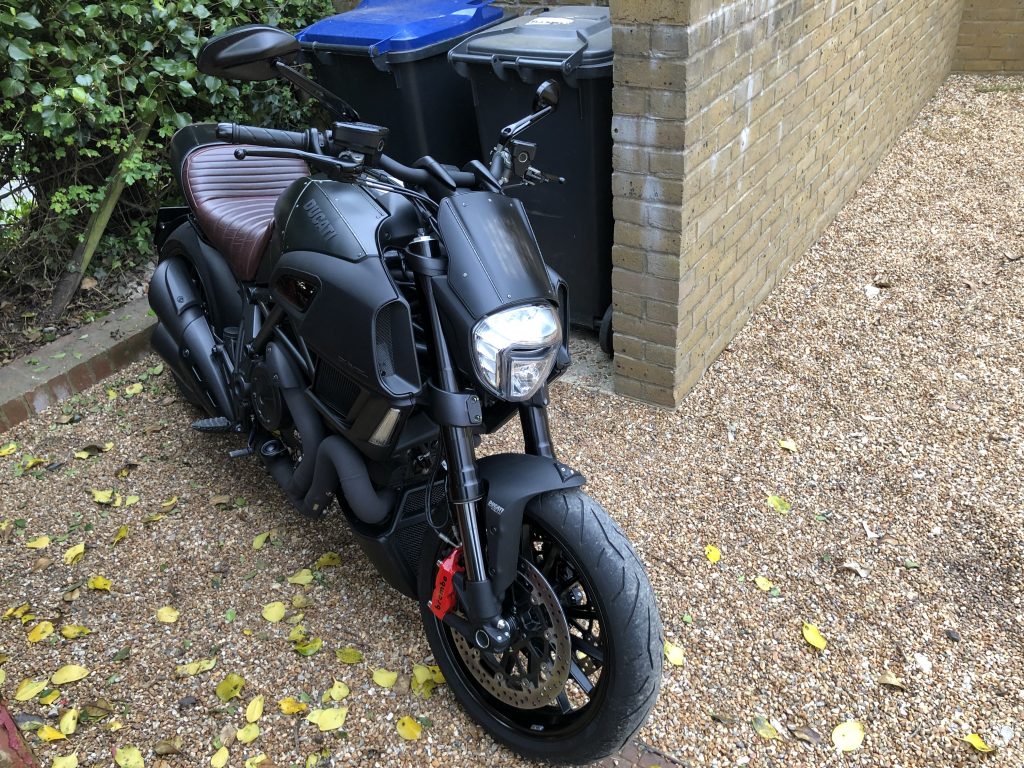
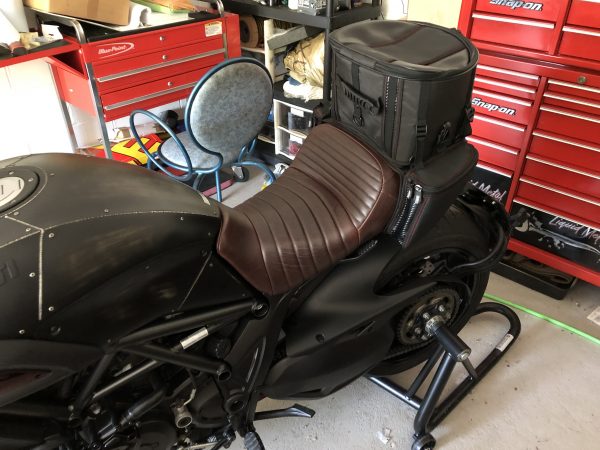
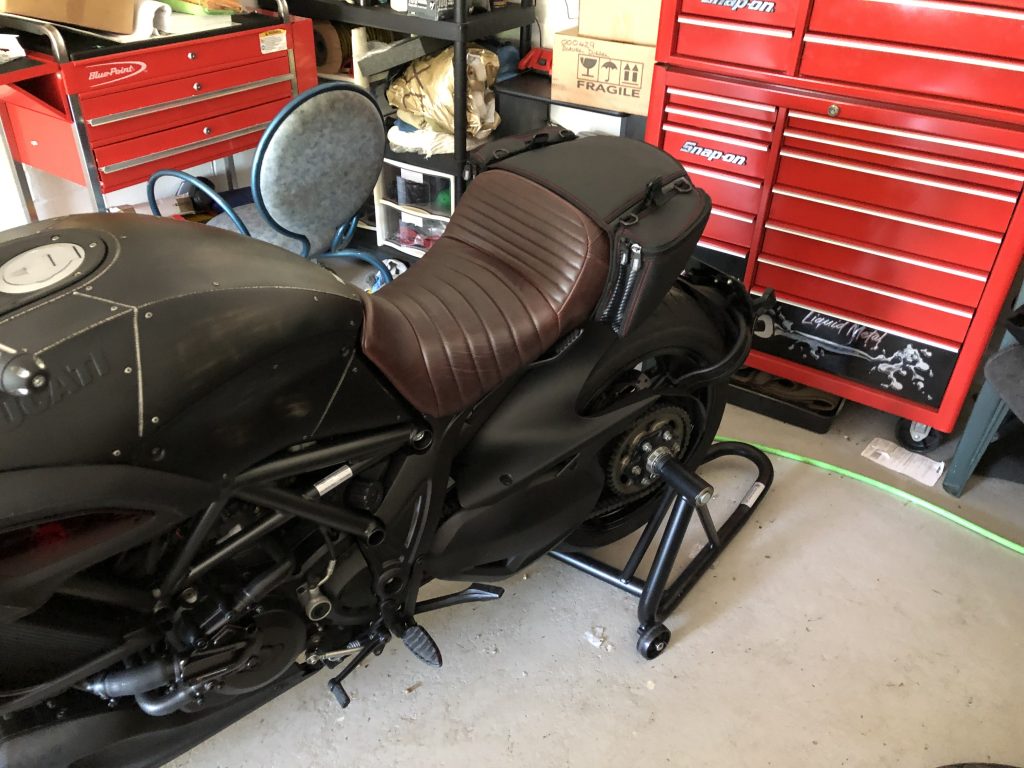
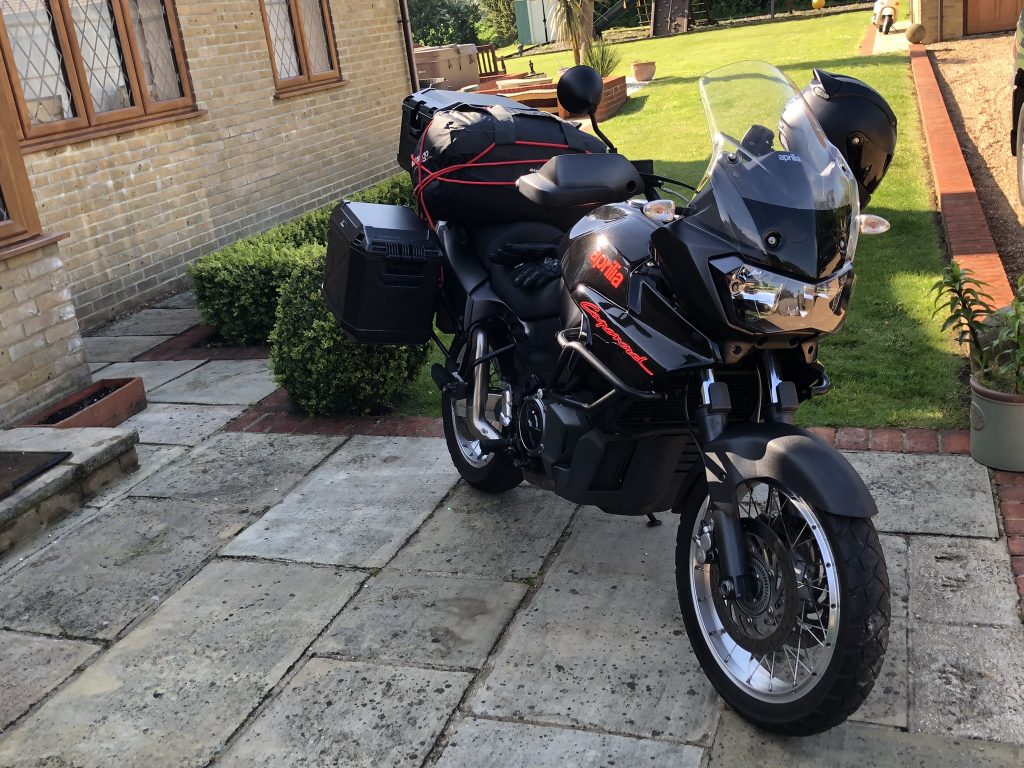
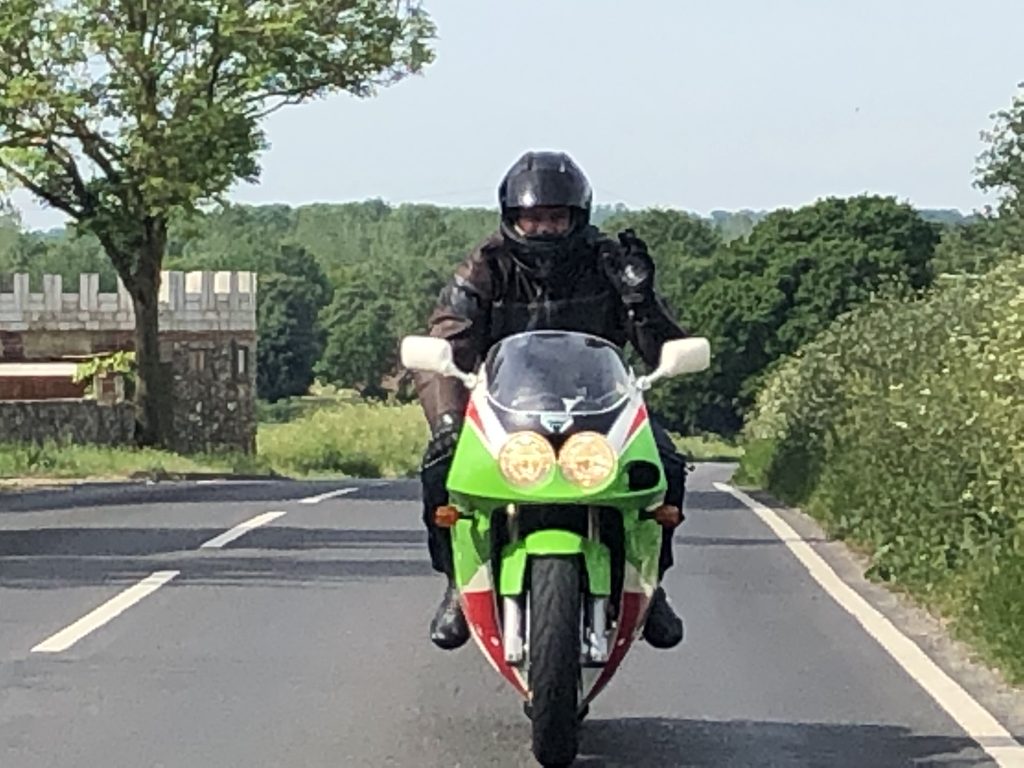
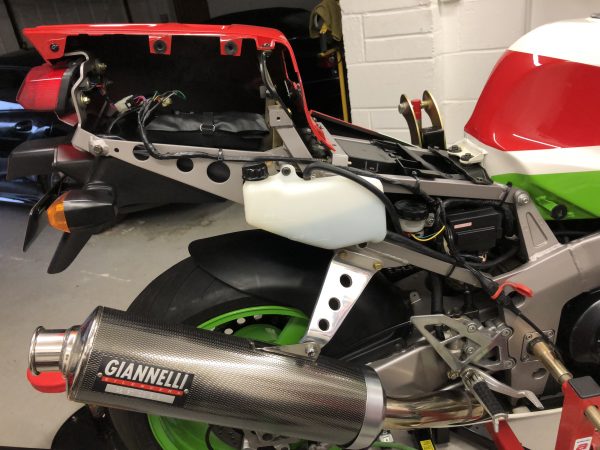
As expected of a bike that has been static for 24 years, there will likely be an element of recommissioning required.

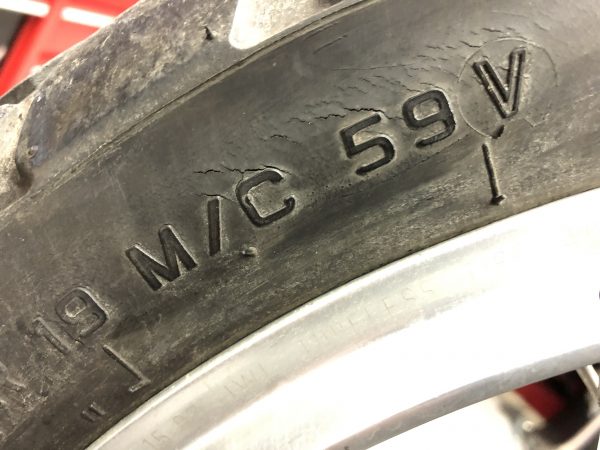
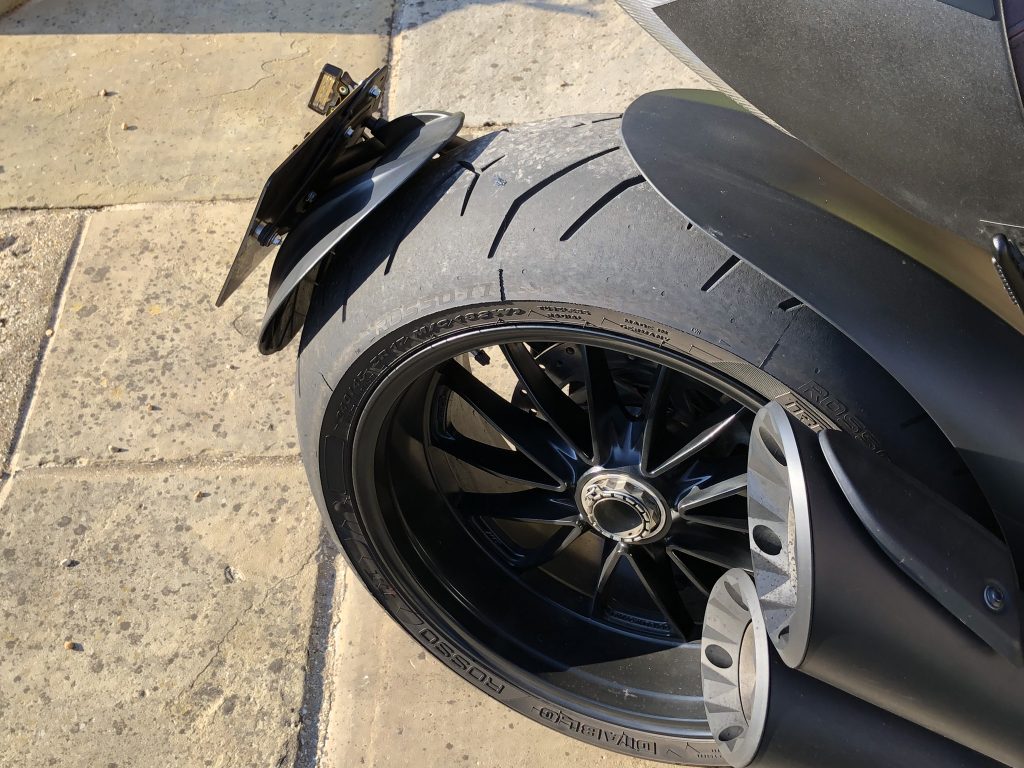
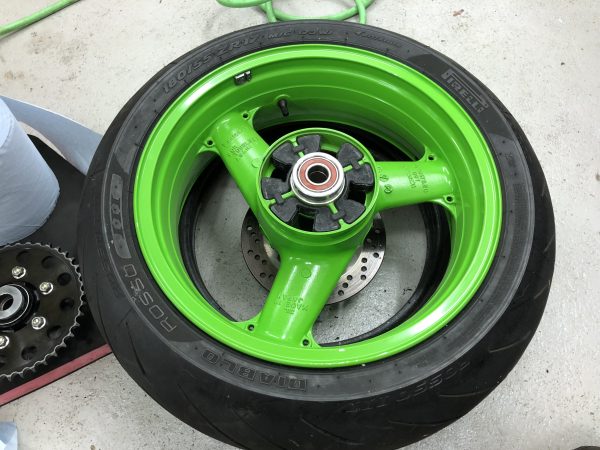
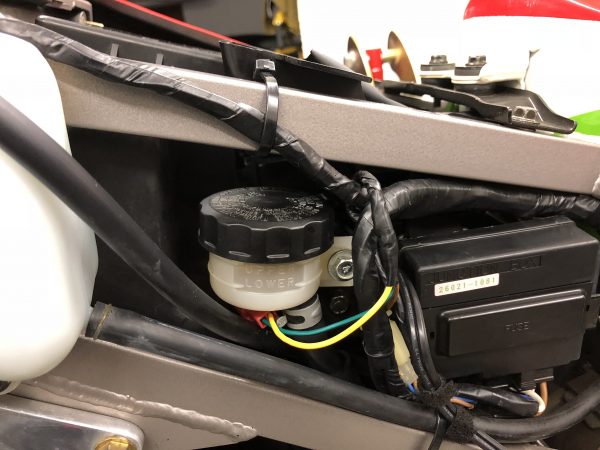
On purchase, the brake and clutch lines were replaced with black Goodrich hoses to retain the stock look, new Pirelli Rosso III tyres and refreshed fluid. The engine was treated with Millers competition running in oil and fresh fuel had her fire up right away.

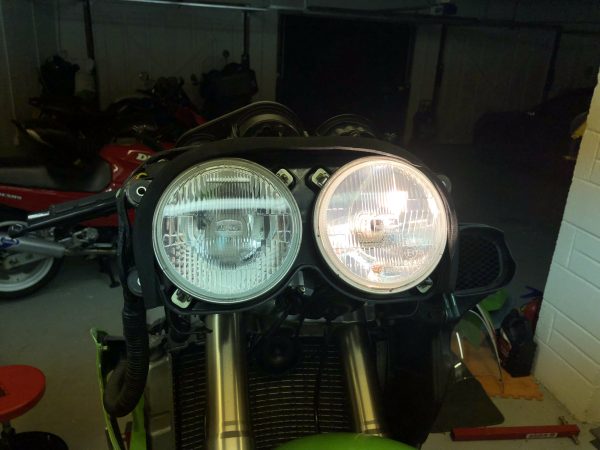
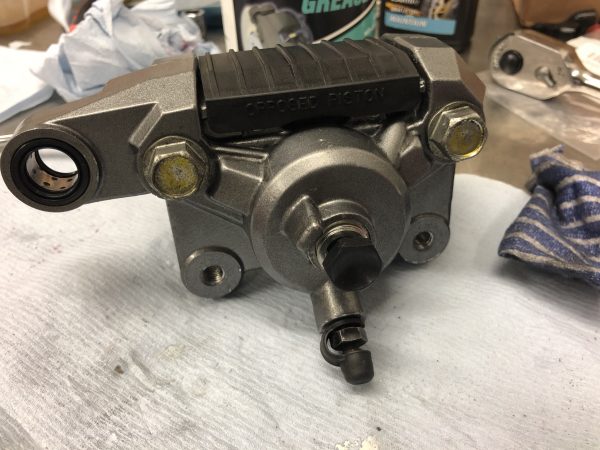
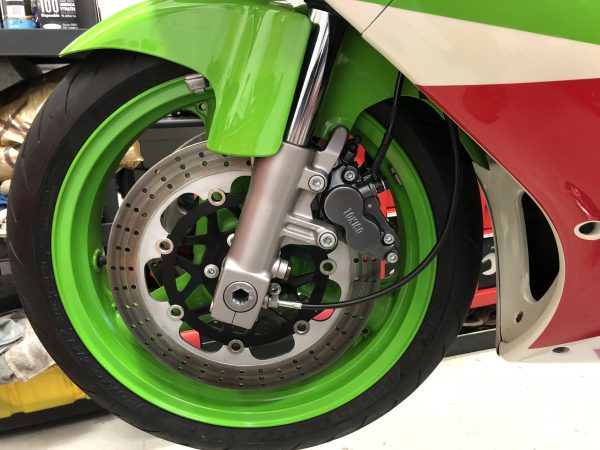
I had my reservations regarding brakes and front fork oil seals. The latter has been fine so far, the brakes on the other hand, while seemingly working fine, have had underwhelming performance. Of course it’s hard to know what normal should be but I can’t believe it would be this poor judging by the rest of the bikes capabilities.

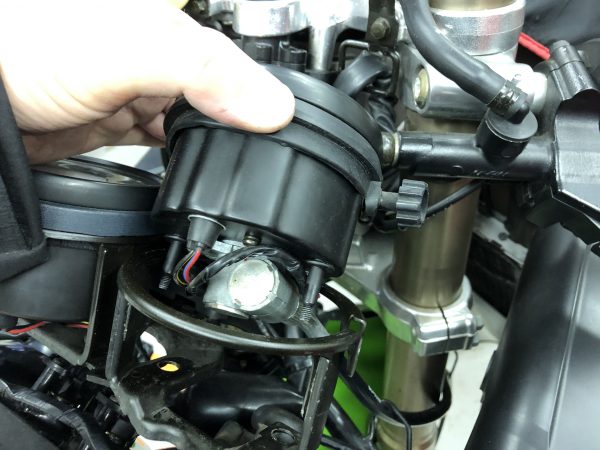
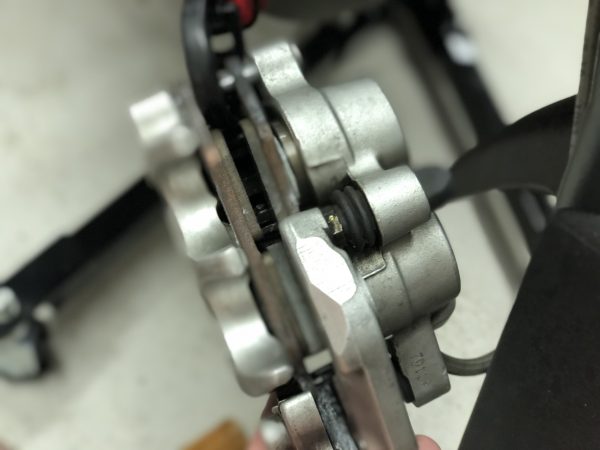
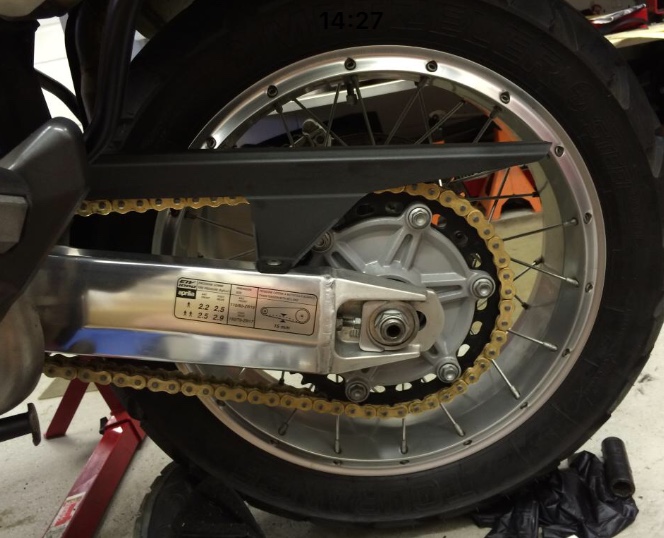
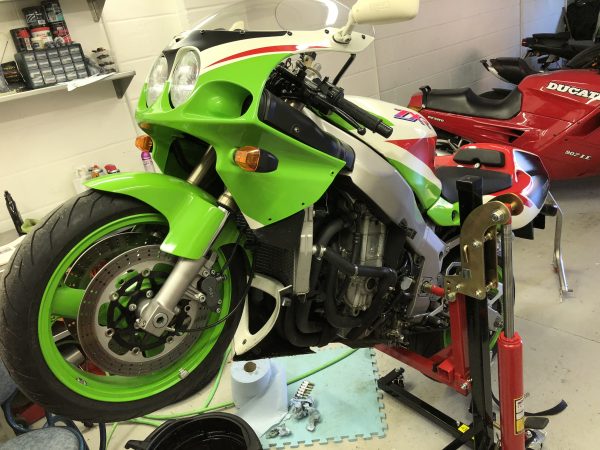
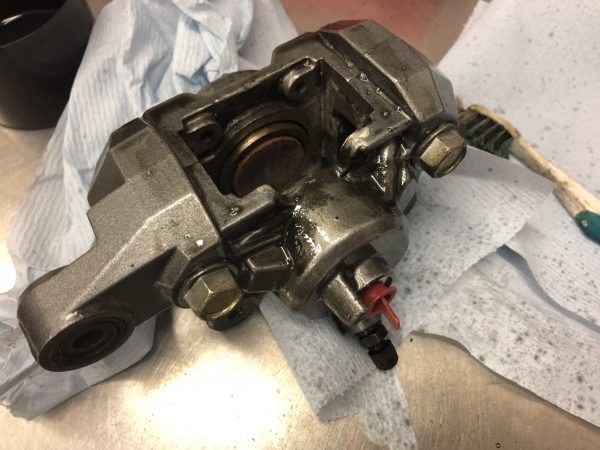
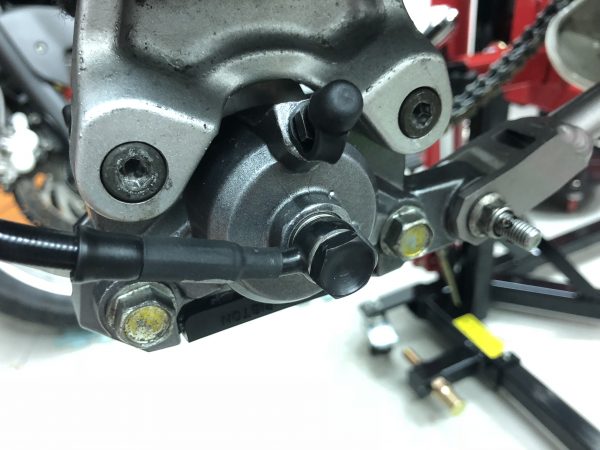
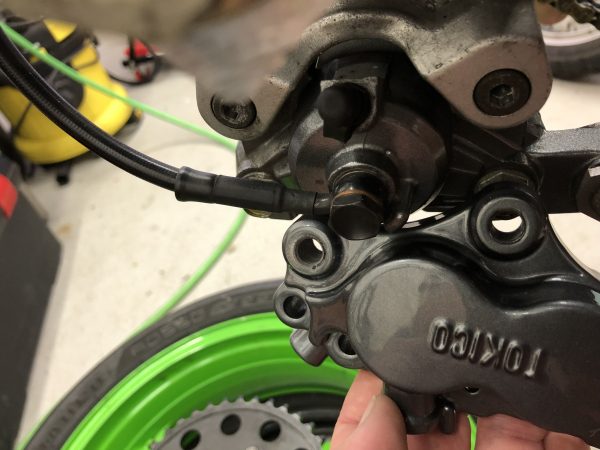
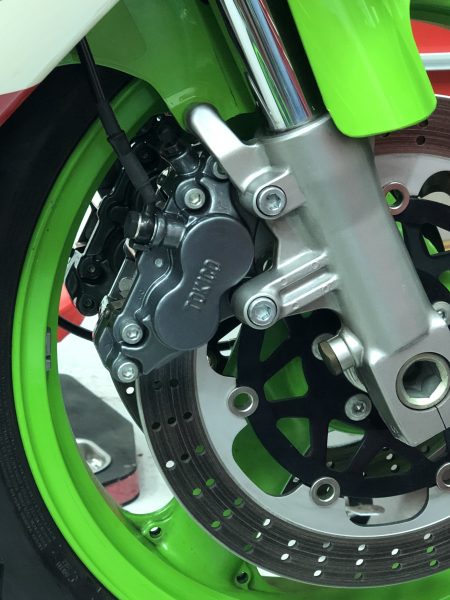
After the first 500 mile running in stint it has become obvious that all is not well with the front brake setup. There is some evidence that a pad is binding on the front disc. With the front wheel off the ground, spinning it by hand yields about 1.5 revolutions. Removing the left hand caliper extends that happily to 3.5 revolutions with a quick flick of the hand.

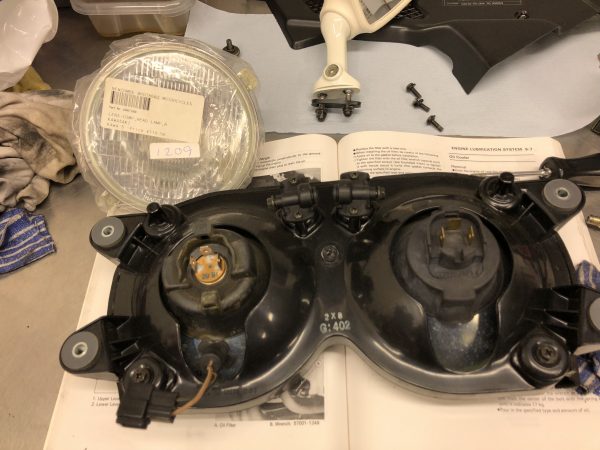
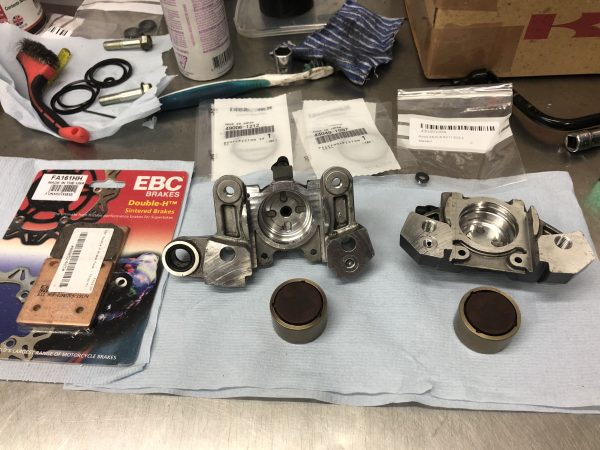
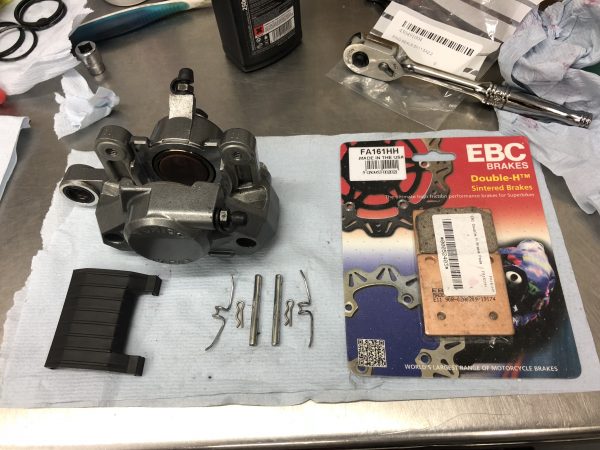
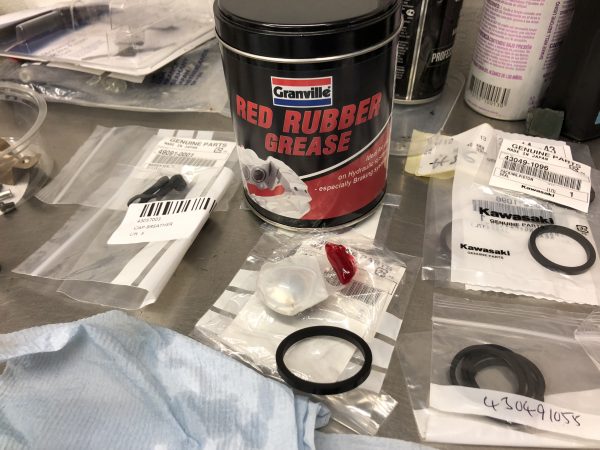
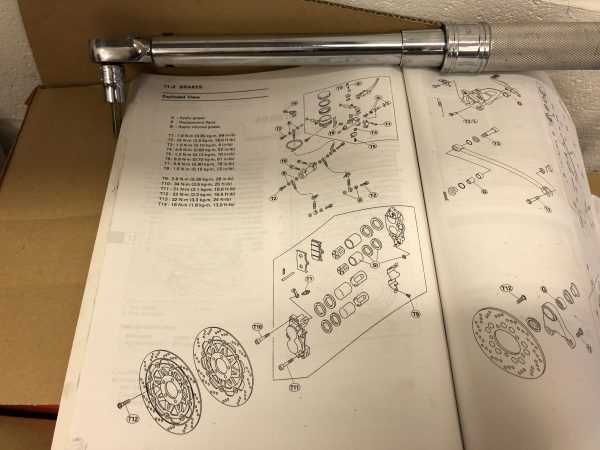
A caliper rebuild was therefore in order. I ordered up all genuine Kawasaki Seals and dust seals, O ring seals and some red rubber grease.

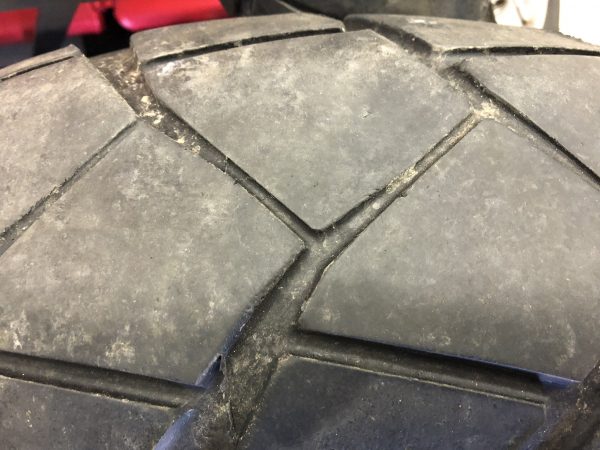
First up, the damage to the disc, it’s aesthetic really as it isn’t deep yet but would have become an issue. The first 500 mile bedding in at not more than 4k rpm is perfect for taking stock of what the bike needs in terms of recommissioning.

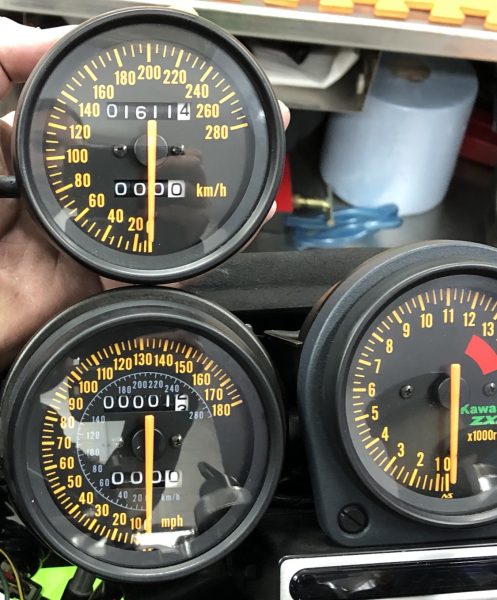
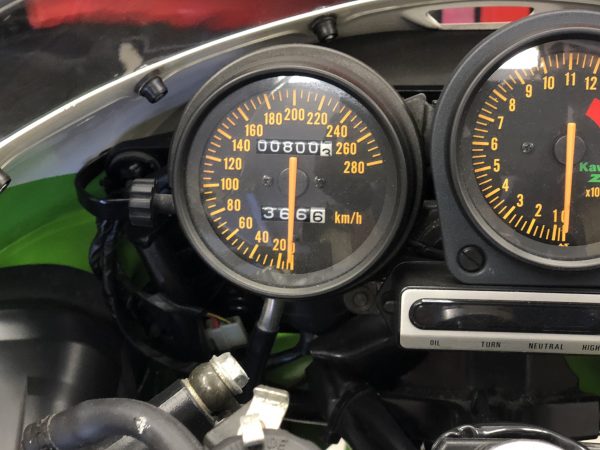
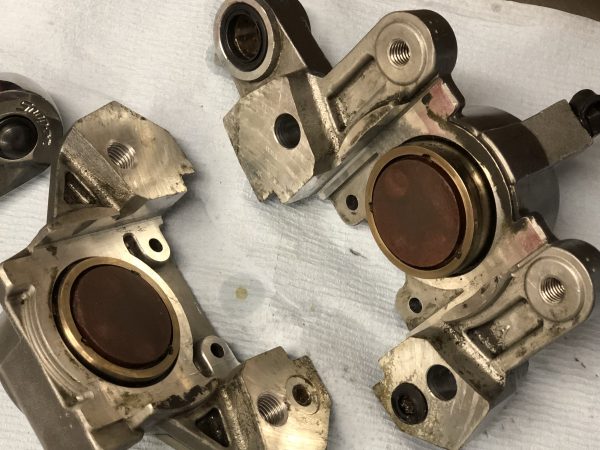
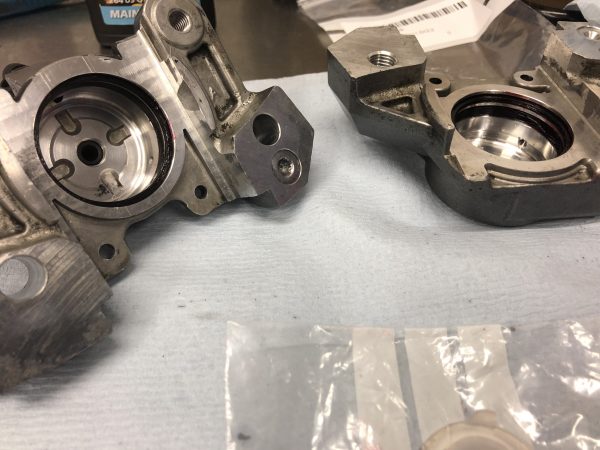
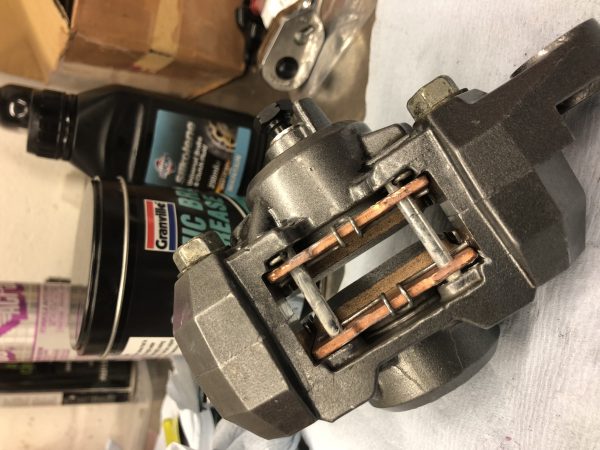
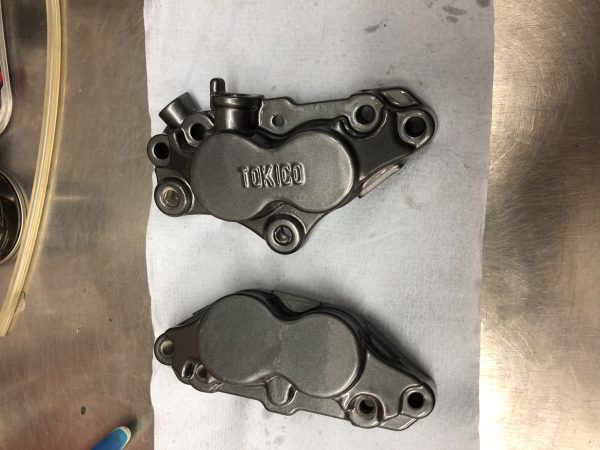
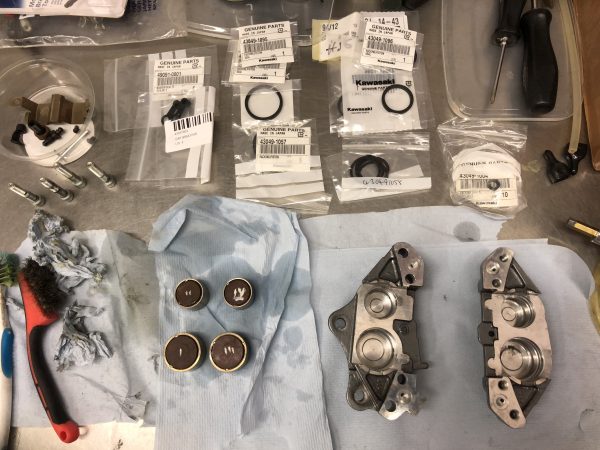
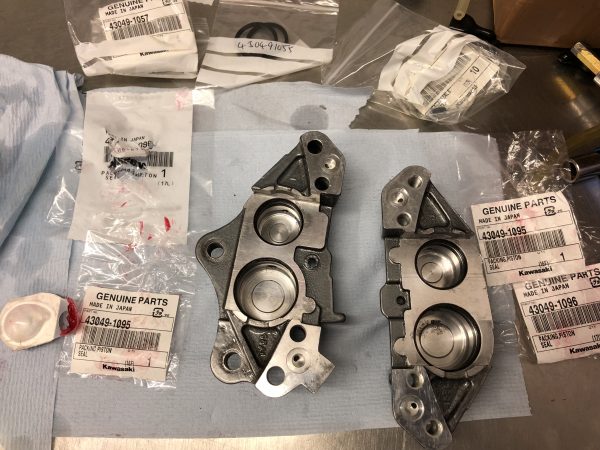
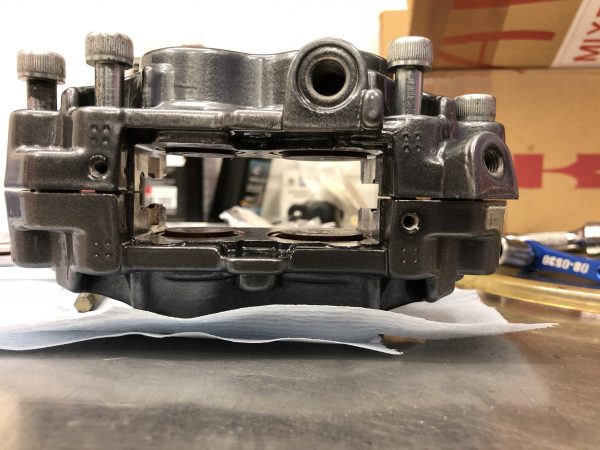
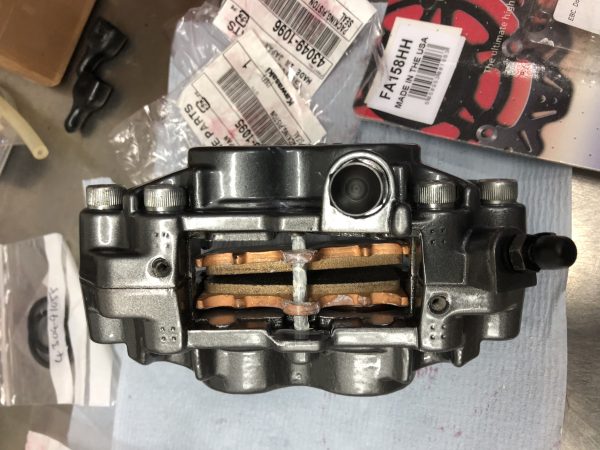
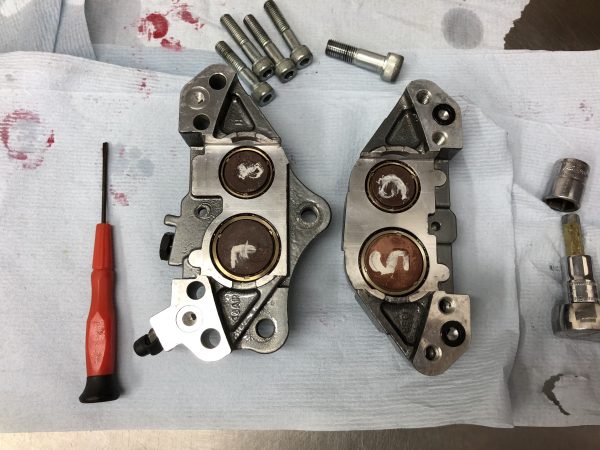
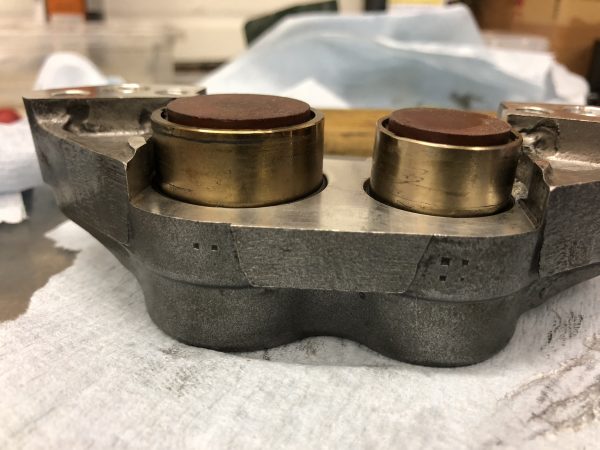
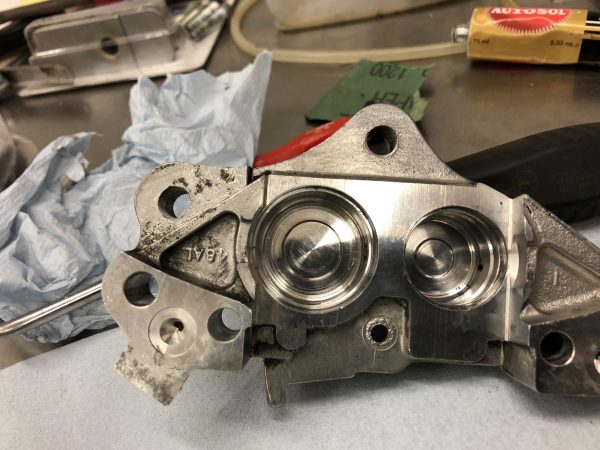
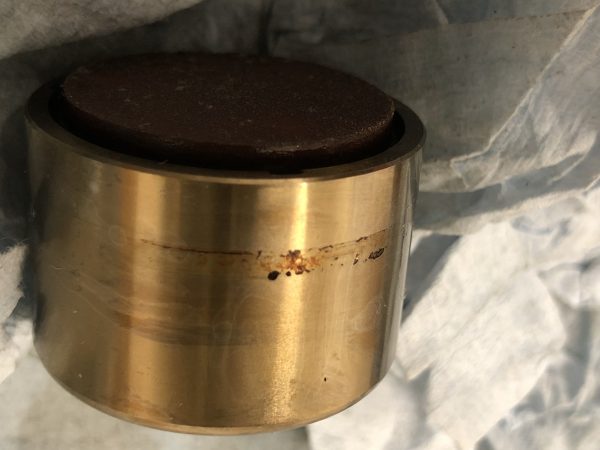
Splitting the caliper halves shows the pistons to be in excellent condition externally. There is no rust as expected seeing the bike had covered a mere 24 delivery miles (39kms) from new and had sat in a collection for the last 24 years until pressed back into light service by myself.

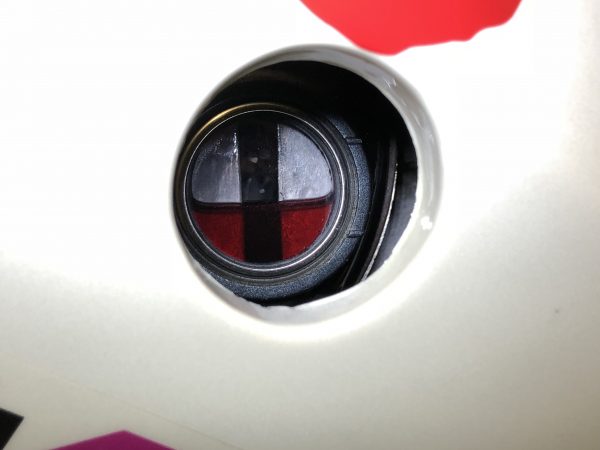
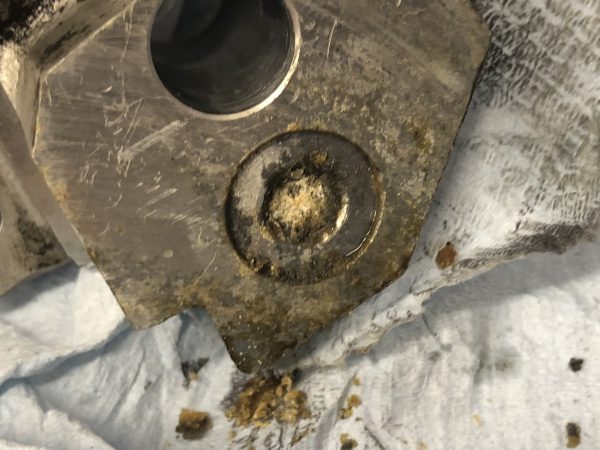
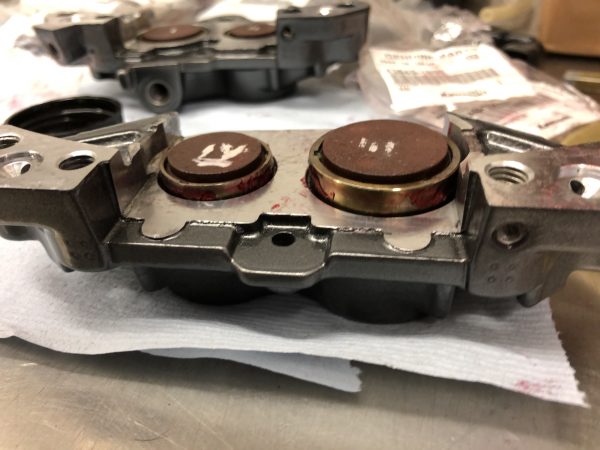
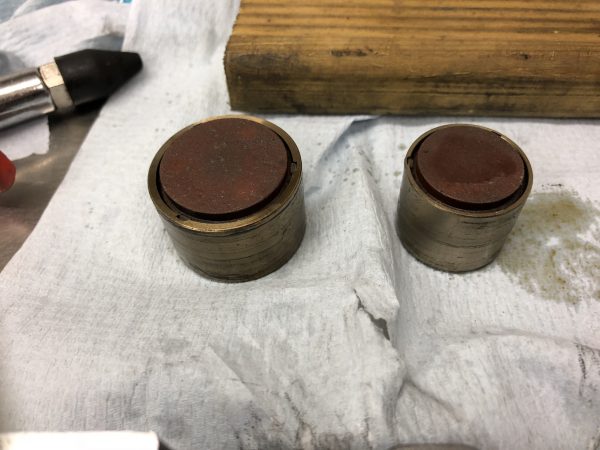
Closer inspection shows the dust seals are damaged, probably where they have been in the same position for many years then suddenly used. The larger piston dust seal had become deformed, likely causing the binding. The bore had some old residual brake fluid that had dried or congealed.

The piston itself showed a less healthy look to it’s internal face, which surprised me initially given the condition of the external face. A good clean with brake fluid and a toothbrush made everything better.

A closer look at the dust seal.

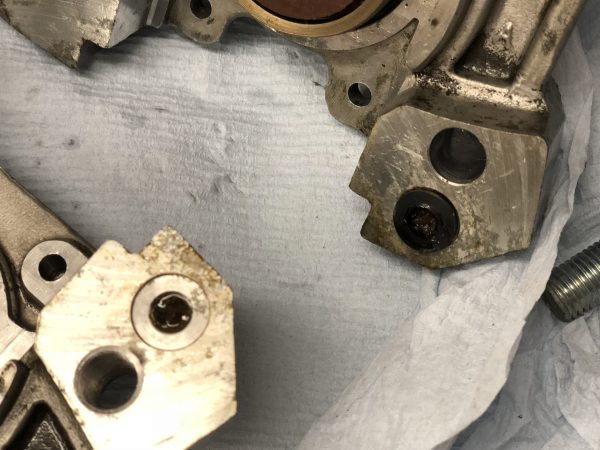
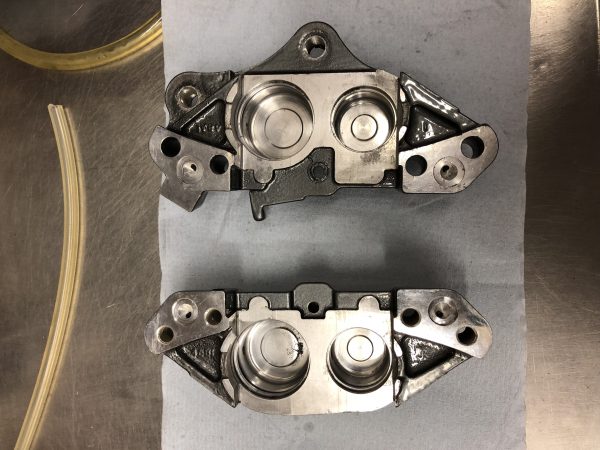
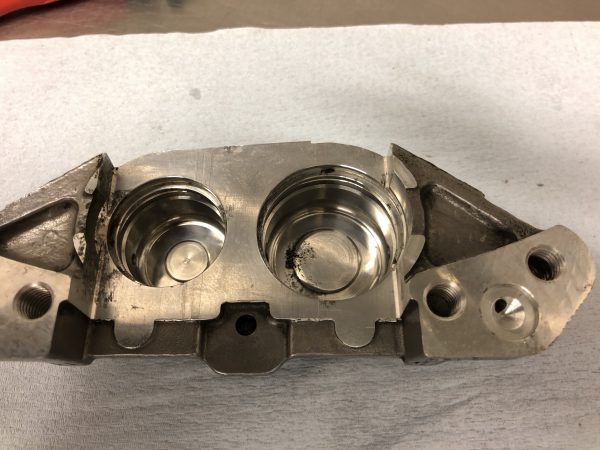
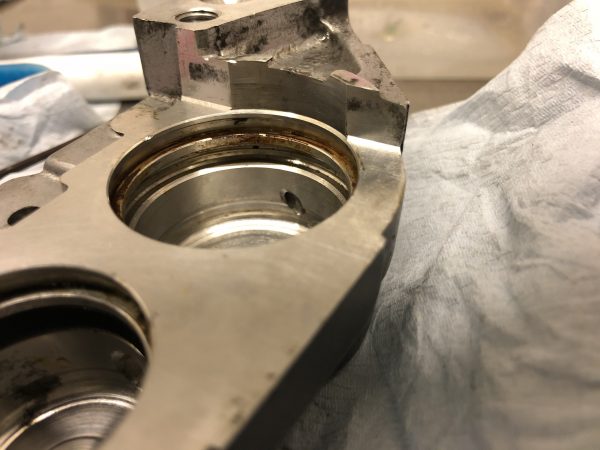
On removing the seals there is some congealed crud, old brake fluid mixed with light corrosion. This I guess pushes on the seal. The rear of the bore also has some dried(looks almost like baked on) brake fluid which is easily removed with some metal polish.

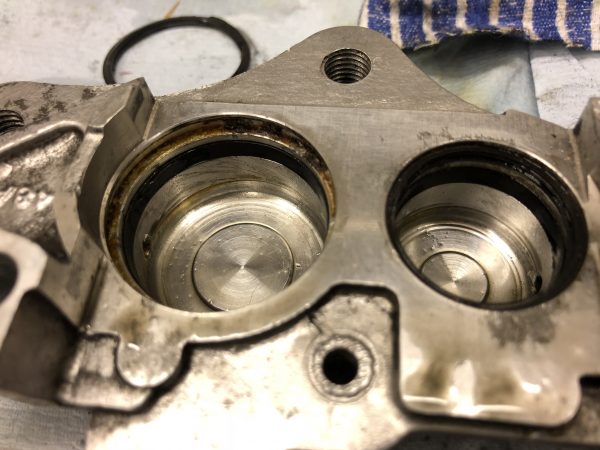
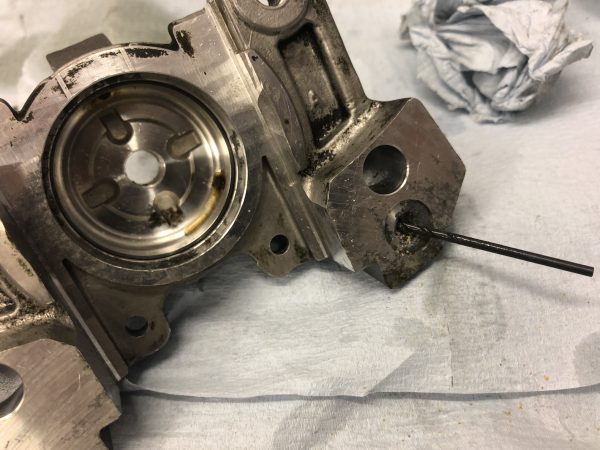
Congealed brake fluid featured in the galleries. Despite having new fluid with the fitment of the braided hoses, this is clearly historic gunk that a flush didn’t shift.

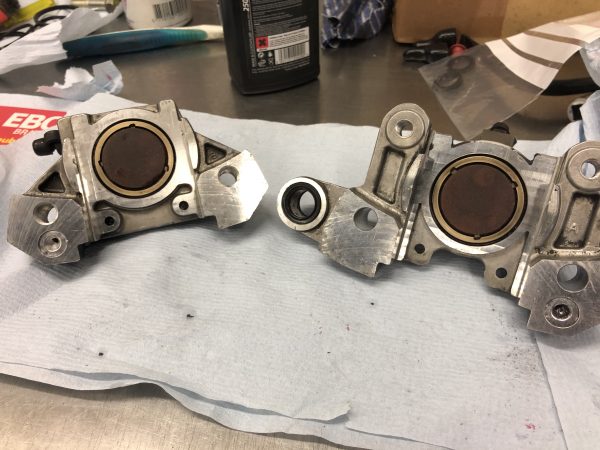
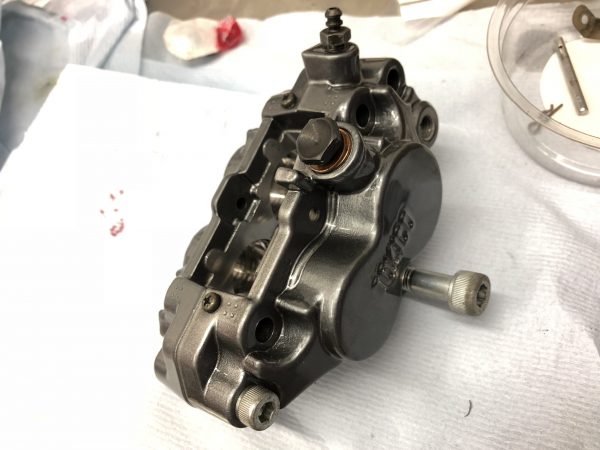
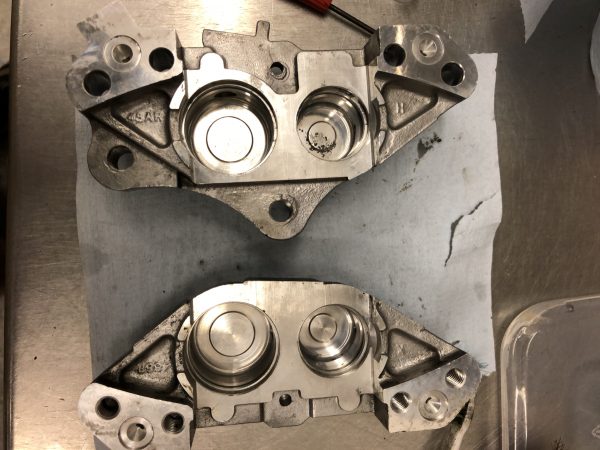
The pistons are generally in good order after a simple clean with brake fluid. The outer caliper half left hand piston has a tiny nick in it, which I later found out appears to be some form of corrosion eating at the piston. This is in a part of the piston which is not affected fortunately. This is commensurate with mild corrosion build up on the bore in the same location which has migrated onto the piston. It is however smooth.

The inner half of the left hand caliper…once again the pistons don’t look great on their inner portions but fortunately clean up well enough.
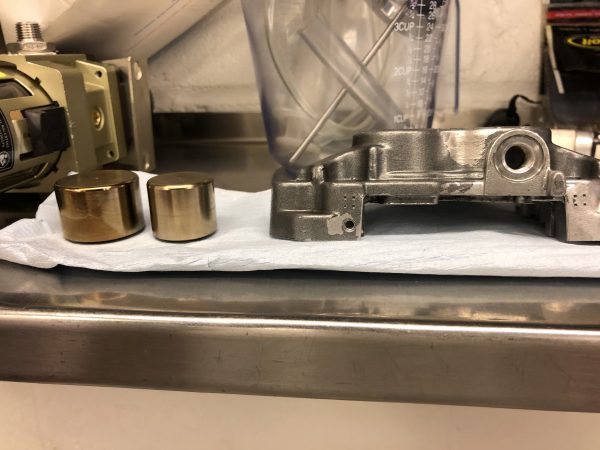
From this;

To this; With just the use of brake fluid.

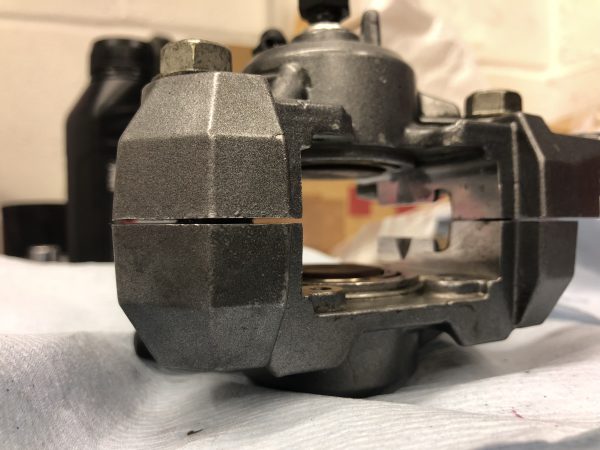
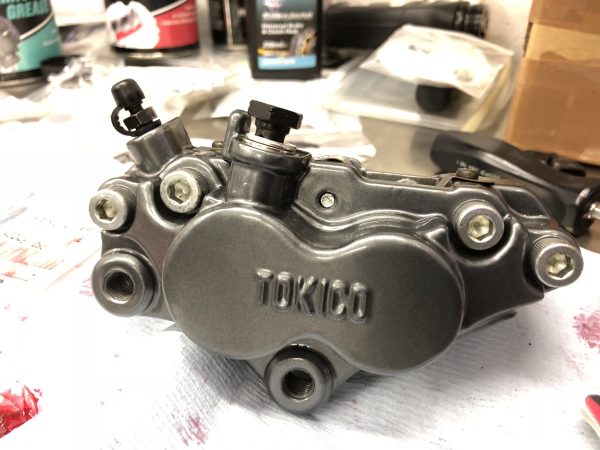
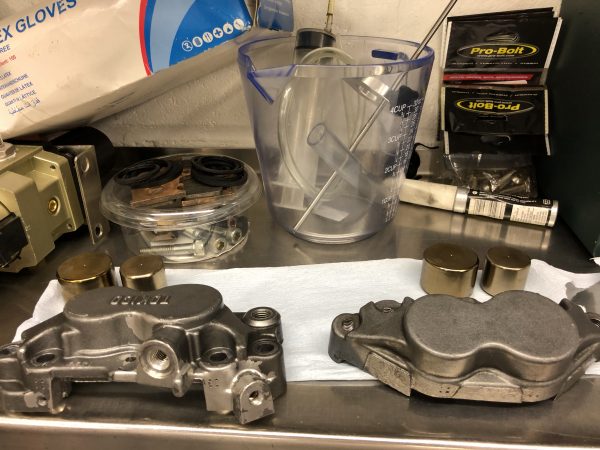
and here is the corresponding outer half after clean up. Unfortunately the thin coating on the caliper was compromised through the use of brake cleaner and break fluid which gets everywhere. The finish went soft and despite trying to remove it quickly it has eaten in and started to lift the finish in areas.

Compounded later with the use of an air compressor.

The inner bores cleaned up well with some metal polish;

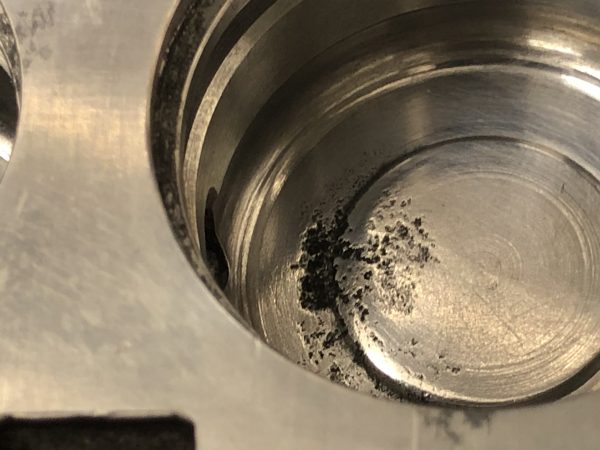
The inner side of the caliper had a spot with corrosion which had actually pitted the bore. Again not in an area of concern with regards to functionality but I’m pleased to have stripped these down to address bigger problems in the future.

A close up shows the pitting. Was it through moisture in the fluid that had built up where it hadn’t been changed in 24 years? I wonder what a regularly used ZXR caliper would look like, one which had had frequent fluid changes? This is to the inner half of the left hand caliper.

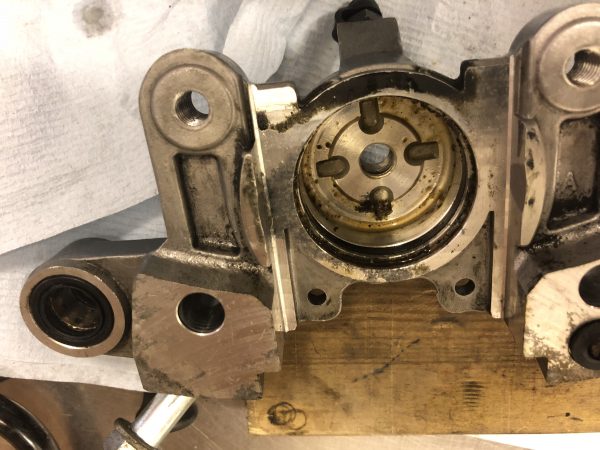
Onto the right hand caliper…a similar story…although this one in particular had a fair bit of corrosion going on in the larger piston bore between the seals…

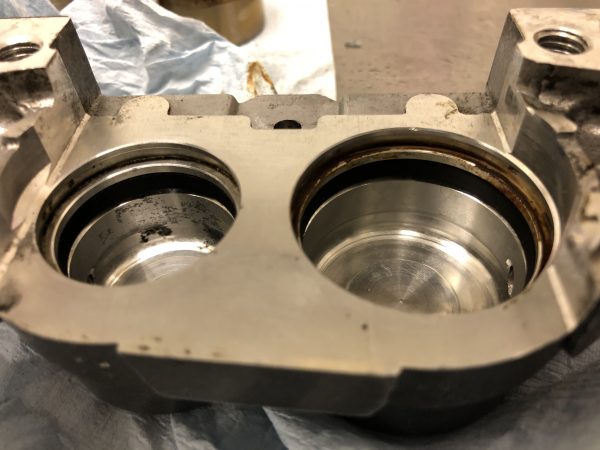
Leaving its mark on the piston itself…similar to the piston above, except this one is in between the seals. All of the main fluid seals were perfect incidentally, however this one has corroded in between the dust seal and the main seal. Once again, fortunately this won’t affect performance since it is beyond the main seal.

Some metal polish cleaned it up but the pitting remains.

A close up of the corrosion in the bore…

All cleaned up with metal polish…again a little bit of pitting in one of the bores at the base of it, this time on the outer half of the right hand caliper.

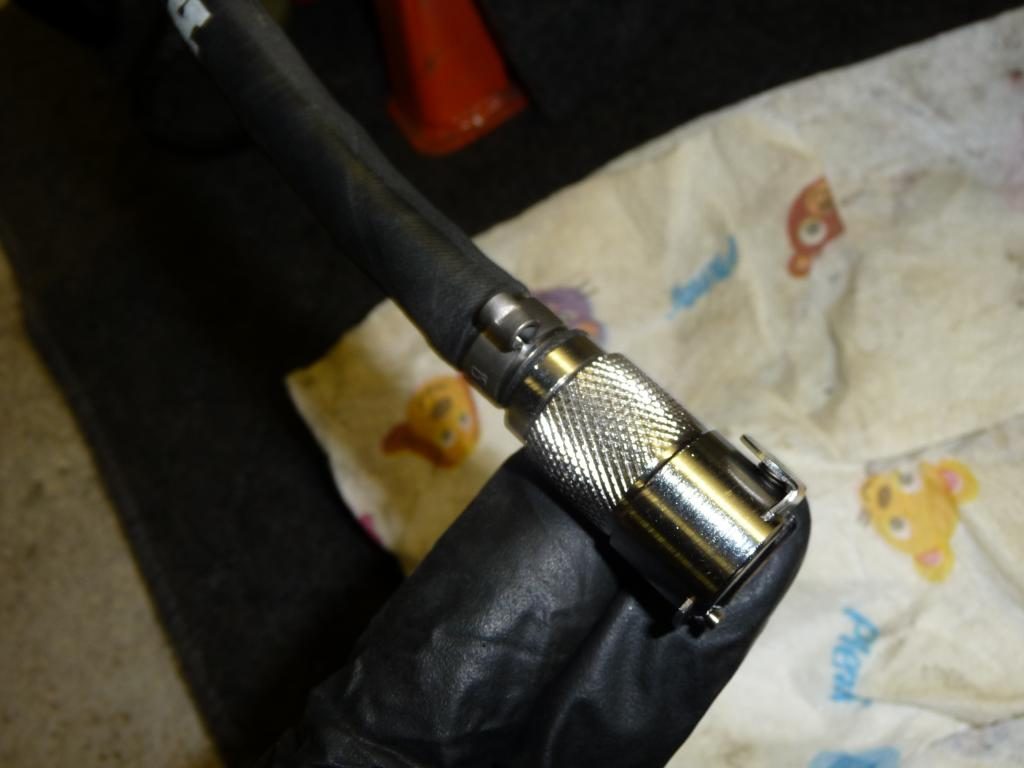
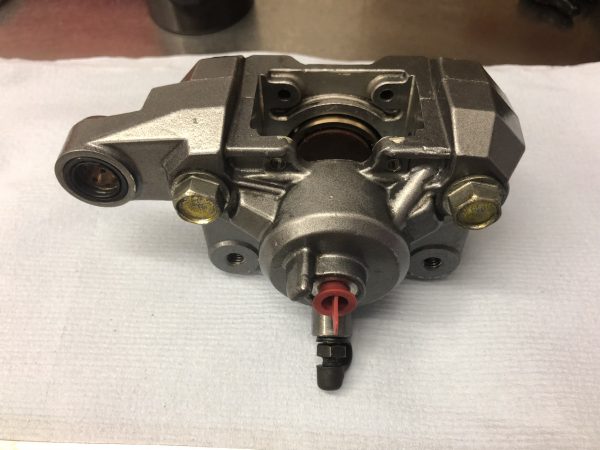
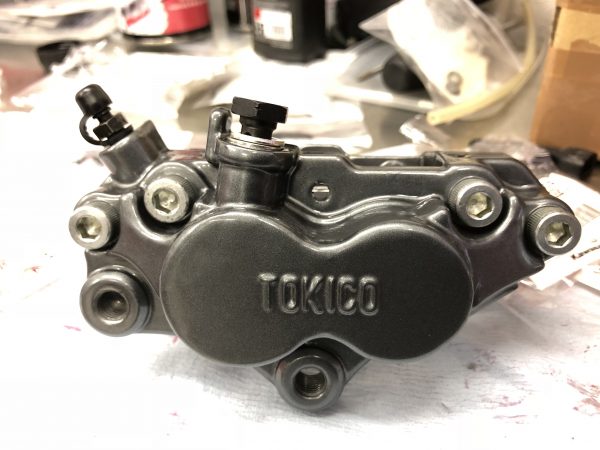
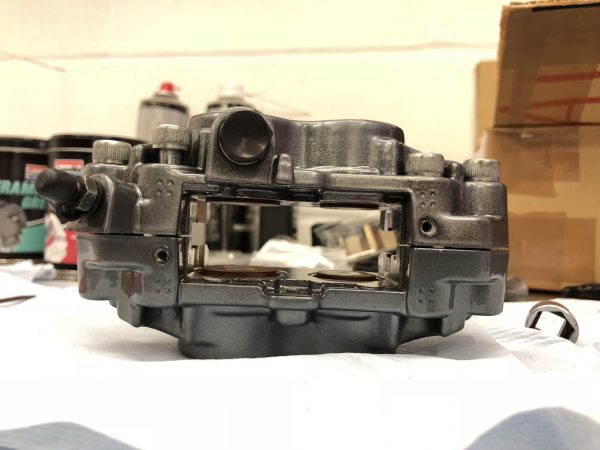
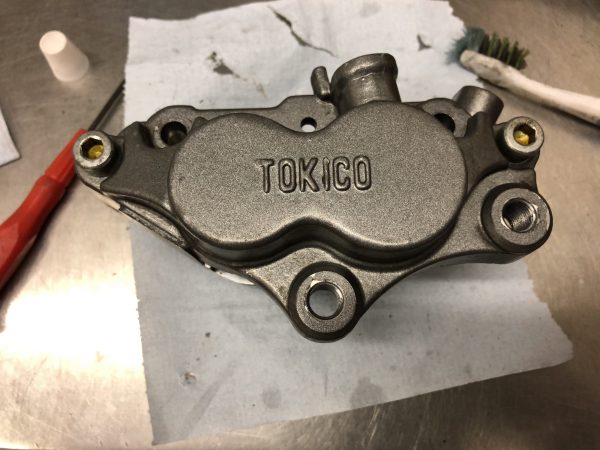
This time no damage to the caliper finish. Using a red plastic plug where the brake hose would go (came with my new oberon clutch slave for another bike) it seems plugging the hole from fluid coming out has helped retain the finish. This one was cleaned down with diesel and detergent/water rather than brake cleaner for the most part.

Now I am in a position to rebuild except the damage to the finish of the left hand caliper means this will need to be sent away to be powder coated. This means they will receive an acid dip and be blasted before having the vital bits masked up prior to application of a 3 coat system. I will update this once this work is done and document the rebuild.

UPDATE

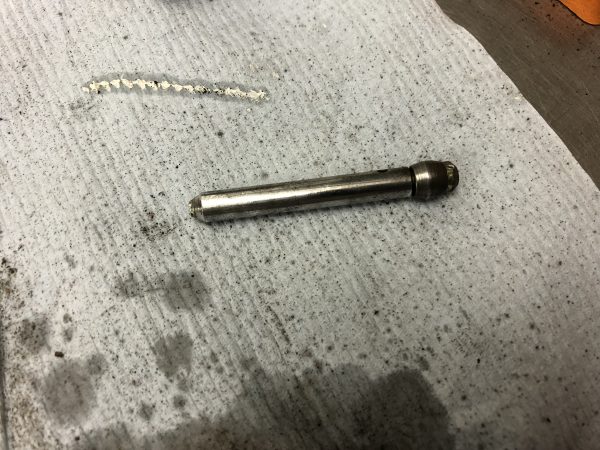
I have luckily managed to track down the discontinued piston to replace the pitted piston… 🙂

In other news, the rear caliper has one piston seized in it also on the inboard side, so this will also be under going the refurbishment treatment. All new seals have been ordered, hopefully the pistons will be ok!